Home Blog Page 7

Organic Compost for Vegetable Garden

0

There are various types of fertilizers available for your vegetable plants. But as a beginner you may get confused that what will be the best one for growing a healthy plant, right?

Or maybe you are thinking about making an organic vegetable garden. Then, which fertilizer will you choose for your veggie garden?

Well, don’t think too much and choose organic compost for your vegetable garden without any doubt.

The main benefit of choosing organic compost may be the eco-friendly behavior of it. Besides, this mixture of organic materials will cause no damage to your plants and vegetables.

So, let’s know more about this amazing organic fertilizer so that you can know why you have to choose this! Let’s dig in deeper.
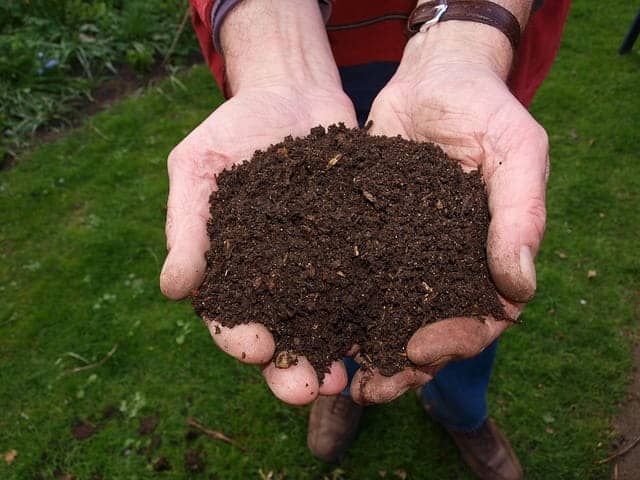
Organic compost in hand for vegetable garden

What is organic compost?

As there is already organic in the name, I hope I don’t have to tell you that compost is a natural fertilizer!

But there are various types of organic fertilizers like chemically organic, agriculturally organic, organic without labels, and certified organic. So, the organic compost belongs to the chemically organic variable.

It is basically a mixture of decayed organic matter and used for conditioning and fertilizing land. When any carbon-based matter like vegetables, fruits, manure, grasses, dead leaves, and woody debris are decayed for a long time, they turn into compost.

For turning these materials into compost, you have to take care of the timing. A well-aged compost contains various fungal and microbial agents that work as a decomposition factor. They break down the organic compounds chemically until the basic nutrients for plants come out.

Why choose organic compost for a vegetable garden?

It is not compulsory for you to choose organic compost. You can also choose synthetic fertilizers, chemical fertilizers. But the organic compost is not eco-friendly but also better than synthetic fertilizers or chemical fertilizers because of other benefits of compost.

You can use it:

  • To enrich the soil
  • To retain soil moisture
  • For suppressing plant diseases and pests.
  • To reduce the need for chemical fertilizers.
  • For encouraging the production of beneficial bacteria and fungi that help in breaking down organic matter to create humus, a rich nutrient-filled material.
  • For reducing methane emissions from landfills and lowers your carbon footprint.

Qualities of the best organic compost

Many people think that using some decaying matter in the soil means that they are using compost. But that’s not how compost should be. There are certain qualities that the best type of compost contains. The compost has –

  • Dark brown color with profuse fire fangs
  • The moisture level of compost should be about 68-70%
  • The pH level should be within the range of 7.2-7.8
  • Zero smell of ammonia
  • No sticky or greasy texture
  • No presence of pests or nematodes

Facts for applying compost in the vegetable garden

For growing healthy and delicious veggies, you can use organic compost lavishly in your vegetable garden. Besides, you can kick the disease and pests out from your vegetable garden.

Garden type for applying organic compost

Your plants need fertilizer whether they are in the container, or in the garden bed, right? So, now you may think that can compost work in your garden beds? Or in your containers?

Well, don’t worry about it. Compost can do amazing works both in your garden beds and containers. So, choosing compost is a good idea, right?

General tips for using compost in the vegetable garden

For using compost in your vegetable garden all you have to –

  • Use it liberally to give food to your plants through plant roots.
  • Apply a 2 or even 3-inch layer of compost each year based on the soil condition in the ground when soil is in a poor condition,
  • Use half-rotted compost during fall just by putting it 12 to 18 inches deep inside the soil.
  • Mix properly decayed compost with soil and side dress them heavily when plants come up as well as during summer.
  • Use the finished compost at least 2 weeks ago before planting.
  • Use generously in the planting holes and furrows

Besides this, the mixture of top-soil and compost can work best for top-dressing and side-dressing growing plants as compost release nutrients slowly in this way. Or else, you can use it as a mulch to protect the soil from eroding rains and temperature extremes.

Moreover, you can use compost watering or compost tea that contains soluble nutrients in it as supplementary feeding for growth. For making compost tea, take a watering can and mix compost and water at a 1:1 ratio.

Extra tips for planting seeds

You have to sift the compost before using it for seeds at first. Then mix it with an equal amount of fine soil and sand. Using coarser compost in the bottom will give your soil good drainage.

After this when the seedlings started to grow, repot them into a strong mixture of compost and topsoil with a 1:1 ratio.

Extra tips for vegetable beds

Don’t use too much compost for your vegetable garden beds. Compost will improve the yield of your crops.

Spread an inch of compost across planting beds in early spring and again after harvesting your crops. Two inches is even better!

Put some compost into the planting holes while transplanting them. Also, you can add some of them as a side-dress for some more nutrients.

Extra tips for potting vegetables

For putting compost in your potting vegetables you can follow the general rules. But for more efficiency, you can make a liquid fertilizer of it.

You can make compost tea for your vegetable garden. For making this, soak a bag of well-rotted compost in a large bucket of water. Ten days later dilute the dark mixture with more water until the color becomes lighter.

Now it’s ready to spray in your vegetable containers. Change the compost inside the pot after a certain period. Also, you can apply the liquid tea every two to four weeks during the growth of the plant.

Best 6 readymade compost for vegetable garden

You can buy various organic compost for your garden. Maybe you don’t even know about that compost properly.

So here I am giving you some suggestions about the best organic compost available in the market. So here you go!

1. Charlie’s Compost

It is a natural fertilizer and natural soil amendment made from chicken manure combined with locally sourced organic matter. It is certified organic.

It is specially designed to accelerate the bioactivity and nutrients of the soil. It is totally organic and suitable for vegetables, flowers.

You can use only a small amount of this manure compost even for the poorest textured soil due to its high concentration. Besides, it can burn some of your plants because of overuse.

The main ingredients of this compost are vegetarian and antibiotic-free chicken manure. This compost increases the water retention of the soil and provides essential nitrogen, phosphorous, and potassium to plants.

You can just spread the compost over the soil and work in it with a rotary tiller, plow, shovel, spading fork, or similar tools. It is good for preserving your poor soil and turn it into healthy soil.

2. Michigan Peat 5240 Garden Magic Compost

Michigan peat magic compost is a great choice for vegetables as a top dressing for lawns and planting beds. This is made from partially composting plants and mosses in acidic and waterlogged bogs.

Michigan peat is an odor-free and natural blend of peat moss. Reed-sedge peat is used for this compost. Besides this, cattails, grasses, and sedges are also used in it.

Michigan peat has 65 percent water holding capacity and contains 90 percent organic matter.

3. Hoffman HOF21045 20#

This cow manure organic compost is designed for adding all essential nutrients to your soil in a chemical-free way to grow veggies. It is a non-burning compost that builds humus, improves soil structure.

This compost is made up of digestive grass and grain. It is enriched with nitrogen, phosphorus, and potassium as well as contains a high level of ammonia.

You can use it for top dressing that will provide organic materials to your soil to grow vigorous plants.

4. Coast of Maine Lobster Compost Soil Conditioner

It is a lightweight dark and rich soil that is consists of chitin and calcium-rich lobster shells along with composted cow manure.

The lobster shells are collected from the dark and cold waters of the Bay of Downeast coast of Maine and the Bay of Fundy. It is ideal for conditioning the soil of your vegetable garden.

At first, the lobster shells are blended with the blueberry brush and wood fiber. Then they are kept for 4 to 6 months for churning, aerating, and checking temperatures. Finally, after this process, they are packed in a bag.

Phosphates, calcium, and magnesium are added to the compost pile by the lobster shells. Besides this, the chitin works for retaining moisture and deterring harmful pests, and the calcium works preventing blossom end rot and several different vegetable diseases.

5. Malibu Compost 100507243 715970 Growing Media

Malibu compost is a proprietary blend that has no GMO pesticides, herbicides, growth hormones, or sewage sludge. It aerates the soil to make it richer, fertile, and well-drained. It is suitable for any kind of soil texture.

Malibu compost helps to break the clay soil as well as removes the drainage and compaction problems. It balances the pH of the soil.

By using it, you can ensure healthy roots. Besides, it is good for water retention.

You can put half-inch layer of this compost and it will work as a top dressing. For containers, put 1/16 inch layer for 4 inches pots, and for garden beds, it will be 1 inch for each raised bed. Add it in early spring as well as in fall.

6. Fishnure Fish Manure Organic Living Humus Compost Soil

It is made from fish manure and clay. It is useful for increasing soil nutrients, decreasing parasites, restraining some plant diseases, eliminating weeds seed.

Moreover, it works for aeration, increased yield, water retention, and fertility. One pound of this compost can works for about 60 square feet, so use a little amount while using it for a smaller area. Basically, it doesn’t decompose in the soil rather than it stays to increase the organic matter of the soil.
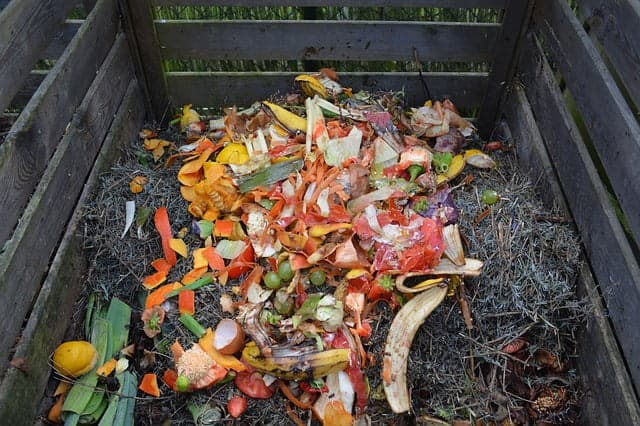
Prepare Organic Compost At Home

How To Prepare Organic Compost At Home

Till now we have talked about the ready-made composts available in the market or in garden centers. But the composts available in the market can be a little bit expensive for the gardeners. Besides this, many can’t trust commercial products.

Well for that I am going to share the recipe and making process of compost at home. So let’s go and find out more about it!

Here we are going to talk about two basic types of composting based on your composting location, one is backyard composting and another one is indoor composting.

Backyard Composting

At first, choose a dry, shady spot for your compost pile or compost bin and it must be near a water source. Add the materials that you collect for composting. Add fine small pieces of the materials.

After adding them, moist them with water. Once the pile is established, ad grass clippings and green waste into the pile and bury vegetable and fruit waste under 10 inches of the materials.

You can cover the compost pile top with a tarp to keep it moist. When the downside of the pile turned into dark, the compost is ready to use. It may take time between 2 months to 2 years!

Indoor Composting

If there is not enough space outside, make the compost inside your house. Use a special type of bin that you can collect from a local hardware store, gardening supplies store, or make yourself.

Remember to move the load compost materials and keep track of your throwing materials. It may take 2 to 5 weeks for your compost to get ready.

Properly manage the bin if you don’t want pest or rodent attacks on the pile. Besides, the poorly managed pile of compost can make an odor.

What Should You Use For Compost?

Many people get confused about the composting materials. So, this part is especially for them.

There are three basic ingredients that all composting needs: browns (branches, dead leaves), greens (vegetable scraps, fruit scraps, coffee grounds), and water.

The compost pile should contain an equal amount of browns to greens. Besides, there should be alternative layers of different size organic matters.

The brown materials will provide carbon for your compost while the green materials will provide nitrogen, and the water will provide moisture for breaking down the organic matter.

What To Compost

  • Fruits and vegetables
  • Eggshells, Nutshells
  • Coffee grounds and filters, Teabags
  • Shredded newspaper
  • Cardboard, Paper
  • Yard trimmings, plant trimmings, Grass clippings
  • Houseplants, Leaves
  • Hay and straws
  • Wood chips, Wood fiber, Fireplace ashes
  • Cotton and Wool Rugs
  • Hair and fur

What Not To Compost And Why

  • Black walnut tree leaves or twigs, coal or charcoal ash (harmful for plants)
  • Dairy products, eggs, meat or fish bones and scraps, fats, grease, lard, or oils (make odor and attract pests)
  • Diseased or insect-ridden plants (can affect other plants when it will be applied)
  • Pet wastes (might contain parasites, bacteria, germs, pathogens, and viruses harmful to humans)
  • Yard trimmings treated with chemical pesticides (might kill beneficial composting organisms)

Composting Process: 3 Easy Steps

  • Step 1: The first step is to combine brown and green. You should have enough compost products to make a pile at least 3 feet deep. Once you have the compost products, you need to combine your wet, green items with your dry, brown items.

For best results, start building your compost pile by mixing three parts brown with one part green materials.  If the compost pile looks too wet and smells, add more brown items or aerate more often. If you see it looks extremely brown and dry, then put some green items and water to make it slightly moist.

  • Step 2: In this step, you need to water the pile. Sprinkle water over the pile regularly just to make it like a damp sponge. Don’t add too much water, otherwise, the microorganisms in your pile will become waterlogged and drown that will rot your pile.

Monitor the temperature to make sure that the materials are properly decomposing. You can simply reach into the middle of the pile with your hand. Your compost pile should feel warm.

  • Step 3: In the third stage, you have to stir up the pile. During the growing season, you should provide the pile with oxygen by turning it once a week with a garden fork.

The best time to turn the compost is when the center of the pile feels warm. Besides, stirring will stop the compost make an odor.

Is The Compost Ready To Use?

After following the above-stated processes, when the compost no longer gives off heat and becomes dry, brown, and crumbly, it’s fully ready to go inside your garden soil or potting soil.

Basically, proper decayed compost contains nitrogen, an essential element for the plants. When the materials for compost start to decompose, bacteria and fungi break down nitrogen-based components into ammonium. Then microbe process the ammonium and make nitrate.

In the final stage of composting, nitrate converts into nitrogen, and compost is ready for use. However, a poorly decayed compost can’t complete this process properly and produced a lot of ammonia. If you sense a foul odor from the mix, then the compost is not suitable for use.

Can Vegetable Plants Grow In Compost Without Soil?

It is not a good idea to grow veggie plants only in compost. It is only a soil amendment in which some essential elements can be missing. Too much compost can cause ammonia toxicity and excessive salinity.

Planting in only compost can lead your vegetable plant to death as it can cause problems with water retention and stability. Using compost with topsoil can give good drainage through heavy soil while it retains water in sandy soil. But when compost is alone, it can dry out quickly.

Besides, it can give stability to a strong root system. It also compacts quickly so if using it in a container, it won’t go for one week. Your plant just needs one or two inches of compost with the topsoil.

A Few Last Words For You

I hope now you know the reason why you should prefer organic compost for your vegetable garden.

There are so many benefits of this organic fertilizer. Aged compost will not only turn your soil into healthy soil but also make sure that your plants are getting essential elements through healthy plant roots.

Besides you can get various types of compost easily available in the market. However, in case, you find it difficult to buy, there are some names I have suggested or you can easily make it at home.

Okay, I hope things are clear now. Wish you all the best for your gardening. Happy gardening!

Can You Grow Avocados Indoors?

Do you want to grow avocado fruit but don’t know if they can be grown indoors? Don’t worry, you are not the only one who had the same question. I also faced a similar problem before starting to produce avocado inside my own house.  In this article, I’ll try to share my experience to explain if you can grow avocados indoors. You can definitely grow avocados indoors by using seeds or young plants. Most people think growing fruits inside the house is a very difficult task which requires a lot of tools. But this is completely wrong. You already have the required tools to start growing avocado houseplant. All you need is a proper mindset and passion to treat the plants as your family members. With regular monitoring and nurture, you can expect to get a successful growth. Also, if you can grow more than your requirement, you can also sell those fruits to earn cash.  So, follow along with us if you want to know more about growing avocado plant indoors. Grow Avocados indoor in pot

Choose your Method to Initiate Growth

You can either grow avocados from seeds or from young plants. These are the two popular ways to grow avocados as indoor plants.  You can grow from an avocado pit that was harvested from a grocery store or from nursery stock. Keep in mind that the avocados are cloned from the mature trees when they are nursery grown, which results in rapid growth over the years. They usually grow about 16 feet tall.

Grow Avocado from seeds

  • First, take an avocado seed and rinse it properly with water to make it clean.
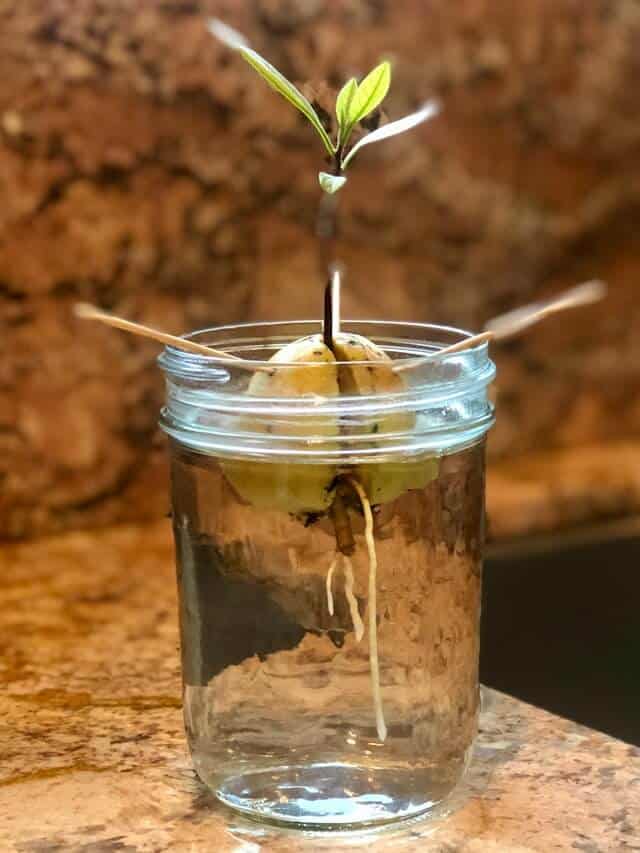
  • Then used 3 or 4 toothpicks to suspend it over a glass of water. Those toothpicks should be placed in such a way that seed gets submerged around 1 inch. The top of the seed should be exposed to air.
  • Place the transparent glass in a comparatively warmer spot. Try to avoid direct sunlight.
  • After 5 or 6 weeks, a stem shoot with root system will start to grow from the seed. If it doesn’t happen even after 8 or 10 weeks, remove the seed and place it with a new one.  See if everything goes properly this time.
  • Keep changing the water continuously after you notice an initial growth.
  • As the stem is around 7 inches long, cut it back to 3 inches. Then wait until the plant starts to sprout leaves.
  • You will eventually notice that the root system has become complex, and the leaves are even bigger.  So now, it’s time to transplant it into a pot.
  • Get a container with a minimum of 10 inches in diameter. Ensure that there are enough drainage holes so that the water doesn’t stay there too long and make the soil soggy. If your container doesn’t have drainage holes initially, drill them to make small holes. Remember that a proper drainage system is a must for avocado plants. Because they tend to have a shallow root system. That means they are very much vulnerable to damage if the roots stay underwater for more than a few days.
  • After you have fixed the container, it is time to choose the ideal soil. You can use sandy potting soil or something else like it, which is fertile, well-drained and loose. In case you don’t want to go out of your house, you can always browse Amazon and buy the best pot that fits your indoor environment.
  • You can place some coarse stones at the bottom of the container, it will help in drainage.
  • Fill the container with potting mix and spread out the roots around the pit. While filling the container with soil, don’t press the soil too hard against the container and try to keep it as loose as possible. This will help the root system to get enough airflow to maintain proper temperature. Sometimes you may want to loosen up the soil a little bit to create few air pockets.
  • Make sure that the top of the seed is above the soil level.
  • Water the plant gently, try to avoid pouring excessive water.
  • Try to avoid direct sunlight while fixing a permanent location for the pot. Make sure that the place you choose has enough wind flow and is not cold. A south facing window will be suitable to place it.

Grow Avocado from Young Trees:

  • You can find young avocado plants from your local garden centers or a nearby gardener to grow as indoor trees. The potted plant is easier to nurture rather than growing from seed. If you can nourish them properly, expect a better outcome with a higher number of fruits.
  • As you buy the young plants try to plant them in the pot immediately. This will help the plant to get fast nutrients in the initial stage and thus enhance growth along the way.
  • If the ordered plants don’t come with a pot or container, you need to arrange one very quickly. Just make sure that the container is large enough and has enough drainage holes at the bottom.
  • Fill the container with potting mix and try not to press the soil level too hard against the roots.
  • If the young tree you got is root bound, try to rough up the root ball before planting. It will result in healthy roots.
  • Place the pot in a sunny spot. But don’t leave it there for too long.

How to Care for Avocado Plants

1. Provide Necessary Sunlight

You must provide adequate sunlight to your avocado plants; these are very sensitive and do not like excessive hot temperatures of summer. Try to keep them in a warm spot.  Maximum temperature should be 85 degrees Fahrenheit but not more than that. In addition to bright light, you may even arrange for supplemental light during the winter season. In this case, buy a couple of low heating light bulbs and hang them above the tree maintaining a considerable distance. As a result, they will get adequate light as expected just like summer.

2. Ensure Adequate Drainage Facility

  • Always make sure that no stagnant water stands near the stem of your plant. To ensure that, never overwater your plants. In most cases, overwatering is a prominent cause of death for the avocado plants that are grown in pot. When you see the color of the leaves are becoming yellowish, you can be very much sure that the plant has been overwatered. In such cases leave the plant like that and let it dry out itself within a few days.
  • Check the plants daily to see the current leaf color and soil moist. If they show any sign of wilting, deep soak the plants once a week.
  • Sometimes you may find that the avocado plants grown in pots suffer from salt accumulation problems. Notice carefully if the leaves are getting dry or curly. You may also see the leaf color of the turning brown.  As soon as you see this you can be sure that excess minerals have accumulated in your soil. To solve this problem, you can approach to methods:
  • Let distilled warm water flow inside the soil of the container and go through the drainage holes at the bottom.  This process should be continued for several minutes until the excess minerals are flushed out of the soil.
  • Use pure rainwater to water your plants every time. When you catch rainwater straight from the sky, it never touches the soil and thus does not have a chance to carry excess minerals. As a result, using pure rainwater will less likely cause mineral accumulation near the roots.
  • Take extra caution in cold winter months. Because due to higher humidity the water tends to evaporate more slowly than summer season. If you don’t take preventive measures as early as possible, it may start root rot. so, it is best to maintain a schedule of watering plants depending on how much water your plants soak up.

3. Prune Timely

Prune the plants in due time to stimulate growth. Use sharp tools and germinate them properly before starting the process to avoid any kind of fungal or bacterial contamination. You need to trim the top leaves just when the avocado plant reaches around 12 or 13 inches in height. make the cut carefully just above the growth nodes otherwise the plant may get damaged.  This will make the plant grow better laterally. Again, trim the lateral stems when they are around 8 inches long. Don’t continue the same type of pruning after the first year.  After that, you need to only prune the year in another winter or autumn if the plant isn’t showing enough new growth.

4. Use Fertilizers when Necessary

You can use fertilizer during the first year after plantation to enhance the root growth. Apply citrus fertilizer after every few months. Do it occasionally, not heavily or frequently. Note that avocado trees also benefit from a certain amount of 10% nitrogen, 10% Potash and 10% Phosphorus with 6% Magnesium. If the trees start to grow fruits you may need to increase the level of Potash up to 15%. Spray Manganese, Boron, zinc etc.  after every few months for the first 5 years. This will make sure that your trees are able to produce enough fruits.

Conclusion:

Avocado is a very juicy and make beautiful houseplants. With its increasing popularity, many gardeners have already started growing fruit trees. Always remember that you may face struggles at the first few times. But as you gain confidence after getting positive results, no one can hold you back. So, don’t waste your time, go buy some seeds or plants and start your very own avocado gardening indoor!

When to Transplant Avocado Seed into Soil

Do you want to know when to transplant avocado seed into soil after growing as a houseplant? I also had the same question when I started to grow avocado in my own house. Don’t worry, in this article I’ll share my knowledge and experience about when and how to transplant avocado seed into soil. You can transplant avocado seeds into soil after the stem has grown up to 15 cm long, having a solid root structure. Also, if the new grown plant shows any symptoms of malnutrition or overwatering, you should immediately transplant it into soil. When to transplant avocado seed into soilTransplanting avocado seeds into soil is quite easy, you need to know the proper methods first. Also, you should look out for any symptoms that show weakness in plants. If you can manage to transplant your avocado seed in the correct time following the right methods, you can successfully grow avocados for the future. So, stay with us and read the rest of the article to find out the correct method and timing related to avocado seed transplantation.

Ideal Time to Transplant Avocado Seeds into Soil

After 4 weeks of transplantation, you should at least get a good sprout from the seed. But in some cases, it can take up to 8 weeks. So, try to be patient as a young plant starts to sprout from the avocado seed. When you get a proper sprout with solid root structure and the stem is 15 cm in length, cut it back to about 8 cm long. After this cut, it will start to grow again. When it reaches 15 cm, this is the ideal time to transplant the seed from water into the soil.

How to Transplant Avocado Seed into Soil:

  • First take a 6 to 8 inches pot in which the avocado seed should be transplanted. Make sure that there are enough drainage holes at the bottom of the container. Otherwise, there is a chance for the plant to get overwatered that will result in root rot.
  • Put a mixture of garden loom or potting soil in one part, perlite, or vermiculite in the second part and peat moss in the third part. This mixture will make the soil lightweight for good air circulation and adequate water drainage.
  • Position your avocado seed in such a way that the roots spread out into the soil and the top of the seed doesn’t get covered by the soil completely.
  • After gently placing the root, fill around the root structure with soil. Take utmost care not to injure the root system. Do not put excess pressure while feeling in the soil. Otherwise, this will create inadequate air pockets inside the soil resulting in poor drainage.
  • Keep watering your plant until the water runs through the bottom of the feet smoothly. Try to keep the soil moisture good but don’t make it too soggy. You can continue the watering process once or twice a week, depending on when the soil dries up.
  • You can always use fertilizer to boost the growth of the plant. Most gardeners recommend using Nitrogen, Phosphorus and Potassium in a 10:10:10 ratio. In addition to natural light and atmosphere, these fertilizers will enhance the nutrition consumption of the plant.
  • Place your avocado plant in such a location that receives enough sunlight. You can place it near a window that is directed east or west.

Should I Transplant Malnourished Plants?

If the leaves look beautiful green and healthy, then you can just keep the plant in water. There is no need for transplantation. But as soon as the plant starts to show any sign, for example, if the leaves start to become yellow or the tip of the leaves start growing brown or become curly, you should immediately transplant the avocado plant in soil. Any of the symptoms mentioned above indicates that the plant is not receiving the adequate nutrients it needs. That is why, you have to transparent the young plant into the soil as quickly as possible.

Does an Overwatered Avocado Plant Need Transplantation?

  • As you grow an avocado plant inside a glass of water there is a chance that the roots may get overwatered. In this case, the plant will start to show symptoms indicating the urgency for transplantation into soil.
  • Check properly if the tip of the leaves has become brown or the nerve-like structures on the leaf start to become dark green and pale. Also, look out for any kind of yellowing or curling in the leaves. If you find out any of these symptoms it is obvious that the plant is being overwatered.
  • As you’re giving excess water and nutrients through the roots, the plant is trying its best to stop the photosynthesis process in the leaves to prevent the consumption of excess nutrition. Try not to transplant during cold winters, especially in the middle of the season. But if you don’t have any option, go for it.

How to Rescue a Dying Avocado Plant by Transplantation:

  • Try to perform the transplantation process in sunny and warm weather. Because if you transplant them in colder weather, the soil will tend to have less humidity and temperature resulting in a transplant shock. Then you have no shot to save your plant.
  • If your avocado is a houseplant, at first select a fair pot that is minimum 6 to 10 inches deep. If your plant is bigger, then a bigger pot would be suitable. Otherwise, you can use any smaller pot of your house that can fit the root system of the plant properly.
  • Use a soil scoop to drop soil in the pot both before and after the plant is being placed. As this is the first time your avocado plant grown in water is being transplanted into soil make sure that the soil height is at least 6 inches.
  • Don’t grab the plant by its seed to pick it up. In many cases when you try to pick up by holding the seed there is a chance that they will break apart. Always remember that even at this stage, the seeds act as a storage area of nutrients for the plant. So, it is better to pick up the plant holding the stem.
  • Use your hand to make a small hole at the middle of the soil and place the plant in that hole very gently. Don’t push the root against the soil too hard, that will damage the entire root structure.
  • Use the scoop to pour soil near the roots. Be careful not to pack it down.
  • Bury the seed just about a quarter way up from the bottom. Never bury the entire seed in this stage of transplantation. Otherwise, it will start root rot.
  • After the transplantation is done, you must water your plants. note that as your plant is already about to die never use cold water to provide hydration. If you use cold water, it will slow down the growth process much more resulting in a quick death. Therefore, always use room temperature water to help your dying plant grow quickly and become healthy.

Conclusion

Avocados are very sensitive plants if grown from seed. You might face difficulties at first. But with gradual experience and knowledge, you will eventually learn when to transplant your seed into the soil. And as you manage to pull it off properly you will surely receive abundance of avocado fruit from the plants in all seasons. So, as you now know how and when is the ideal time to transplant avocado seed, execute it properly and hope to receive a much better outcome in the future.

Best Soils to Grow Vegetables in Pot

0
You may be sad after the death of your favorite plant. You leave no stone unturned in taking care of the plant. But it couldn’t make it. So, now you may think where have you gone wrong? Well, have you ever noticed your plant’s soil? Do you know what are the best soils to grow vegetables in pot? Best Soils to Grow Vegetables in Pot If not then please check the soil of your container plants. Without ensuring the best soil for your plant roots in containers you can’t expect your plant to grow. But how can you know that it is the best soil, right? Well, that’s why I am here to tell you about the best soil to grow vegetable plants in the container. So, without any delay let’s dive in deep!
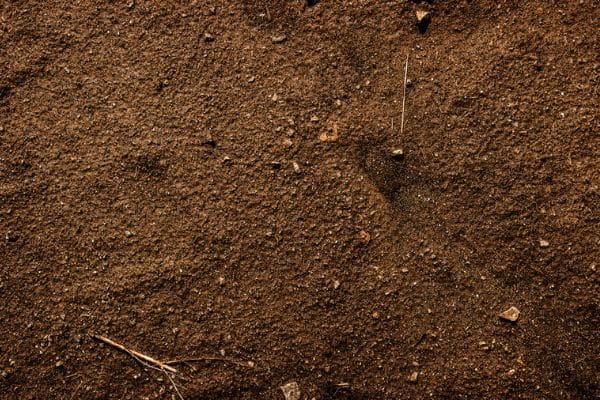
What is the best soil to grow vegetables?

When you are about to choose the indoor potting soil for your garden, you can see there are many options for it. There is garden soil, potting mix, and potting soil. Then there are more variations of potting mixes. There is soil on the basis of its texture like dry soil or clay soil. Now, which one will you choose? You must prefer good quality potting mix for vegetables. It is good for container gardening to grow beans, carrots, squash, lettuce, eggplants, tomatoes, spinach, herbs, spices, and many more when there is a lack of space! But still, if you want to use soil instead of potting mixes then you need to use different types of soil according to your plant type. Don’t worry and just stay with me. I will fill you with more details about it. Some basic features you can take care of while choosing the soil for containers:
  • The medium you choose should be light and fluffy.
  • The drainage capacity is perfect so that it can also hold moisture.
  • It is more like spongy for better water and air circulation.
  • Make sure the weed seeds are absent.
  • It is not too soggy and the smell of the medium is pleasant.
  • There is no bug in the soil or medium.
  • Doesn’t shrink and also doesn’t leave the corner space of the container.

Best Type of Soils

So, now it’s time to know the best soil type. Soil is also an essential element like sunlight and watering for healthy plants. There are many types of soil that you can use for your potted vegetable plants. Using any random soil for vegetables won’t give you the guarantee to have a successful garden. Besides, sometimes it’s really hard to deal with the soil. That’s why I don’t recommend you to make a garden with soil. However, let’s know about the types.

Clay Soil

Clay soil is really a tough thing to deal with. It is very dense in texture and has a reddish color. Clay Soil It is sticky in wet conditions but hard and heavy when it dries. Even it can block the drainage holes sometimes. Really hard to dig! You need to use organic material to fix the soil.
Best growing veggies in clay soil

Basically shallow roots vegetables are the best match for clay soil. You can grow broccoli, broad beans, French beans, cabbage, and cauliflower. You can also plant carrots or daikon that will help the clay to break up more.

Sandy Soil

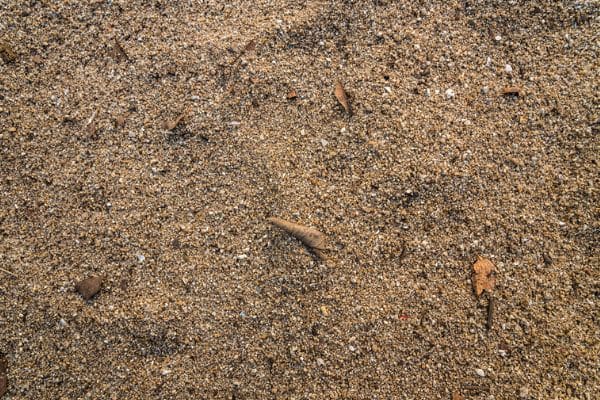
It is easier to deal with sandy soil than clay soil. It is fast draining, fast-drying, and can’t stay stuck together. Sandy Soil For amending sandy soil, loosen up the dirt and mix some compost as well as organic matter with the soil. Use a 2:1 ratio for soil and others. Make sure the matter is mixed about 3 inches deeper from the surface. You can also add some grass clippings for water retention. Also, ensure proper watering and fertilizing for this soil type to provide nutrients.

Best growing veggies in clay soil

There are many types of vegetables that go well with sandy soil are root vegetables like carrots, parsnips, and potatoes, leafy greens like lettuce, as well as others like peppers, squash, and zucchini.

Silty Soil

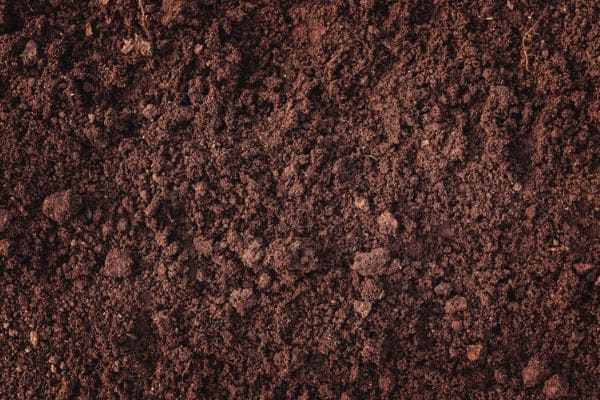
It is better than sandy soil as well as holds moisture better than sandy soil. It is soft and powdery but becomes slippery when wet. Its texture is between clay and sandy. Silty Soil For amending the soil use lime along with other organic fertilizers. If it is not acidic, then don’t use lime. Besides, using some mulch or clippings before planting is really helpful for aeration and drainage.
Best growing veggies in silty soil

Shallow root veggies like beets, garlic, radish beets parsnip, onion, and various herbs grow really well in this type of soil.

Loamy Soil

This soil consists of sand, silt, and clay. This is the ideal type of soil for gardening. It is well-drained and moisture retained. Loamy Soil There are all vital nutrients present in the soil as well as its nutrient retention is good. You don’t need to do too much for amending this soil. That’s why it’s good quality soil. Just use some natural fertilizer to maintain it and you are lucky enough to get good veggies!
Don’t choose garden soil for your container gardening

Most beginners use garden soil for container vegetable gardens. But don’t do it. Now, you may think I use the same soil in the garden for growing veggies. Then why not in the pots? Well, some get lucky with garden soil and suggest you do the same. But you may not be lucky enough here. I am forbidding you to do so then obviously there are some reasons. You need a light and fluffy medium for your gardening pots as I said earlier. However, the garden soil is too heavy to make your pots heavier to move. So are you thinking now that this is such a tiny matter to solve? Then let me tell you that this is not the main problem. Well, garden soil is a filthy thing for your pot. There are bugs or pests, disease organisms, fungal spores, and weed seeds in the garden soil. So, if you use this soil in containers that have a limited place, then certainly you are calling trouble for your indoor plants. Since garden soil is so heavy, it can compact too quickly resulting in poor drainage and airflow. The top of the garden soil becomes dry too fast and creates waterlogging under the surface. As a result, the plants can’t get enough nutrients. That’s why you should prefer potting soil or potting mixes for your potted plants. But still, if you insist on using garden soil then make a homemade soil mix remembering the following tips
  • First, add some peat moss to improve soil-texture
  • Then use perlite or coarse sand for improving drainage
  • Finally, sterilize this mix in the oven to kill some pathogens and weed seeds. For this, cover the soil with foil properly and bake it for 30 minutes to 180 degrees Fahrenheit. Remember to keep the heat below 200 degrees otherwise, the soil may get toxic.

Let’s talk about  the amazing indoor garden saver: potting mix

Many people confuse potting mix with potting soil. But the potting mix is a soil-less mix whereas the potting soil contains soil. Potting mix is also called potting compost or organic soil mix. It was mainly designed for the plants in the containers. Potting mixes come with organic matters like compost, peat moss, and bark chips or pine bark. There is no chemical fertilizer used in it and that’s why it can provide the plants with a good amount of nutrients. Besides this, it also balances the pH level of the soil by aeration. That means it can solve the problem you would have faced with garden soil. It also balances the moisture of the soil. Don’t forget to check the potting mix before using it in the garden. Make sure it contains vermiculite or perlite. Otherwise, the moisture retention or aeration properties will be damaged. Besides you can use your own customized potting mixes as per the requirements of the plant.

What is used in the potting mix?

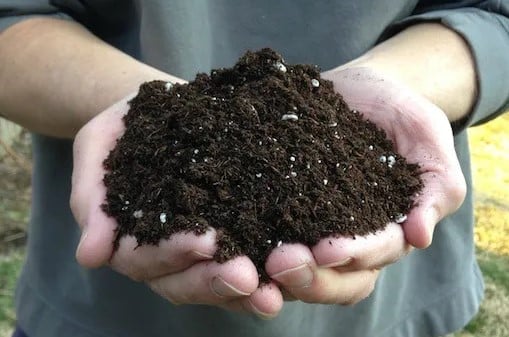
potting mix Potting soil mixtures are completely organic matter mixture that doesn’t contain any kind of soil. It’s a blending mixture of the following mentioned items:
Sphagnum Peat Moss:

It is the primary and stable ingredient of the mix. It needs a lot of time for breaking down. It is easily available and makes the potting mix properly. It is cheap and doesn’t make the soil mix too heavy. It is well-drained and well-aerated. But It is acidic in nature and to balance the pH level of the soil you may have to use limestone.

Fertilizer:

Mined minerals, plant materials, and animal by-products are used as fertilizers to reduce nutrient deficiencies and ensure the healthy growth of the plants. It is necessary as in most cases peat moss alone can’t provide all essential nutrients for the plant.

Perlite:

This mined volcanic rock is used in the mix for proper drainage. It expands in heat and holds its weight in water about four times. Thus it improves drainage but is also a lightweight ingredient for your pot.

Vermiculite:

This particle also expands by heat and converts into a lighter one. It is used to add porosity. It also adds calcium, and magnesium, and increases the capacity to hold water in moist soils.

Sand:

Coarse sand is used for increasing the drainage capacity. It can add some weight to your pots. You can use a little amount of it but it is not that preferable.

Limestone:

It is for the pH balance as we said earlier. If it is not used then you have to put it separately in your pot before planting. There is dolomitic limestone and pulverized calcitic limestone. You can choose any of them.

Compost:

Another component that is good for water retention and nutrient-rich.

Wood Chips or Pine Bark:

It is mainly used for increasing pores in the soil that ensure good airflow. However, they try to steal the nitrogen from the soil. That’s why some blood meal is added into the mix as well.

Types of potting mixes

Lighter and fine-textured: Used for seed starting and root cutting. Coarse sand and Pine Bark: Used for potted trees All-purpose: Used for container gardens, good for vegetables, and perennials.

Why choose a potting mix?

Let’s discuss the beneficiary sides of potting mix.
  • Light but a fluffy texture medium with a pleasant smell
  • Provides better aeration and moisture retention.
  • Porous structure for good airflow
  • Zero weed seeds
  • No bugs or pests
  • Organic matter so doesn’t harm the plant or environment.
  • Non-shrinkable and doesn’t leave any space from the side of the pot.

Best 6 Amazing Readymade Organic Potting Mix

The following gardening soil mix comes with essential plant food for vegetables. Let’s know more about them.

Black Gold 1302040 16-Quart All Organic Potting Soil

It is a rich mixture of organic fertilizers, pumice, and earthwork castings. The ingredients are an essential block builder. This is a loamy textured potting mix. It is effective for growing fresh and succulent vegetables as well as aromatic herbs. Each bag of this mix is known to be home to fresh nutrients. This way it works on proper oxygen distribution and drainage. Moreover, it contains OMRI-listed natural fertilizer that proves as a good source of nutrients for the heavy feeder veggies. It is a premium quality yield.

Fox Farm Ocean Forest Potting Soil

It is a sandy loam potting mixture that contains peat moss, natural fertilizers, and forest humus. The pH range of this mix ranges from 6.3 to 6.8 and so no need to add extra limestones. It is easy to handle as well as offers good values. Thus it is perfect for beginners. However, it is not that good with water retention. Besides, sometimes there may be big chunks of organic material in the bags of mix.

Espoma AP2 Organic Potting Soil

With a beautiful earthy smell and a good amount of essential nutrients, it is good for both indoor and outdoor gardens. This mix can hold a large amount of water to moisten the soil. This mix is created with the Myco-Tone formula that helps in deciding the perfect amount of water needed for the plant. So no excess watering or less watering. Besides, this formula ensures the faster growth of plants in any kind of environment. In addition, the fertilizer ratio of this mix is 2% potassium, 7% nitrogen, and 2% phosphate at least. However, this mix is a little bit expensive!

Miracle-Gro Potting Mix

With a unique formula, perfect pH, perlite, and peat moss, it is a perfect mix for any type of plant. It is suitable for indoor gardening due to its light texture. This multi-purpose potting mix is used for amending and improving soil quality for vegetable gardens. It is a mixture of 14% potash, 21% nitrogen, and 7% phosphate. It gives plants a strong foundation, vital nutrients, and a healthy environment for the roots in container gardening at least for 6 months. It also grows plants two times bigger. It is recommended for growing vegetables from vegetable seeds or root cuttings. This mix comes at an affordable price and is eco-friendly too!

Burpee Organic Premium Potting Mix

It releases vital nutrients instantly as well as a steady food supply for veggies. It consists of compost, perlite, and organic fertilizer. Because of the coconut coir used in it, it can keep the soil moist. It has good water retention and good drainage capacity as well. It is another OMRI-listed potting mix that you can use for any type of pot. This potting mix is enough for 3 months.

Proven Winners Premium All-Purpose Potting Soil

This is a flexible and mid-weight product that you can use for several plants. This is a professional-grade soil mix that consists of composted bark, premium peat moss, and horticultural grade perlite. It is good for air porosity and drainage. It is cheaper and can be used for any potted plants. However, the amount of fertilizer is a little bit lower in this mix. So you have to use fertilizer separately before planting.

Homemade Potting Mix

If you think that buying a ready-made potting mix is a bit costly for you, then you can definitely make your own. Also, if you want your own customized mix then it’s a good idea to make it at home on your own. Homemade Potting Mix Besides, the readymade mixtures can have water crystals, soil wetters, or chemical fertilizers that are a threat to users. But when you make it on your own, you can avoid it. You need to make a loose and porous mix for proper transport of fertilizer, water, and air as well as that will ensure proper drainage. For making a basic potting mix, let’s look into the recipe:
  • Put 1 bucket of peat moss in a clean container.
  • Put an equal amount of perlite or vermiculite with peat moss which means 1 bucket of each of them.
  • Mix ½ bucket of compost or composted cow manure.
  • Now Mix 2 cups of fine sand.
  • Mix ½ cup limestone and 2 cups of slow-release fertilizer thoroughly and add them to the potting mixture.
  • Adjust the pH of the potting mix by adding sulfur to lower the pH or lime to raise the pH.
  • Sift the potting mixture through a screen with half-inch hardware cloth to break any large clumps into fine pieces. If you are going to use the potting mix for germinating seeds, sift it through a ¼-inch hardware cloth for a finer texture.
  • Moisten the potting mix before planting.

Some last words for you

Here, I have tried to explain what are the best soils to grow vegetables in pot and almost all types of mediums that you can use for planting vegetables. Well, now you know –
  • What an ideal type of soil should be like.
  • Why you should choose potting mix over the garden soil.
  • Some best potting soils.
  • And lastly how easily you can make your own potting soil.
So, all the choices are right here in front of you. Just make your decision wisely and save your weak plants. Don’t stop and keep going with gardening. Happy Gardening gardeners!

Can I make an indoor vegetable garden?

0

Sometimes you really wish to have some freshly grown vegetables rather than the veggies from the market. But you live in an apartment and don’t have a lawn or enough open space to make an outdoor vegetable garden.

Now you may be wondering how this wish can become true. So, Can you make an indoor vegetable garden inside your house?

Yes, you can. All you just have to make sure your plant gets enough sunlight, water, and nutrients. Besides this, taking proper care of your garden can make your dream come true.

Only thinking of having an indoor garden is not enough. Rather than that you need to take some action!

But what will you do? Well, for that I am here with this article to give you guidance about the indoor vegetable garden. Let’s dive in for more details.

Can I make an indoor vegetable garden

From where to start?

Let’s start your indoor gardening journey by making the right plan for it. The right plan will help your way to achieve your dream.

You certainly need to ensure some things for your garden. Like plan for a garden location, then how you would like to make it: in a container or on the ground. So you have to think and plan all the following things to start.

1. Choose the location

The first thing is to choose an indoor garden space for your garden. The location should have a proper lighting system. If you don’t have an open rooftop or balcony, then you can choose windows to set up your garden.

Most vegetables want sunlight for at least six to eight hours per day. Again, for some vegetables, 4 hours of sunlight is enough like lettuce and herbs. Some need direct sunlight or some need partial sunlight.

So choose a place where your plants can get maximum sunlight. Along with sunlight, you have to make sure that the temperature of your location is perfect for the plant.

Some vegetables need cool weather to grow like radish, beets, lettuce prefer to grow at around 15 degree Celsius. So give them a place where the sunlight stays only for 4 hours per day or less.

Some other vegetables prefer heat to grow like peppers, beans, and tomatoes. They need a temperature of around 20 degrees Celsius or above. So, ensure they have at least 6 to 8 hours of light.

2. Select the right containers

After choosing the right location, you need to think about what you will use for sowing. Basically, it is right to choose containers rather than an open ground for indoors.

You can’t randomly choose any size of the container. The size of the container will vary according to your plant. The container you have selected must be clean, solidly constructed, and has proper drainage holes.

Small size veggies like a salad green, and radish can grow in deeper soil containers that are a few inches deep. Large plants like tomatoes, cucumbers, and beans need to grow with more root systems to support them, so use larger containers.

Carrots and beets also need to grow in large pots as they grow under the soil.

3. Select the growing medium

Perfect soil will grow healthy plants and you will get good veggies. So, choose high-quality potting soil as well as high-quality seeds.

It’s better to use a sterile potting soil mix for indoor gardening. It is super light and so you can move around your containers easily. Well, the best benefit of this is that it may save your plants from soil-borne pathogens.

Perlite, vermiculite, peat moss, and sand are equally mixed in this mixture. Some mixtures contain moisture-holding crystals and timed-release fertilizer though they may be a lit bit expensive for you.

4. Fertilizer for the medium

The plant may need to give nutrients from external sources though they collect their nutrients from the soil. Many times it so happened that the soil doesn’t contain enough nutrients.

So, you have to provide them for plant growth.

You need it more when your plants are growing in a soilless mixture. You can use a water-soluble fertilizer, organic liquid fertilizer like fish emulsion, seaweed fertilizer, or some chemical-based fertilizer following the product instructions.

There are some other variations too like palletized fertilizer. It is a slow-release fertilizer that is mixed up with soil while preparing.

Be cautious while using any kind of fertilizer. If you use excessive fertilizer it may burn delicate roots or build up salts.

5. Water for your plants

You can’t live without water so as your plant. Ensure the right amount of watering for your plants so that they are moist enough.

Generally, tap water is okay for your plants. But sometimes, minerals from your tap water can be harmful to your plant. If so happen then definitely use filtered water or boil the water and cool it before use.

Excess water can make your plant roots get rotten. The roots may get loosen from the soil too. On the other hand, too little water can make the soil dry especially during winter when you use the heater for heating.

Indoor plants have a limited amount of soil and so they need more water to keep them moist. So, use a tray under the pots and some stones in the lower part of the soil.

The tray of water will keep the soil hydrated and stones will hold on to some water. However, mold on the soil surface, root rotting, and leaves dropping off are the signs of overwatering. Ultimately, your plant will die.

So if you don’t want to lose your plant, please take care of them by giving them the right amount of water.

6. Pest attacks! Are the saving materials ready?

An indoor garden is much easier than an outdoor garden when it comes to animal attacks or pest attacks. If you use sterilized potting mediums and containers, then you have to worry less about the pests.

There may be mealy bugs, spider mites, aphids, or whitefly when you already have houseplants. You can control these pests just by spraying organic insecticidal soap.

Follow the instructions written on the packet to use.

Don’t overuse or use it when it’s almost the harvesting time. Wash the veggies before use if you use pest control products in the garden.

What to grow? When to grow?

You have got all the necessary things ready to make your garden. But wait! Where is the plant?

Okay, don’t worry. Relax a bit.

I’m going to tell you when you can start your gardening and the veggies that you can grow indoors, for example, you can’t grow corn inside your house.

The right time to start an indoor vegetable garden

“When should I start making my indoor garden?” Probably this question is rising in your mind.

Well, you don’t need to concern about the season or the perfect time for indoor planting. In an indoor garden, you are controlling the growing environment of the plants.

So, it is 40 degrees or minus 40 degrees Celsius temperature it doesn’t matter.

Besides, the choice of vegetables also plays a great role here. Some veggies love to grow at a cool temperature like lettuce, radish, and beets. Try to grow them during winter.

Again, some prefer hot weather to grow like peppers and tomatoes. So, choose them to grow in summer.

Like this, growing times will vary but you can ensure controlled temperature and LED light to grow your veggies indoors anytime!

11 Easiest vegetables to grow inside for beginners

vegetables

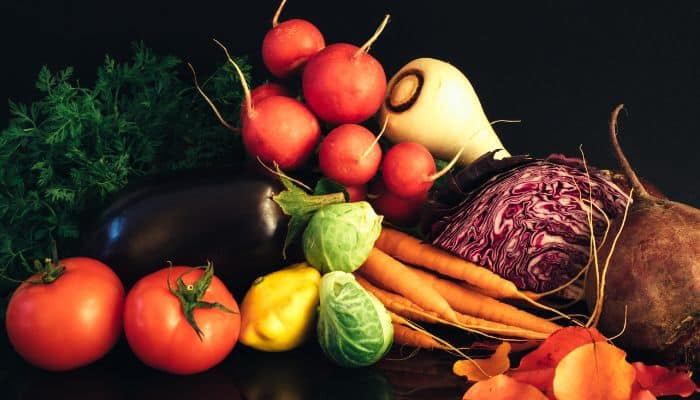
There are almost dozens of plants that you can plant in your garden. So, let’s check it out.

1. Herbs:

You can choose to grow herbs to make your food tastier. You can even put the potted plants inside your kitchen beside a sunny window.

Though they are not vegetables, you can plant them to get fresh herbs as well as for saving money. As a beginner, it will be easy too for you to make an indoor herb garden. Just directly put the seeds in the soil.

2. Greens:

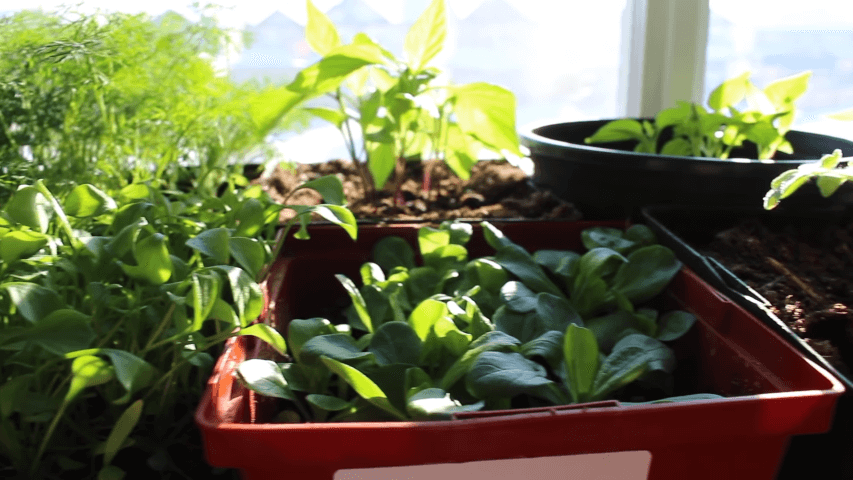
You can make your garden greener just by planting lettuce. It will also give you continuous harvest without using too much sunlight.Besides this, you can grow other leafy greens like spinach, Swiss chard, kale.

This green portion will ensure you a good salad! You can also regrow them from food scraps.

3. Carrots:

Only some good soil and a deep container you are all ready to grow carrots. It is mainly a vegetable for cold weather.

4. Radishes:

Along with carrots, you can grow radishes too in your garden. It needs only 4 inches of soil and you can grow it as a beginner. It will provide you a quick harvest.

5. Potatoes:

It is a little bit difficult to grow them. They need large spaces to grow and need a lot of sunlight after establishment. But if you love them all these difficulties don’t matter.

6. Scallions:

Scallions are low maintenance and quick harvest giving vegetables. You can use seeds to grow them or regrow them from the scraps. Plant the white bulb in the soil and get a continuous harvest.

7. Tomatoes:

There are various types of tomato plants that you can harvest inside your house. All you need proper sunlight, large size pots, and enough root support system to grow this large plant. But honestly, dwarf tomatoes are easy to grow inside.

8. Peppers:

Small chili pepper, shishitos, and many other types of chilies can be grown indoor. It is easy to grow pepper plants as they are small in size. Like tomatoes, they also need proper sunlight.

9. Microgreens:

Basically, miniature greens from radishes, mustard greens, chard, broccoli, lettuce, and more are known as microgreens. It is a good addition to your salads and can easily grow in an indoor garden. Putting in a shallow container, place the container in a sunny place.

10. Celery:

It is a re-growing plant that you can put in your vegetable garden. Plant the seeds or put the stump (about 2 inches tall) inside the container or in water. Put the root side down and new celery will be started to grow.

11. Mushrooms:

Mushrooms are not vegetables but you still can grow them if you don’t have enough sunny spots. Button mushrooms, oyster mushrooms are easy to grow.

You can use a wood log to grow them or can use grow kit easily.

The last thing is that grow your favorite vegetables but know every single detail of your plant before planting.

But if you want to get a quick harvest from the first gardening batch, then plant carrots, radishes, and microgreens. They are easygoing too!

Take care of your plants

It’s not like you just plant a tree and now your duty is over. The plant will take care of itself and give you some great veggies out of gratitude for planting them.

No, after planting your duty is to take care of them.

  • Balance the sunlight and make sure your plant must get adequate light. Too much sunlight can damage the cold season plants and vice versa can happen with your summer season plants.
  • Maintain the soil moist. Make sure your soil is not too dry or too wet. Also, check the drainage holes. Are they too much to drain all the water? Are they too short to keep all the water inside the pot? So, make proper drainage holes.
  • Identify if your plants are healthy enough or not. Are they suffering from plant diseases or pest attacks?

Are they dying? What can be the cause, overwatering or under watering, light leveling, or negligence?

Know the problems and apply the solutions.

Solution of common problems for beginners

You are new to gardening and it is quite normal for you to face problems. You can face different types of difficulties.

But here are 1 or 2 common problems that almost all have faced.

How to know when to water your indoor plant?

I know plants can’t talk but you can understand when they need water. So, here are the tips –

  • Use a soil probe to draw some soil out of the pot. You will get to know what the condition of the soil under the surface is.
  • Another tool moisture meter will tell you how dry your soil is by using a measuring scale.
  • Usually, you can lift the container up. If they feel heavy then they are hydrated enough.
  • If you notice brown crispy edges of the leaves, they need more water. If the leaves’ edges are brown and mushy, they get excess water through frequent watering.
  • Sometimes yellow leaves indicate that they get too much or too little water. But it may not be the case all time.

How to grow plants without sunlight?

Many indoor gardeners face the problem that there is not a required amount of sunlight. So, what will you do? Give up gardening!

Well, that’s not the solution. You use an artificial light source for your plants.

Plants can get benefit from cool and warm fluorescent lights like natural lights. If the sunlight is not enough, replace sunlight with full-spectrum CFLs and LEDs for more efficiency.

Sometimes you need to choose 1000 watt to grow light bulb that has the same wavelengths as the sun. A regular light bulb may not work.

Put the lights in a chain for easy movement and place the lights 6 inches away from the plants. For light reflection, you can even use aluminum foil or a whiteboard around the container surface. This will maximize the effects.

Especially, when you sow the seeds or bulbs, arrange for the lights if the plants can’t get enough natural light. After germination when the seedlings come out, you better place them under artificial lights.

When the plants get sunlight for partial hours, you can put them where they can get light both from natural and artificial light sources.

Advantages that you will get from indoor vegetable gardening

The indoor vegetable garden will help you to relieve stress. In this era of technology, we spend too much time using devices and get stressed. So, it will give you happiness without using devices.

Also, it will add some kinds of fun to your monotonous life.

We don’t have time to do the shopping for fresh veggies regularly and cook them. So, having an indoor vegetable garden will ensure a healthy diet for you.

Nowadays many dishonest businessmen use chemicals to keep the vegetables fresh for a long time. So, if you own an indoor vegetable garden, you won’t have to worry about what you are eating.

It can save your money too. Many herbs and veggies available in the supermarket are costly.

Besides, less shopping means less usage of plastic wraps. Less buying means less production and less usage of chemical fertilizers. So, can you imagine how much eco-friendly your garden is!

Last but not least, an indoor garden will give your home a fresh feeling.

Some extra tips for you

Who doesn’t love to get some extra? Everyone, right?

So, here are some extra tips for your garden

  •  You can grow veggies all year round by ensuring the basic needs of the plants. Just choose the seasonal vegetables to grow as a beginner. Otherwise, if you choose to make a summer garden in winter, it will be a little difficult for you now.
  • You can recycle materials in your garden. For example, use plastic water or oil containers for your garden. Coffee grounds, food scraps, and banana peels as fertilizers too.

You can find so many recycling ideas for your garden. So, show you creativity!

Few Last words for you

Can I make an indoor vegetable garden? Now you know that you can make an indoor vegetable garden. So, what are you waiting for?

Get the essential elements and indoor space ready, choose your vegetables, make your garden, harvest your indoor veggies, and add some green to your home.

Always remember that you can have your own choice when selecting a veggie and modify your garden according to its requirement. But don’t take too much hassle as a beginner and don’t choose too big plants for indoors.

Wish you all the best. Happy gardening!

How to prepare a vegetable garden from scratch

0
Are you new to gardening? Don’t know how to prepare a vegetable garden from scratch? Then this article will guide you in making a vegetable garden from scratch. Not only that but also it will help you to manage the garden and handle the problems you will face in the garden. Well, you might be afraid of hearing the words problems, manage, handle, and all but chill. For making a vegetable garden you don’t need a Ph.D. degree in gardening! All you have to do is follow some steps to own a vegetable garden of your own. I have kept the steps as simple as possible so that as a beginner it is more reliable for you. So let’s dive in deeper and find out the awesome tricks to grow your garden.
How to prepare a vegetable garden from scratch
MakeBreadAU / Flicker

10 really easy steps to prepare a vegetable garden

As a beginner, you may think that vegetable gardening will really be a difficult task. But don’t worry. I have tried to make this as simple as possible for you. So, here you go! Before you start vegetable gardening, you need to assure that you are prepared for this battle! Relax!! You just need some practice, choices, and plans. Okay, now let’s see what preparations we have to take first

1. Make a vegetable garden patch with a potted plant

Practice makes a man perfect. So, as a beginner, you should start with a patch garden. You don’t know how to prepare the soil or what vegetables you would like. So to solve this problem start with a little container garden.  container garden This way you can know what to do and how to do it. Besides, the disappointment of failure will be smaller with small gardens. Also by this, you will be aware of the budget of your garden and how much hard work it will take to make a garden. Moreover, for making a sample garden you don’t need extra space. You can make this on a deck or even a balcony where you get enough sunlight.

2. Analyze the gardening problems with your mini container garden

Now you have a mini sample garden. Identify the problems that you have faced in making and managing this garden. Note down all the problems like:
  • Seeds have not grown well
  • Plants are not in a good shape
  • Pests and disease attacks
  • Animal attacks and many more like this
Don’t miss any problems to write them down!

3. Choose a suitable land

Now you have the basic knowledge of gardening and its problems. So, it’s time to step forward. A good location can ensure a good garden whereas a poor location will give you poor vegetables. Choose a location near your house so that it can be easier for you to take care of it. The characteristics that a good location has –

Proper sunlight

Basically, your fastest-growing vegetable plant needs direct sunlight for 6 to 8 hours daily to do photosynthesis. The leafy veggies can tolerate some shades. vegetable plant needs direct sunlight So, in the shady part, you can plant some herbs or leafy veggies like lettuce, kale, parsley, and spinach. For root vegetables like carrots, and radish, 4 hours of sunlight is enough. So to cultivate root vegetables you can choose a land sunny for a particular day time. Besides, the veggie can enjoy a little bit of afternoon shade if the summer is too hot!

Proper draining system

If your soil is too wet, it can destroy the roots of your plant. As a result, your plant will die. So, make the soil is not too damp and you have a well-draining system in your garden. But you also have to be careful that you are watering your plant’s soil regularly to keep them moist, especially during the hot weather. If you feel that the soil is dry on the surface then it’s time to water. Along with this remove the rocks as well if the soil is rocky. The plant can’t grow its roots well in rocky soil and the water can’t react properly with the plant.

Stable and less windy

Often wind may affect your plants. If the wind flow is too high, it can uproot the young plants in the garden. Besides, wind can keep the pollinators away from the plants. Also avoid the location, where there is too many people or animal visiting. Many times plants die as they came under the feet at such a young age.

Nutrient-rich soil

The plant needs two types of nutrients. One is macro-nutrient and another is micro-nutrient. A plant basically collects these nutrients from the healthy soil as you can’t feed them by using your hands and mouth. For this, you need land where the soil is full of nutrients. You can also collect some samples of your soil. Send them to the nearby lab to know which nutrients are missing there. You can also check the soil texture at home. The texture of the soil determines the water draining level and the presence of nutrients too. After checking the texture, make sure to use organic fertilizer to make your soil full of nutrients.

 4. Chose a plot size

As a beginner, you should start with a small garden. Though you have the basic garden skills now, it is wise to choose a smaller size. It will be too much for you to handle a big garden. garden plot So just start with a small one and collect experiences!
  • 10’x10’which means a 100 square feet garden is an ideal size for a beginner. It is perfect when you are planting on plain ground. With this garden, you can produce different types of vegetables as per your choice. Besides, harvesting vegetables will be enough for your family. You can choose 3 to 5 variable plants and plant 3 to 5 plants of each variable.
  •  But still, if you want to have a bigger garden, then I would suggest you choose a plot of 12’x 24’. This size of your ground garden will be enough to feed a family of four 3 hills of yellow squash; 1 mound of zucchini; 6 tomato plants; 10 assorted peppers; 12 okra plants; 2 cucumbers on a cage; a 12-foot row of bush beans; 6 basil; 2 eggplants; 1 rosemary, and a few low-growing herbs such as oregano, thyme, and marjoram.
  • If you choose to plant in a raised garden bed, the perfect sized garden bed will be 4’x4’means 16 square feet or 8’x8’means 64 square feet.
  • It doesn’t matter how big or small your garden is! All you have to take care of is the fact that there is a path after every four feet or so. This path will allow you to reach your plants for harvesting and cleaning.
Just make sure you don’t have to step on your other plants or soil to reach out to the plants.

5. Prepare the ground

The land selection is done but you can’t put your seeds directly in the soil. That will not help you. In fact, it will make you disappointed when you will notice that the plants are not growing properly.
  • Start preparing your garden soil by pulling out weeds and the best time for it is summer. There can be some perennial weeds too, make sure you are removing them too.
  • If the weeds are too many to remove and you find it too difficult, just use weed-removing objects. Try to use organic products more than chemicals. For example, you can use glyphosate, black impermeable, corn gluten meal.
  • Once your ground is free from weeds it’s time to fork your ground with the garden fork. If you do it in winter, the weather will do the rest for you which may take a couple of weeks.
  • Using the garden fork, fork the soil roughly and leave the soil in clots. The frost and cold will break down the soil and you will get the soil ready within spring. If the soil is not clay soil, it will be detangled and powdery by that time.
  • On the other hand, if the soil is clay soil, you need to have some patience as it will take time to detangle. Though it’s difficult to deal with clay soil, it is more fertile and nutrient-rich.
  •  Finally, when you turn over the soil, many weed seeds may come to your plot and germinate. So, if notice the seedlings early in the garden, it’s better to use a hoe and throw them out of the garden. Besides, the slugs will go away.

6. Choose the vegetables

Out of excitement, many beginners plan to plant a lot of plants in their garden. As a result, they could not manage the garden well or their harvests are wasted. Besides, many choose a vegetable that is too difficult to handle! vegetable garden While selecting vegetables read the instructions on the seed package carefully. They have different benefits, some are suitable for container gardening, some are disease resistant, and many more.
  •  You can try 2 or 3 varieties of the same veggies. Many times if one fails, others work. In this way, you can be sure about next time planting.
  • Next, you need to know whether you want to grow vegetables from seeds or from young plants. Seeds of annual veggies (peas, beans, squash, lettuce beets) should be planted indoors first about at least 6 weeks before the last frost. Seeds of carrots, beans, and peas can be directly sown in the garden.
  • For slow-growing plants like broccoli, celery, and kale, you can use seedlings and transplant them into the garden. This will give you an earlier harvest than seeds. Transplants also do a better job in case of resisting pests.
  • The next thing you need to be careful about is your family’s choice and how much they can eat. If your family members don’t eat broccoli, don’t plant them. Instead of them make a big portion of lettuce if your family loves them to eat.
  • A big portion doesn’t mean you will plant the same plant all across your garden. No, it’s a big no.
  • Bring some variation. Choose as you like. Plant as much as your family can eat. You can gift vegetables to your friends and relatives but don’t overdo them.
  • Sometimes you may think to grow easily available and cheap vegetables to plant. But that doesn’t seem like a good idea! Instead of this plant some expensive or rarely available veggies. You can also put some herbs!
  • Always use high-quality seeds as low-quality or cheap seeds of the market may not germinate. Then you will lose your money as well as time instead of saving it. Moreover, you can choose seeds over individual plants as it is cheaper.
  • Choose vegetables both for warm weather and cool weather. This way you can get continuous harvest throughout the year. You can grow lettuce, carrots, and radishes during spring, tomatoes, eggplant, and peppers during summer, and potatoes and kale during fall.
Finally, you can’t choose a vegetable that will grow during your summer vacation. I mean to say you are away from home on a trip, then who will take care of your lovely plants?

7. Know the little details of your vegetables

When you are done with choosing vegetables, go deeper with the details of planting those veggies. Like how much time they need to harvest, ideal temperature, planting time, and so on. For your convenience, I am enlisting a small detailing demo of 5 vegetables. Just go for it and make your own preferences like this or with your required details.

Lettuce

  • Harvest time: 65 – 80 days (varies from type to type)
  • Ideal temperature: 45 -75 F
  • Planting time: Spring, fall
  • Spacing: 6 – 18 inches (varies from type to type)
  • Germination time: 2 – 15 days
  • Light preferences: Sun or partial shade

Spinach

  • Harvest time: 40 – 50 days
  • Ideal temperature: 35 -75 F
  • Planting time: Spring, fall
  • Spacing: 8 inches
  • Germination time: 6 – 21 days
  • Light preferences: Sun or partial shade

Green beans

  • Harvest time: 55 – 65 days
  • Ideal temperature: 55 -85 F
  • Planting time: Early Summer
  • Spacing: 6, 18 inches (row)
  • Germination time: 8 – 16 days
  • Light preferences: Sun or partial shade where hot

Cucumber

  • Harvest time: 48 – 65 days
  • Ideal temperature: 70 -85 F
  • Planting time: Summer
  • Spacing: 12 inches, 3 feet (row)
  • Germination time: 4 – 13 days
  • Light preferences: Sun or partial shade

Yellow Summer Squash

  • Harvest time: 48 – 65 days
  • Ideal temperature: 70 – 90 F
  • Planting time: Summer
  • Spacing: 12 inches, 3 feet (row)
  • Germination time: 6 – 12 days
  • Light preferences: Sun or partial shade

8. Planning to put them in the places

Now you know when you need to plant the vegetables and their weather preferences. So now it’s time to know how to place them in your garden. Let’s take a guide for your garden layout. garden layout You can select row cropping, intensive cropping, and square-foot cropping layout for your garden. Plant your veggies at least 18 inches apart rows so that you can get to walk. This approach is beneficial for big vegetable gardens. Row cropping will help you to use mechanical instruments or to fight weeds. The problem with this approach is that you can’t plant many vegetables. But with intensive cropping, you will not face that problem. In an intensive cropping approach, you plant 2 or 3 plants really close in a wide row. The width of the row is about 4 feet. Now you may think that the plants are too close to each other. Won’t that be a problem? So let me tell you that the plants are at a safe distance and grown-up plants won’t touch each other’s leaves. In this layout, you can use every square inch of your garden but it is difficult to reach the plants when needed. Moreover, you can’t use it for vine plants like cucumber. There is another method called the square foot method that is derived from the intensive cropping method. Here you have to use a physical gridding system and divide a raised 4×4 garden bed into 1-foot squares per portion. Also, use 8 cubic feet of great quality garden soil and make 6 inches high for both sides. This layout works like 1 XL plant per square, 4 large plants per square, 9 medium plants per square, and 16 small plants per square. Tall plants like tomato plants and vertical supported plants like peas, beans, and cucumbers can be planted on the north side of the garden. If you plant tall veggies in the north, they won’t shade the other vegetables. Use the shady (unavoidable shades) parts of your garden for cold seasons and use the sunny part for summer and spring. Moreover, you can use your DIY frame trellis for growing veggies. Try to plant vegetables seasonally. After harvesting, plant another vegetable for the next season. If you want to plant annual or perennial crops like asparagus, and herbs, then give them the permanent location of your garden as per their requirements.
asparagus
asparagus
Make segments in your garden on the basis of harvest periods. Basically, plant the quick harvest plant on the front side of your garden so that you can collect them easily. And plant the long harvest plants in the backside. Also don’t forget to keep the sunlight, water flow, and nutrient factors in mind while making the segments. Moreover, give space to your plants. Don’t put them all together and stop their growth. Sometimes it so happened that you don’t want to harvest all your spinach at the same time. So use stagger planting. Plant the seed with a couple of week’s gap or as you wish to harvest. Finally, you can use some modern technologies too. There are many technologies that will help you to make a foolproof layout for your garden.

9. Make the garden thing happen

Finally, it’s time to take another step forward for vegetable gardening. Your location is ready and now it’s time for you to turn all planning into action! You can directly put seeds in the soil or turns the seeds into seedlings and then plant. You can also buy the seedling from the nursery but that will be a little costly. Make the garden thing happen You can put direct seeds of tap-rooted vegetables like carrots or radishes. However, for the vegetables that take a long time to harvest, you better don’t put them directly in the soil. First, make seedlings and then plant. For directly planting you can choose from two different methods given below:

Hill method:

making a pile of soil ensures the heat for germinating seeds that need warmth. Make the pile high around 6 inches. If you are using garden beds, then the pile is not necessary. Next, make 3 or 4 small holes on the pile with fingers and put one seed for a single hole. Read the packet’s instructions to find out what should be the depth of a whole. After putting the seeds, water them gently. Separate the seeds at the required distance after germinating. Remove the week seedlings so that your plants will not be crowded

Through method:

In this method make a small pit using two fingers. Then spread the seeds lightly and evenly according to the pit’s length. Then just close the pit using some soil. Follow the instructions to know the depth of the pits. Water the seeds and wait for the seedlings to come out. Then separate the seedlings after germinating and plant them properly. So this was all about direct planting. Now let’s move forward to seedlings transplant. As we discussed earlier that slow-growing vegetables grow better when you put seedlings instead of seeds. The first thing is to buy high-quality seeds and potted them with a seed starting mix. This mix is not soil but ideal for seed germination. It’s better not to use garden soil for growing seedlings indoors. Make sure that your container gets enough warmth, sunlight, and water. Also, check the seed’s packet instruction to know if you have planted the seeds at the proper depth. If the depth is not correct, there is the possibility that the seeds won’t grow. As soon as the seedlings started to come out, put them outdoors for a certain amount of time. Repeat it for a few days to make your plants adjustable to the external environment. But be aware of the fact that too much heat can damage your seedlings otherwise! Basically, late winter and early spring is an ideal time for sprouting seeds. When you think that the seedlings are now ready for planting, chose an ideal time to put them in your garden. Drizzly or overcast weather is perfect for the job but never mind if you don’t get it. Plant it early in the morning. Remove the tiny roots and put some fertilizer days before planting. This will make them stronger. Next, make a hole where you want to put the plant. Then remove the seedlings from the pot and put them in the ground. Do the transfer carefully. Don’t damage the roots. Add some extra compost tossed into the pot. Your plant will thank you for this!

10. Caring for your garden

I know you have worked a lot till now to set up your garden. But you would feel really bad if somebody tells you that all your hard work will go in vain! Caring for your garden Wait! Don’t be upset. All you have to do now is take care of your garden and all your hard work will pay off! Some basic tips you need to follow to grow healthy plants.

Fight the weeds back

Weeds are also a kind of plant that will try to steal your plant’s sunlight, nutrients, and water. But you can’t make the police complain about that. Use a hoe or a hand fork to cultivate the upper soil that will disturb the growth of weeds. A mulch of clean straw, compost, or plastic can also be used around larger plants like tomato plants. The mulch will also reduce the watering needs. Besides, frequent use of corn gluten meals will reduce the weeds in your garden.

Give food to the plants

Foods give us nutrients and do the same for plants too! Well, I’m not talking about pizza or pasta. I’m talking about fertilizers for plants. Basically, the directions for fertilizer application are mentioned in the seed packets. But you can use compost too. It’s organic and good for your soil as well as for your plant.

Animals are not allowed

Animals like deer, raccoons, rabbits, and others can damage your garden. Use a fence around your garden. Make it about 8 feet tall or as much as you required. Also, make a 6 inches tall barrier under the soil to prevent rabbits from digging the soil and enter in the garden. Moreover, the usage of repellents and technology are effective too to keep the animals away.

Insects should not exist

Pick up the large insects and caterpillars using your hands. In case of a small infection, it is effective. But in case of large attacks use insecticidal soap spray. Or else you can use other pest control chemicals. But be cautious while using any kind of chemical in your garden.

Don’t make them sick

Plants who died from fungal disease are not a new thing in the flock. Viruses, bacteria, fungus, and contagious diseases can attack your plants. Water directly on the soil, not on the leaves or the plants. If you are a sprinkle user, use it early in the morning. Watering Thus the plant will dry before night otherwise damp plants get attacked by fungus easily. Remove the affected plants from your garden and don’t add them to the pile of compost. In addition, you can choose to plant the disease-resistant variation of your desired veggies. Find out the detailed clarification about the diseases and cure them quickly!

Don’t let the happy moment ruin

Probably, the happiest moment in a gardener’s life is the harvesting time. But this time you also need to be careful. If it goes wrong, your plant has to suffer the consequences. Use scissors to detach the veggies from the plant. Don’t pull them too hard otherwise, you may uproot the plant. Don’t smash other plants while picking vegetables from others. Don’t harm the tender leaves or any newborn veggies. Try to understand when they are looking good enough to eat. Don’t pick them unripe or too much ripe. Some veggies will give you multiple harvests during their growing season. So, just pick more veggies with care and the plant will give you more!

Conclusion

Well, enough of talking now. You must think, “OMG! There are so many things to do. Will I be able to do that?” Then let me tell you, yes! You can do it. Just go for it. Gardening is a pleasure of mind and the hard will surely pay you off! Let me summarize the processes for you. Make a patch container garden and earn experience and knowledge in gardening. Choose a perfect-sized land and make it suitable. It may take a couple of weeks to get your land ready. Within this time choose the vegetables. Go deeper with the details of your vegetables. Make a layout of your garden. All are ready. Now it’s time to buckle up and make your gardening dream come true. When the garden is ready, do take care of your garden and ultimately harvest sweet sweet vegetables! That’s all. Happy gardening.

Will Heavy Rain Damage Peony Plants?

Are you concerned if heavy rainfall could damage your peony plants? Well, you have reached the right place to find the answer. I’ll try to share my experience and knowledge along the way to provide guidelines. Heavy rainfall can do significant damage to your plants, no matter which season it is. During spring, heavy downpours may smash and splatter your peony plants across the lawn. Sometimes, the sturdy plant stems may break after the rain by arching toward the ground. Also, you cannot be sure that the peony rings won’t shatter soon. You need to consider various aspects to prevent serious damage from rainfall.  Sometimes, salvaging after the disaster can help you recover. So, read the rest of the article to know about the best rain-resistant plants and how to take preventative measures against heavy rainfall. Will Heavy Rain Damage Peony Plants

Which Peonies are Highly Rain Resistant?

Once you plant a peony, it becomes very resilient day by day. Although there are some of the best types of Herbaceous peonies and perennials offered by mother nature, heavy rain may cause a significant amount of damage to it. So, if you want to choose such peonies that provide good resistance to rain, consider selecting these types from below:

Paeonia lactiora “Krinkled White”:

Out of all the single white peonies, this Paeonia lactiora “Krinkled White” is the best one. It won the American Peony Society Award. You will notice their crinkled petals with golden stamens in the center. Their height can be up to 90 cm. They are very resilient, and you may not require any stalking to support them. It would help if you planted them in mid-season. Expect them to bloom in late spring and early summer. They are moderately fragrant and highly resistant to rainfall.

First arrival “Itoh Peony”:

This variety of peonies is one of the earliest intersectional peonies. Most gardeners regard this as one of the best available Itoh peonies. You will find its distinguishing colors, lavender-pink, and reddish-purple at the base of the petal area. The flowers are large and bloom in semi-double blossoms. They can grow up to 20 cm in width and 70 cm in height. You will find their scent almost like a rose. They are vigorous, rain resistant, and perfect for cutting to use in the future. Expect up to 40 blossoms after the first plantation if you manage to take proper care each season. Midseason is the ideal time to plant them if you want to get a better outcome.

Paeonia lactiora “Sword Dance”:

Another good rain-resistant peony is this variety called Paeonia lactiora “Sword Dance”. You will be dazzled by their magenta-red petals with golden yellow stamens of a reddish color. Their height can be up to 90 cm. Plant them in the late season for a good outcome. After blooming, you will notice their beautiful large blossoms. They are both rain and wind-resistant, which makes it ideal for your garden and pot.

How to Protect Plants from Heavy Rainfall?

peony plants As you love your peony plants, you should take preventive measures to secure them from heavy rainfall and storm damage. Also, the shrubs have initial flower buds that result in a good outcome. So, if you do not take care and provide protection to the peony buds timely you will not get the expected bloom. However, smaller plants like Herbaceous peonies are comparatively easier to provide protection. So, follow the steps below to protect your native plants from heavy rainfall.

1. Try to Protect the Roots

Spread mulches around your plants to protect their roots from weather damage. Try not to apply mulches very close to the root, otherwise, the root may get damaged and start to rot. q? encoding=UTF8&ASIN=B01JGTDLVA&Format= SL160 &ID=AsinImage&MarketPlace=US&ServiceVersion=20070822&WS=1&tag=gctlove 20&language=en USmulch Ensure a three inches layer around the root area, this will prevent cold damage following heavy rainfall.

2. Be Sure to Cover your Plants Timely

Cover your plants with overturned buckets or pots to prevent them from suffering cold wind and excessive rainfall. But check the height of the container first to see if it matches the height of the plant. Also, you can put one heavy object on top of the coverage in case of heavy wind.

3. Provide Wrapping when Necessary

You may need to wrap up certain plants with strong fabrics like burlap for protection. In this case, make a frame using garden stakes when required. For larger plants like a tree peony, wrap them in burlap and tie them with twine or thin wire. In case of newly planted trees, wrap up the trunks at least and use garden stakes. This will provide protection from heavy winds and cold weather.

How to Salvage from Plants after Heavy Rainfall?

You can make a beautiful garden after a lot of hard work, but mother nature can easily wreak havoc and destroy that location. Storms and heavy rainfall can damage woody stems, weaken shrubs, and pulverize the flowers. Sometimes you may find that look it seems impossible to repair the damage. But, if you can properly utilize what is left after the disaster, you can still salvage and even successfully replant. Here, you will find some essential tips that will help you to know what to do after heavy rainfall.

1. Always Check for Plant Roots that are Exposed

Heavy rainfall and wind can drastically change the look of your garden. It can cause significant damage to your garden leaving the shrubs and plants vulnerable. In case your plants and shrubs have fallen over or turned upside down, you need to Investigate the overall root structure carefully to decide if replantation can be successful or not. If you find that the damage done is not significant, simply cover the root structure with necessary soil and compost. Then gently put back the plant in its current position.

2. Remove any Broken Stems

Check your shrubs and plans to detect damaged or broken stems. You can cut back the damaged or affected areas with a sharp pair of garden scissors close to the stem. This will enhance your plant’s revitalization and it will grow gradually.

3. Try not to Fertilize Immediately

As you’re done clearing the debris and cutting down the damaged part of the plant give those shrubs and plants a minimum of 2 to 3 weeks for natural recovery. You can apply fertilizers after the damage has been repaired normally. In this case, the growth enhancement using fertilizer is not necessarily required.  Also, if you apply fertilizer to a damaged plant there is a chance that you may receive a negative outcome.

4. Get Rid of Unsalvageable Shrubs and Plants

You may find it tough to completely remove a plant or even a shrub. But in some cases, you might need to be harsh and remove a certain portion of the plant to give it a chance of regrowth. Otherwise, the plants might not provide enough flowers after blooming at the end of the season.

5. Use this Opportunity to Remove Weeds

After the heavy rainfall, the ground becomes soft and fertile. So, you can choose it as a perfect time to clear the weeds along with the debris. Because after you have cleared up the broken shrubs and branches it will be easier to remove the weeds. In fact, removing the weeds will help your plants to recover faster. peony garden

6. Ensure proper drainage of the soil

Heavy rainfall can result in wet soil. If stagnant water accumulates near the root, it can be quite damaging to your plants. Your plants may face root rot, fungal disease, and infection. So be sure to arrange enough drainage facilities in both your garden and pot.

7. Make Air Pockets in the Soil

You should also focus on making some air pockets inside the soil so that proper air and water flow can take place. Because heavy rainfall can make the soil surface compact. You can use a small shovel or garden fork to loosen up the soil and create such little air chambers.

Conclusion:

Heavy rainfall will damage your plants and it is a very common phenomenon in some countries. But if you are a peony enthusiast, be sure to take necessary precautions so that you can protect your plants from storm damage during winter, fall, and spring. Contact your local garden centers to buy relevant objects of protection. If you’re able to pull it off properly, your garden will always look good, even after heavy rainfall or thunderstorms.

Can I Plant Peony in a Pot?

0
Do you want to plant peonies in pots as you don’t have a garden of your own? You may also be confused about which pots are perfect for the job. In this article, we will discuss if peonies are suitable to grow in pots or not. You can easily grow and bloom peony flowers in a pot in your house. Don’t worry, you don’t actually need to be a professional gardener to start growing peony flowers. Planting peonies in a pot is very easy and trust me, you will learn how to do it in no time. At first, you need to choose the ideal container and variety of peonies to initiate. Then, you have to prepare the soil and container. Furthermore, you have to apply fertilizers and provide a good environment inside the house if you want a large bloom of flowers every season. Finally, daily caring and timely pruning will keep your plants healthy and yield a higher outcome throughout autumn, winter, and spring. Can I Plant Peony in a Pot

5 Easy steps to planting peony in a pot

Planting peonies in a pot inside your house will increase its beauty of it. You will love the smell and color of the beautiful flowers once they start to bloom. Choose the ideal variety, prepare soil and pot, take proper care, etc. to yield such a good outcome. You will start to feel the nature inside the house and may also earn extra money if you grow more than enough. So, follow along with us if you want to know more about planting and taking care of peonies in a pot.

1. Choose the Ideal Variety of Peony

Paeonia suffruticosa or “Zhao Fen” is an ideal one among peony plants that you can grow in a pot. They can grow up to 6 feet tall and 4 feet in width. Paeonia tenuifolia or Fern Leaf Peony is another suitable option for you. They can grow up to 2 feet in height and 40 cm in width. You can also choose Paeonia “Zhu Sha Pan”, which is called Cinnabar Red. They are perfect peonies to grow in a pot and can become up to 2.5 feet in both height and width. In general, you will find the Herbaceous variety more suitable to plant in the pot rather than the tree peonies or Itoh (Intersectional Peonies). The Herbaceous peonies are quite smaller compared to the tree peonies. They can grow easily up to 4 feet in height. If you want to enjoy longer peony blooms, planting “Xuan Li Duo Cai”, “Rosedale”, “Charlie’s White”, and “Marietta Sisson” will be suitable for you if you live in a Mediterranean climate region.

2. Select the Best Pot to Plant Peony

Put the Peony in a pot that has a minimum of 1-foot diameter and 2 feet depth so that the peony root has enough room to grow. The pot that meets such criteria will be suitable for your Peony plant. Always select a pot that has an adequate drainage system and enough space for the peony root to grow inside. Otherwise, the “eyes” or initial peony buds will remain undeveloped. Also, if the soil becomes soggy, it may start the root rot. You should not transfer your plants frequently because peony likes to stay on the same soil surface after growth. In this case, try to use a permanent pot that lasts longer. A 5-10 Gallon-sized container may be ideal for you. Pot to Plant Peony You can buy “Whiskey Barrel Planter”. It is a unique option for the best size pot as it is already drilled with drainage holes. So, you don’t have to drill yourself. Also, they come in multiple sizes and colors. You can buy it on Amazon. Also, you will find the “Self-Watering Pot” another good option. It is suitable for the dry region where the climate is hotter. It slowly plants the water for a longer period of time. However, if you select this pot, check frequently if the water is clogging or not. Otherwise, the peony roots may start to rot.

3. Prepare the pot for Peony

If your container is not pre-drilled, drill a hole of half-inch diameter under the container. This will convert any large gallons into a pot for plantation. Then cover the drainage hole with a piece of thick cloth so that no soil or gravel can pass through the drainage hole. You should set the planter inside the water catch basin in order to collect any excess water when it leaves the drainage hole. But make sure that the container is elevated up to a space of two feet so that it doesn’t stay in the soggy soil.

4. Where do I Place the Pot?

Always keep in mind that peonies require sunlight of a minimum of 6 hours daily to grow and bloom up to the expectation. So, place the potted peonies in such a location that gets enough sunlight. Try to avoid such locations that have excess rainfall. Because the soil surface of the pot gets soggy, the root will start to rot and that will yield fewer flowers. Never place the potted peonies in a darker shade. Avoid any barrier that blocks adequate sunlight. Keep a distance of a minimum of 1 or 2 feet between each pot. This will allow for better air circulation between the plants. Try to keep the pot away from herbivorous and pet animals. You may keep them on an elevated platform or can use a fence to protect them.

5. Add nutrients and fertilizers to the soil

Provide a composition of 65% topsoil and 35% perlite. This will ensure better drainage for the root of the plants. In addition, a mixture of compost with peat moss will add more nutrients to the soil. Spread two inches of gravel in the bottom of the planter. Then fill the planter with a potting mix that is rich in organic matter and is well-drained. Leave a minimum of 2 inches of soil space above the edge of the planter. Be sure to set the tuber on top of the potting mix. There should be a distance of a maximum of 2 inches of soil over the top of the tuber. Continue mixing water into the potting mix until it is properly moistened. Before you plant the peony bulbs, sprinkle some compost into the soil to add additional nutrients. This will help the peony bulbs to grow better. If you want to make your own soil-less potting mix you can use sphagnum peat moss, compost, and perlite or coarse sand. These types of drainage materials are very efficient to train any excess water away from the roots. Spread organic mulch or shredded bark across the top of about one or two inches of soil. This will help to retain its moisture. Try not to apply mulch directly to the stems. You may apply a low nitrogen fertilizer like 5-10-10 monthly. Spread it after dissolving one tablespoon of water-soluble fertilizer per gallon of water. As a result, you will have better peony blooms during the season.

Take Care of the Peonies

Take Care of the Peonies

1. Water Regularly

During spring, water the plants if there is no natural rainfall for one or two weeks. If they are not watered properly during the first year of growth the flowers will remain undeveloped. Water the container if the upper portion of the soil mix becomes dry. Try to put the water evenly and also ensure that the excess water is drained freely through the hole at the bottom of the pot. Water them once or twice a week so that there is enough moisture in at least 5 inches of soil. However, take care that the steam doesn’t stand on excess water otherwise the root will start to rot. Sometimes you can add a little mulch to the water. In this way, the soil will retain moisture slowly through the evaporation process.

2. Provide Regular Sunlight

If you keep the container inside the house, try to put it in front of the South or West facing window. As a result, they will get enough direct sunlight for at least 6 to 8 hours. This will help the plant to grow enough flowers. To provide a supplement to the natural light, you can use four fluorescent light bulbs with 2 or 3 full-spectrum 40-Watt fluorescent bulbs and some 40-Watt cool white bulbs. Make sure that the bulbs are at least 6 inches above the plants. They should stay on for 12 hours at least. Alongside sunlight, these supplementary lights further push the plant to bloom more flowers during the season. You can use the customized timer with the light that helps the bulb to turn on and off automatically. In this way, even if you forget to turn on the bulbs, the plants will not miss the artificial light.

3. Use Houseplant Fertilizers

Give houseplant fertilizers to the peonies. It is best to fertilize after a regular watering. Don’t fertilize around midsummer. Houseplant fertilizers that are water-soluble are best for potted plants.

4. Avoid extreme cold weather

extreme cold weather Try not to keep your container outside if it is freezing cold, you might want to move them inside. This will protect the tuberous roots from getting frozen and damaged. Place the container in a basement or an unheated garage for the winter. Although they die in case of hard freezes, they also need a moderately cooler area to blossom better for the rest of the season.

5. Prepare for Resting Period

Don’t water the peonies too much during the late summer. In order to encourage going dormant for the winter, sometimes let the soil dry off completely before watering it again. The plants should have a minimum of a two-to-three-month rest period. If the container is located outdoor, you may leave it out for a few cold winters. If the container is inside the house, try to slowly reduce the duration of supplementary lights in order to match the shorter days of Autumn.

6. Prune Timely

Use hand pruners to snip off the stems all the way down to the soil when the leaves start to turn yellowish and die. Clip the stems just below the flower head before the petals start to fall. In this way, you will not have a mess of petals in the container. Pruners Cut back the dead stems to the ground in fall. This helps to prevent insects and diseases. Also, the container looks clean. The ideal place to cut the stem of peony is above a healthy bud. If it is attacked by diseases make sure you cut back up to the healthy portion. When you remove the stains try not to damage the crown which is an important part between the roots and the stems. Remove the entire stem by cutting it close to the ground only in case of severe injury or overgrowth. You can remove a certain number of peony buds to control the quantity and flower size. If you leave the bud at the tip of a stem but remove the side flower buds, there is a chance that you will get a very large bloom. On the other hand, if you remove the terminal flower buds and leave the side ones, it will result in an abundance of flowers, but their size will be small.
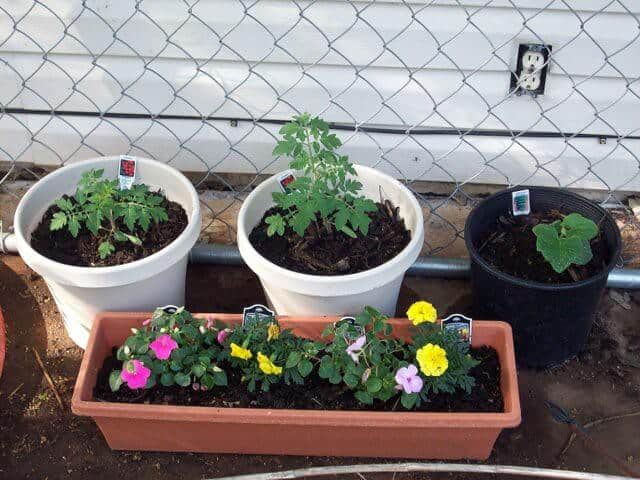
Final Word

Peony plants are ideal to grow in a pot in general. They are very resilient and tolerant of cold winters. After a proper indoor bloom in the container, your house will start to look more beautiful. Also, if you manage to grow more flowers than your expectations, you can even sell them at your local garden centers or a gardener to gain cash. As a result, those peony flowers will not only be a symbol of beauty, but also an extra source of income for your family. So, what are you waiting for? Don’t hesitate to start planting peonies in a pot, and thus increase the beauty of your home.

6 Tips On How To Protect Your Container Garden From Animals

This article is definitely for you when you want to be a superhero and save your little container garden from animals! It is heartbreaking when someday you have just found out that your doggy has uprooted your plant from the pot. Now you are just feeling like killing the dog but you can’t do that. You have the feeling of crying or screaming badly. But, wait! You neither have to kill your favorite pet nor have to cry. You just have to follow the following steps to protect your garden from animals. So, let’s dive in deep.
How To Protect Your Container Garden From Animals
 

7 Amazing Ways to keep the animals away

You may think that plants are inside the pot, not in an open space. So now no animals can damage them. But no, it’s not true. Basically, vegetables or flower plants are planted in containers. So you can keep your plants inside or outside of your houses like vegetable plants outside the house and the flower pots inside the house. So, you see many unwanted things that can happen with your plants as we said earlier. In the case of container gardening, the enemies can be birds, rabbits, squirrels, wild animals like rodents, raccoons, foxes, deers, or other household pets. So, are you ready to give protection to your container plants? Well, to protect the plants from animals we can use both physical and chemical protection.

1. Make a Physical Barrier

Creating physical barriers can be your first option to keep some animals away. You can use wood, metal wires, or plastic ropes to build a fence around to save your garden from pests. You can also use garden fabric to cover the plants or metal hardware cloth to cover the soil to stop the pests like rodents from breaking through the soil. You can also cover the garden area with heavy rocks. This type of barrier is too good to prevent squirrels from coming to your flower pots. To save the garden from rabbit damage you need to use at least a two or three feet tall fence and for deers, it needs to be at least six to eight feet tall. In vegetable gardens, you can use bird netting, plastic bird netting, or chicken wire to make a fence around individual plants and save the vegetables from birds. Moreover, you can use shiny elements like aluminum pie pans, near your container plants to scare away deers or birds.

2. Keep your garden clean

Keeping the garden clean is another solution. Brush piles, weeds, and tall grasses can attract rodents and other animals to the garden. So, these need to be cleaned.

3. Use a chemical or natural repellent

You can use two types of repellents for your garden, one is natural repellents and another is electronic repellents. electronic repellentselectronic repellents Some animals hate the strong smell of repellent or herbs like rodents hate the smell of basil, mint, thyme, and garlic. So, surrounding the garden area with these herbs will keep the specific animals away. Cayenne peppers, black peppers, and any other peppers can keep the squirrels away from your garden. They hate the spicy smell so spread some pepper flakes or can spray some powder on the soil and it will do the work. Besides cayenne pepper, you can use mothballs, Epsom salt, animal repellents like predator urine, and an ammonia-soaked rag to repulse the raccoons. To protect your potted plants from rabbit damage you can use hot pepper or dried blood (blood meal) sprays and garlic oil also.

4. Use the biological process as a shield

Well, it might sound weird but some biological processes can truly save your garden. Some worms or natural fertilizers can really save your garden. Using microscopic worms or milky spore bacteria to kill the grub worms in the garden is also necessary. Many animals like rodents can attract to the garden because many animals eat them. Then you can use bone meal to repulse the squirrels. A bone meal is basically a mixture of animal bones and wastes that you can easily find in any local garden center. q? encoding=UTF8&ASIN=B07L389BRM&Format= SL160 &ID=AsinImage&MarketPlace=US&ServiceVersion=20070822&WS=1&tag=gctlove 20&language=en USbone meal

5. Grab a technology and digitalize the garden

In case you need an instant result to save your garden from animals, you definitely can use some technology. There are professional traps and release services that will keep cunning animals like foxes away. Using some powerful motion lights that can identify the movement of animals and use bright lights to frighten the animals away can really be helpful in cases of some nocturnal animals like foxes and raccoons. Besides, there are some advanced scarecrows that identify the movement of wildlife and instantly spray water to frighten away the animals from the garden. Another technology is an electric fence that can keep the deer away. But before you put up an electric fence you may have to go through some legal activities according to your residential area.

6. Keep your adorable pets away

It may sound harsh but it’s true that your own pet can cause harm to your favorite plants. So, you better keep them both at some distance. Also, give your pets some attention and they will not try to damage your garden to get rid of boredom! Animal in container garden

Why do animals come to the garden?

Now you know how to protect your garden from the animals. But does your curious mind want to know why they keep visiting your garden? Why do they annoy you so much? Well, let me share some of their reasons for coming.

Their foods are in your garden

Squirrels basically come to bury their food cache. They choose the flower pots to hide their foods as the potting soil is too soft. Rodents like to dig the soil and search for insects. Deers visit to eat your flower plants and woody plant shoots over grasses. Foxes, raccoons, and other nocturnal animals come in search of food. Raccoons literary can eat anything and so it is harmful to your container gardening. Foxes will dig your garden just to find out some worms to eat.

They just want to have some fun

Your garden is too beautiful. So, the animals decided to have a disco party in your pretty garden! Well, just kidding! Jokes apart, if we talk about your pets, then the rabbit loves to eat your plants. And your dogs and cats might get bored and they need your time and attention. But don’t worry your cats will not dig your garden as it is a clean freak animals.

Conclusion

So till now, I have shared my knowledge about how to protect your container garden from animals. Now it’s your turn to choose wisely to protect your garden.
  • Add physical barriers and if needed add barriers to individual plants.
  • Use spray deterrent, scent repellents, or urine deterrent whichever is required.
  • Mix protective components with potting soil or use technology as you want it.
  • Keep your container garden away from your pets and other animals.
Last but not least, take care of your lovely flower and vegetable gardens. Happy gardening! Hope it is helpful for you. Have a good day!

Best Soil For Growing Peonies

0
Do you want to choose the best soil for planting peonies? While planting peonies both indoors and outdoor, you may face many problems related to soil. If proper action is not taken quickly, your bloom may delay and disease might attack the plants. In this article, we will discuss the best soil types, conditions and how that soil can be prepared to avoid bad outcomes. Peonies prefer loamy and well-drained soil that has an average pH of 6 to 7. If your soil doesn’t have enough organic matter, slow application of fertilizer will help to become nutritious. To know more about the best soil conditions and fertilizers required to grow peony flowers, follow along with us to the end.
Planting peony in soil
Chantal GIRAUDEAU / Flicker

Ideal Soil Conditions for Outdoor Peonies:

  • Plant peonies in soil that gets adequate sunlight for a minimum time of 6 hours. Avoid planting under the shade of trees that are bigger than peony. Otherwise, your peony plants may become malnourished due to competition for soil nutrients, water and air.
  • Loamy soils that are already broken into small pieces are ideal for herbaceous and Itoh (intersectional) species; they don’t grow well in hard soils that are tough to penetrate. If your soil is not well-drained it will become soggy and form large clumps of clay near the roots. In this case, try to mix one or two cups of sand into that soil to increase its draining capacity.
  • Most of the herbaceous varieties prefer neutral or slightly alkaline soils. The tree peonies require a sheltered position. Compared to the herbaceous and intersectional varieties, tree peonies are more tolerant to acidic soils than the
  • Avoid lower grounds and waterlogged areas. Peony plants grow well in a comparatively high or slope area where rainwater doesn’t stand for long.

Best Soil Condition for Indoor Peonies:

  • Fill the container with a well-drained potting soil. Try not to use standard potting soils that does not provide enough drainage as peony roots are vulnerable to rot.
  • Use containers that can hold up to 24 inches of soil. As herbaceous peonies have large root systems, they may not grow properly in soil if your container is not big enough.
  • Water the potted peony once a week and make sure that no excess water stands near the plant stem. Otherwise, the root may rot and yield no flowers.

Ideal pH of Soil and How to Achieve it

Try to keep the pH of your soil from neutral to slightly acidic, that is from 6 to 7 on a pH scale. If you can perfect the soil pH in the fall, you will receive better results in the upcoming spring season. There are some tricks to determine if your soil has a correct pH or not.
  • Get a proper soil analysis from your nearby testing laboratory.
  • Purchase a soil test kit from a nearby garden center.
  • Take help from your local soil specialist, if available.
After the test results if you find your soil too acidic, you can raise the pH by adding ground limestone when it is moist to higher pH above 7. On the other hand, if your soil is very alkaline, add Sulphur or Aluminium Sulphate to increase the acidity and lower pH below 6. Avoid adding these chemicals excessively into the soil. Otherwise, you will get a negative outcome. Always take help from your local garden centre or garden specialist. They will recommend which chemicals to apply at what rate based on your soil type and pH.

What fertilizers are best for Peonies?

Among many fertilizers, you will find 5-10-10 low nitrogen fertilizer the ideal one for growing peonies. It has 10% phosphorus, 10% potassium and 5% nitrogen. Osmocote’s fertilizer and Earth 707P fertilizer contains essential nutrients for your soil. It will enhance the color and growth of your flowers in both winter and spring. You can use them for both indoor and outdoor space.

How to Prepare Soil for Peonies?

  • Spade the soil to a depth of 12 inches to 15 inches before planting the peony bulbs.
  • If you have clay soils, drainage of water can be a problem for the stem and roots. In this case, mix crushed stone, compost or rock dust into the soil to make it a more sandy.
  • If you have sandy soils, provide compost mixed with water to increase the amount of nutrients in the soil. This will further help to retain moisture and help the plant to store water and food.
  • If your soil doesn’t have enough nutrients, use fertilizer when their initial growth is about 2 or 3 inches above soil level. Apply 5-10-10 low nitrogen fertilizer into the soil around the base of the plant. Don’t use an excessive amount of fertilizer, apply only one or two cups per plant and apply near the stem.
  • Be careful not to disturb the peony roots while adding fertilizers. Don’t apply fertilizers too close to the roots. This may even start root rot. Try to avoid the eyes (initial flower buds) while applying fertilizers.
  • If you want your soil to conserve more moisture during spring, add 2 or 3 inch layers of organic mulch. This will gradually add organic material into your soil and increase its new nutrient value.
  • In case of potted peony, ensure that the soil has a mix of 35% perlite and 65% topsoil.
Although peonies are very resilient and can use natural organic material to get nutrients, proper soil is necessary to achieve better blooms. Rather than planning to apply fertilizer, try to prepare the soil properly at the initial stage before plantation. As a result, you will require less amount of fertilizers to apply. Your hard work will surely get paid off some day and your garden will bloom with beautiful peony flowers.