Home Blog Page 4

Can you freeze fresh basil

Basil is a good herb to add to the dishes in your kitchen. You can add the basil in your soup, stew, spaghetti sauce, or tomato sauce. But you might not have fresh basil throughout the whole year if you have planted the annual varieties. So, you have to preserve the basil for the period when the fresh basil won’t be available. So how are you going to preserve it, right?

Can you freeze the fresh basil? 

Yes, you definitely can freeze the fresh basil. As basil is sensitive to cold, you can’t directly put it in the fridge. Before freezing it, you have to process it well otherwise the leaves may turn black. 

Well, the frozen basil may not taste as good as the fresh one. But you can easily use the frozen basil for cooking dishes except for garnishing. So, if you want to freeze the basil, there are many ways to freeze it as you can’t directly put it into the fridge.

So, let me tell you about the freezing methods so that you can use them to freeze the basil. Let’s dig in deeper!

Processing basil for freezing
Rob Backyard Gardenerr / YouTube

How to freeze basil in the fridge

There may be times when you get too many leaves from your plant. Or maybe the harvests are too much for you to use. Or else, you might want to preserve the basil for the winter. So, no matter what the reason is, all you want is to preserve the basil, right?

Basil is a delicate herb. That’s why keeping it fresh for a long time is quite difficult. But with a few techniques, you can preserve basil easily.

So when we talk about the techniques, we can say that freezing is probably the easiest way to preserve the basil. For this reason, I am sharing 3 easy ways to preserve basil in the fridge.

1. Freeze the whole leaves

Freezing the whole leaf is probably the easiest task when it comes to freezing. There is nothing much to do and you can use these frozen leaves later as a fresh one. In this way, you can have basil for the whole year round for adding in the soup or sauces.

For this technique, collect the basil from the stem. Wash them properly and leave them on a paper towel for drying. Now keep the boiling water and a bowl of ice water ready.

Put the basil leaves in the boiled water. Leave them in the pot of water for not more than 3 to 4 seconds. You just have to blanch the leaves and so these few seconds will work. Now using a slotted spoon take the leaves out of the hot water and place the basil in ice water. Leave that for a few seconds to let them cool down.

After a few seconds, get them out of the cold water and place them on a paper towel again. Once this is done, you can make layers of the leaves placing them separately on a parchment sheet. Put the leaves according to the paper size and place the sheets in a freezer-safe container box or plastic bag. Finally, put them in the freezer and get them out when it’s needed.

2. Freeze the basil as ice cubes

If you want to add basil flavor to the soup, then the easiest way is to add a basil cube to it. For making the ice cubes, you have to remove the leaves from the stem first. Then wash it properly and dry it using a paper towel.

Now use a food processor to grind the basil leaves. When the leaves are almost done, add some extra virgin olive oil to them. You can put 1 tablespoon of olive oil for 1 cup of basil. After adding the oil, make a fine paste of basil.

Then use a spoon to take the puree out of the food processor and place them in the ice cube tray. Freeze it for 8 hours or overnight and after that remove the cubes out of the tray to preserve it in a freezer bag or inside a container.

However, if you don’t want to make a puree, you can use one more technique to make basil cubes. You can chop the basil roughly. Then fill the cube tray with olive oil and put some chopped basil pieces into that oil using the edge of your knife. Then freeze it and later on preserve them in the container or freezer bags. You can use these cubes in your pasta dishes easily.

3. Turn your pesto into ice cubes

Now the final way to freeze your basil is to make pesto cubes. In this way, you can preserve the basil for up to 6 months or more than that.

You can make a basil pesto recipe as per your preference. Or else, you can add 2 cups of basil, 2 cloves of garlic, 1/2 cup Parmesan cheese, and 1/4 cup of almonds, pine nuts, and walnuts in the food processor to chop them finely. After that add 6 tablespoons of extra virgin olive oil or as much it is needed to make a paste. Grind it until it makes a fine paste.

Then remove the pesto out of the food processor and put it in the cube trays. Once they get frozen, replace the cubes in a freezer bag or container to preserve them. You can also add some other seasoning of your choice.

Other ways to preserve basil leaves other than freezing

Many people may not want to freeze the basil as they find it difficult to do or simply they don’t prefer the freezing ones. That’s why I am adding some more ways to preserve basil other than freezing.

So, here are 5 preserving ways to preserve the basil leaves without freezing them.

1. Make the powder of dry basil leaves

Though the dry basil leaves are not as tasty as the fresh ones, they can be added to your recipes in many ways. The easiest way to dry the basil is a microwave oven.

All you have to do is to remove the leaves from the stem and wash them properly. Then dry them using tissue or paper. After that, set the oven temperature at the lowest rate. Place the leaves on a cookie sheet and place them on a baking tray.

Leave the basil in the oven for 2 to 4 hours on the upper rack of the oven. And wait for it to become crumbly.

When you remove the tray out of the oven, keep it for a few moments to cool it down. Once they are cool enough to touch, crumble them with hands and store them in a container. Make sure you have preserved the powder in an airtight container.

2. Make basil flavored vinegar

By making basil-flavored vinegar, you can also preserve the basil. It is very easy to make basil-flavored vinegar.

First of all, remove the basil leaves from the stem and wash them properly. Using a salad spinner, you can dry the leaves. Now, take a mason jar and filled the jar up to 1/2 to 2/3 with basil leaves. Now fill the remaining part of the jar with white vinegar and seal the container properly.

Store the jar in a cool and dark spot for almost 2 weeks. After 2 weeks you can take the leaves out of the jar and replace the vinegar in a clean bottle. And with this, your vinegar is ready to put in your favorite recipes.

3. Make basil flavored vodka

Preserving basil with vodka may sound surprising to you but this is true. This way is too simple to carry on with your basil. Vodka has an amazing ability to keep the fresh basil flavor and aroma.

All you have to is, put one cup of fresh basil in a mason jar. Add 2 cups of vodka to it. Close the jar lid and leave it in a cool and dark place. Keep the jar in that place at least for 3 days to infuse.

You can taste it daily to check its potency level. But if you want, the lighter taste of the basil, then add one more cup of vodka to it. Once all the processes end, pull the leaves out and store them in the fridge.

4. Infuse basil using oil

This basil oil you can use for marinating, seasoning, or as the alternative to fresh herbs while cooking. For infusing oil with basil, you have to mix 4 cups of basil leaves with 2 cups of extra virgin olive oil in a food processor. Turn them into a fine paste and after that pour the mixture into a pan.

Heat the mixture for around 45 seconds at medium flame. Next strain the mixture using a mesh strainer. Let the mixture rest for a few hours and you will notice the little particles of basils resting down in the bowl. Finally, move the oil in a container from the upside leaving the particles of basil behind in the bowl.

5. Preservation method for a short period

The water method and towel method are some ways to keep your basil fresh for at least 7 days.

For the water method, you have to collect the stem of the basil, cut the end of the stem and simply put it into the jar or pot of water. Next, wrap the upper part of the leaves with a plastic bag and put it in a cold place or inside the refrigerator. In this way, you can preserve the basil with its fresh green leaves.

And if that is not that convenient, then put the individual leaf in a single or more layer on a paper towel and roll the towel to preserve it like other herbs.

Few last words for you

It is for sure that nothing can beat the taste of fresh herbs. But if the herb is not available, then you can only rely on the preserving one.

You can freeze the basil leaves using the appropriate method out of all these. On the other hand, if you don’t like freezing your herb, you can go for other methods like powdering dry basil or infusing it with liquid. So, select the appropriate method for preserving the basil leaves and use it in your dishes. Happy Gardening!

When to plant the basil outside

If you have outdoor space and you want to grow basil outside then you surely can do it. Basil is a sun-loving plant and so it will love to grow in your outdoor garden. But you know you can’t control the environment outside and your basil may even die during cold days.

So when to plant the basil outside?

At least 50°F or 10°C is needed as it is a considerable warmth to put your basil plant outside. But the preferable warmth is 70°F or 21°C for the best growth of the plant, so it’s better to put it outside then. Besides this, if you are transplanting basil seedlings wait for them to grow at least 3 inches tall.

With the proper condition of your plant and environment, you can plant this popular herb outside when the time is right. So what is the right condition? When the time is perfect for outside planting? These questions are rising into your mind, right?

Well, don’t worry I am here with the answers. In this article, I will give you guidance about outside basil planting. So, let’s dig in deeper.

Plant basil outside

Right conditions to transplant the basil outside

Well, you know all the basic requirements for your basil like adequate sunlight, moist soil, liquid fertilizer, and so on. These things you certainly have to follow strictly but when you are putting the basil outside, the scenario is a little bit different. But how, right?

Okay, so let me tell you when you are growing basil indoors you can move the pot under sunlight or remove the pot from sunlight when it is done. Then you can save it from cool wind or put it in a warm place. But it is nothing like that in the outdoor garden.

In the outdoors, you neither can control the temperature, not the sunlight. That’s why you have to wait for the right time and season for planting your basil outside. So let’s move forward to know the right conditions for planting your basil outside.

Plant basil when the temperature is appropriate

As we have said earlier, basil can’t endure cold weather and always crave warm weather. The temperature should be at least 50°F or 10°C. If the temperature starts to fall beyond this limit, your basil may get damaged and even can cause death if it continues to stay in that temperature.

Though basil can survive at 50°F, it is not perfect for the faster growth of basil. For the faster growth of basil, the temperature should be 70°F or more than that. But make sure the temperature shouldn’t be more than 80°F otherwise your basil will grow slowly. However, you should wait until the temperature of the soil rises to 60°F or 16°C at least for transplanting.

Besides that, basils grow best when the daytime temperature is 70°F and the nighttime temperature is more than 50°F. You should also take care of the fact that the temperature should not fall below 50°F or 10°C at night.

Here I have added a temperature chart so that you can know what will happen to your basil at different temperatures.

Temp (F) 32 50 60 70 95
Temp (C) 0 10 16 21 35
Effects Damage due to frost and will die soon A few damages like a black spot on leaves and will die if it continues to stay in for a long period. Perfect soil temperature for putting basil outside. Perfect for the growth of the basil At this rate, your basil will grow slowly

Plant basil where it can receive the right amount of sun

Many gardeners have certainly said that sunlight is a crucial element for growing basil. I also agree with that but do you know that too much of anything is not a good thing, right? Basil needs 5 to 6 hours of sunlight per day.

However, what will happen if your basil gets too much sunlight continuously? Well, the answer is simple. It will get a sunburn, like us. There will be brown color spots on your basil leaves or the color of the basil leaf. The soil will dry out quickly. As a result, your basil will wilt or started drooping.

So, make sure there is not too much sun exposure for your basil. Besides that, try to put the plant in a sunny spot avoiding the harsh afternoon sun rays. It is not good for the basil plant. Try to give the plant morning hours bright light as much as possible.

Prepare your basil before planting outside

The right time to transplant your basil seedling is then when your young plant is strong enough to cope with the outer world. Basil is sensitive to sunlight and moisture. So, prepare your plant to tolerate the outer world’s mood swings for not to die immediately due to an adverse condition.

So let’s move forward to know what you can do to prepare your basil.

Solidify your basil plant

Most of the basil varieties don’t have any wooden structure. They are soft and need to be solidified if you grow them indoors from basil from seed.

You need to put your basil outside for a few hours regularly when you are growing it from the basil seeds inside. Slowly increase the hours of putting it outside. You need to put it outside under the sunlight for at least 2 to 3 weeks while growing it inside. By doing this your plant will learn to cope up with the midday sunlight.

Besides that, you have to lessen the amount of water. It means you can’t water the plant until the soil is fully dried out below the surface. It is necessary so that your plant can thrive for a few days without water.

Also, leave the plant outside for 2 or 3 days for the whole night before planting. Just make sure there is no frost and the plant is placed against a south-facing wall. This way your plant will be strong enough to face the outside world.

Wait until your basil grow true leaf

If you plant your basil too early when the true leaves are not grown yet, it can harm the future growth of the plant. The plant should be strong enough to handle the aftershock of planting like facing the direct sunlight, rough weather, and so on.

Many gardeners may have told you to plant your basil after 5 to 6 weeks from the day you plant seeds. But it is better if you plant your basil after it grows some true leaves.

The first set of green leaves that grow out of the ground are the seed’s part and provide foods for the plant. The next pairs of leaves are the plant’s true leaves and you have to wait for this set of fresh leaves to come out to plant your basil outside.

Some basil care tips to keep it alive

  • You can grow the annual types of basil that will be mature for reproduction before the frost season so that you can save the basil from frost You should choose some fast-maturing varieties of basil like Cinnamon basil, Kapoor Tulsi, Lime Basil, Mrs. Burns’ lemon Basil, Piccolino, Spicy Bush, Genovese Basil, Sweet Basil, and Sweet Thai Basil. By this, you can plant it during the summer to avoid the spring frost and harvest it faster before the fall frost.
  • Make sure to check the weather forecast before putting your basil outside. You should not put your basil outside until the danger of frosts has been passed completely.
  • If you have already planted the basil outside without checking the last frost date, then don’t worry. Just cover the plant with a cold frame or cloche.
  • Try to cover the basil after 5 or 6 hours of sun exposure. You can use some shade to cover the plant for certain periods. Besides that, cover the plant during the afternoon shade.
  • Also, make sure the plants are receiving enough sunlight and watering for having a healthy plant. You are using well-drained soil to keep the soil moist. Space basil to prevent them from fighting for nutrition and you are providing enough fertilizer for them. Choose the best location for it with proper drainage soil.
  • Keep pruning the basil to get the bushy growth of basil. Also, clip off the flower buds from the plant as soon as you notice them.
  • Finally, it’s better to put your basil outside in the container garden set up despite putting it directly in the ground or garden beds. By doing this you can move the entire plant easily inside and outside as per the requirement. Like during cold nights or hot weather.

Final words for you

Well, we all know that no plant will live forever. But at least we hope to live our plant a little bit longer. We want to get the fresh basil for a little bit longer for our supply of pesto, salads, pizzas, or tomato dishes. So, I hope the information will enough for you to keep your fragrant basil plant alive a little longer. With a little bit of care and attention to our mother nature, you can happily grow basil outside. Happy Gardening!

How to revive overwatered spider plant

The Spider Plant, commonly known as the Airplane Plant, is one of the most common indoor plants. This fast-growing plant only requires indirect sunlight and is frost-free or moist to outgrow any other plant with little to no maintenance.

Although Spider Plants are almost hassle-free to grow, they too sometimes face many issues like brown leaves, root rot, brown spots, spider mites, and so forth. One of the major reasons behind these is overwatering your spider plant. So, how to revive overwatered spider plant?

Aside from its attractive appearance, the plant has excellent air-purifying properties. Apart from their green leaves, these plants are loved for their adorable small white blooms.

They may be placed practically anyplace in the house and enhance the inside of the house due to their ever-pleasant appeal.

How to revive overwatered spider plant
Donna Joshi / YouTube

As the plant is a bit water sensitive, it tends to react heavily due to water stress. Keep in touch with the blog to get an insight into how to recover your plant from overwatering or excess water.

Is it risky to overwater spider plants?

Yes, it is. As the plant. As spider plant is native to areas of desert or barren lands, the plant heavily reacts to excess watering issues.

Too much water will drown the roots of spider plants if they are overwatered. Waterlogged soil contains less oxygen, which tends to choke off the plant’s roots.

Root rot fungi thrive in a wet environment, and if the plant isn’t saved quickly enough, they can destroy it. Root rot is caused by the fungus and bacteria that settle in the substrate. Ultimately it may kill your plant.

For all of these, you must strive to avoid overwatering your plant while keeping a note in mind the problems caused by excess water.

What are the signs of overwatering?

A spider plant that is growing in wet conditions will begin to exhibit signs of illness and dissatisfaction.

Some of the symptoms you’ll observe on the plant are drooping leaves, brown stains and stains on the foliage, and stunted growth.

The following are symptoms of an overwatered spider plant:

Leaves changing colors:

The foliage of the spider plant transforms from a lush green to a pale green hue when it begins to discolor owing to over-irrigation. This begins from the plant’s base and progresses to the top leaves.

The leaves turn from pale green to yellow as the discoloration increases, and brown specks may appear at the tips. The leaves begin to droop and fall off soon after.

Soaked Soil:

If the soil around your spider plant appears to be soaked, it’s because it can’t hold any more water due to soil quality.

spider plant with soaked soil

Because it cannot remove water quickly enough, soil with poor drainage capacity is more likely to induce spider plant overwatering.

Mold and mildew are examples of fungal growth that can appear in wet soil.

Brown leaves:

If your spider plant’s leaves have brown spots on them, you’re probably overwatering them. These unpleasant stains begin as specks and then grow into larger brown patches.

Leaves falling off:

Spider plant leaves begin to fall off as they continue to fade owing to over-irrigation.

Check whether fresh leaves are among those that are falling off the plant to see if it is due to overwatering or natural causes.

Root rot:

The healthy roots of your spider plant get smothered and weak as the soil in which it thrives becomes flooded. Fungi and other diseases that cause root degradation thrive in the presence of weak roots.

Uproot your spider plant to check for root rot and see if any of the roots are squishy/soft to the touch or have a brown hue.

Browning leaves edge:

Overhydration is the most common cause of browning edges on your spider plant’s leaves. This is because spider plants move water away from the center of the leaves and toward the edge.

browning edges on spider plant's leaves

When the moisture-holding capacity of the leaf tissues at the tips and edges is reached, they tear, causing browning at the edges.

Pest incursion:

Most pests grow in overwatered environments. If your spider plants are infested with mealybugs, aphids, or whiteflies, you’re likely overwatering them.

Spider plant pests prefer the lower side of the foliage to infest.

How to save overwatered spider plants?

The first step in recovering an overwatered spider plant is to stop watering it straight away. If the soil is still waterlogged, you can tilt the pot to drain the water.

The following actions you’ll take to save the plant will depend on whether or not root rot had developed by the time you discovered the watering problem.

How to revive an overwatered spider plant with no signs of root rot?

If your spider plant is exhibiting all of the above indicators of overwatering, except for root rot, it could be in the early stages of moisture damage.

Simply halt your watering schedule and dry up the soil by exposing it to direct sunlight to treat the plant. To stop the leaves from wilting, mist them.

Finally, before repotting, disinfect the soil with a fungicide, as the absence of root rot does not rule out the presence of fungi in the soil. Also, remember to get a pot with sufficient drainage holes.

q? encoding=UTF8&ASIN=B000UJVDXY&Format= SL250 &ID=AsinImage&MarketPlace=US&ServiceVersion=20070822&WS=1&tag=gctlove 20&language=en USir?t=gctlove 20&language=en US&l=li3&o=1&a=B000UJVDXY

They could still be multiplying and causing root degeneration in the future.

How to revive an overwatered spider plant with root rot?

If your spider plant’s roots have a slimy texture, a foul stench, and a black/brown color, they’re rotten from overwatering.

Follow the steps given below to solve the problem and rescue the plant:

Wash off the soil

Run a faucet over the soil that is still sticking to the roots after uprooting the spider plant and confirming root rot. You may simply use tap water to do it.

The root sections, which suffered from the severe root red, are also scattered as water removes soil. Washing under high pressure should, however, be avoided because the root system sections still healthy may be physically damaged.

Remove infected roots

As some rotten parts are still lodged in a rotten system after the spider plant has been washed, use a pair of disinfected shears, and any discolored leaves to cut them off.

q? encoding=UTF8&ASIN=B01JZFC9QS&Format= SL160 &ID=AsinImage&MarketPlace=US&ServiceVersion=20070822&WS=1&tag=gctlove 20&language=en USir?t=gctlove 20&language=en US&l=li2&o=1&a=B01JZFC9QS

Only healthy roots should remain when you are done.

Cut the leaves

To account for root loss, prune some of the spider plant’s top growth or cut off some long plant leaves.

This is because the residual roots may not be sufficient to support the plant’s surviving foliage.

Treat the root system

Disinfect with a commercial fungicide solution in the surviving root area.

You may also do the same with a natural fungicide solution containing cinnamon and activated charcoal if you are worried about the environmental implications of chemical products.

Repot the plant and water accordingly

Replace the old substance with a fresh mixture of potting soil with organic ingredients, before repotting the spider plant. Irrigate until the water from the drainage hole troughs comes out after the repotting.

For the plant to begin showing signs of recovery it should take about ten days with the help of fresh soil with an enhanced potting mix.

Final Words for You

After following these steps treat your plant as regular as you do your mature spider plants.

Keep it in a shady spot with indirect light away from direct sunlight or bright light and your plant will recover only in ten days. A healthy mother plant will also ensure a healthy spider plant baby.

Happy gardening!

HOW TO TAKE CARE OF SPIDER PLANT INDOORS

The Spider Plant, commonly known as the Airplane Plant, is one of the most common indoor plants. These fast-growing plants only require indirect sunlight and are frost-free or moist as like any other tropical plant to outgrow any other plant with little to no maintenance. Aside from its attractive appearance, the plant has excellent air-purifying qualities. Apart from their green leaves, these plants are loved for their adorable small white blooms and also called ribbon plant due to their curly white stripes. They may be placed practically any place in the house and enhance the inside of the house due to their ever-pleasant appeal.

Spider plant is one of the easiest plants to grow. Even for beginners, it’s very simple to look after adult plants through some very easy steps. Spider plants hardly need any specific care comparing to other plants. Sometimes face the plant reacts through syndromes like brown leaves, root rot, brown spots, spider mites, brown leaf tips, and so forth. But they can be also treated very easily through in-house care or by modifying indoor conditions.

Taking care of spider plant

Where should I keep my spider plant?

Spider plants can adjust themselves to any place you want. You can simply keep them in your bedroom, drawing room, or even in the bathrooms. You can also place them in the hallways or lawns. But you must ensure that the plant gets indirect sunlight or low light. As Spider plant does not like strong light, keeping the plant in direct sunlight will eventually kill the plant.

In short, a place must be free from moist, indirect light and a place with much air ventilation will help your surrounding be full of oxygen and healthy air. Sometimes you might need to arrange for artificial light for your indoor spider plant to maintain better light conditions.

When should I water my spider plants?

Spider plant is very sensitive towards the water and may even heavily react if you overdo watering them. These plants contain tuberous roots which help them to store water. There is no fixed quantity to which extend you should water your plant. It may vary upon certain facts; like location, soil type, time of the year, and even the growth stage is your plant currently in vary its need for water from the plant nearby.

Watering the plant once a week may become a good game to you but still, it may vary for your case due to weather, humidity, and other aspects. So, do check before watering. You may simply dig the soil up to one inch and if you find the soil dry then water them. Overwatering will make your healthy spider plant droopy and turn the leavers brown. Halt your watering schedule for a while if these symptoms are seen.

Also, you might refrain from watering your plants in the winter depending upon the soil. You can simply water them using tap water. But you might need to filter or purify tap water if they contain chlorine or any kind of chemicals. These chemical substances may also harm all of your plants and lead them to death.

When should I prune my spider plant?

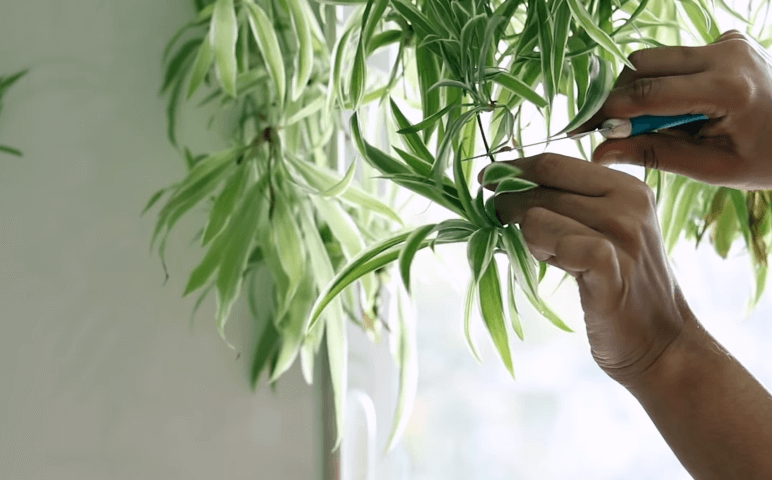
Pruning or trimming spider plants is an essential step in spider plant care to keep the plants healthy and happy. Pruning spider plants helps to cut off excess leaves and spider plant babies, furthermore, keep your spider plants in a nice, beautiful shape.

You may use your regular pair of scissors to simply cut off excessive leaves from your spider plant. You may follow these simple steps and reshape the foliage of your adored plant.

  1. At first cut of the unhealthy-looking brown or yellowish leaves: Take your pair of scissors and cut off the damaged or unhygienic-looking brown or yellow leaves directly from the base of the plant.
  2. Cut off some babies: it’s better to cut them off some spider plant baby to keep it at a minimum number. To do this, you may simply cut off the stem that connects the baby with the mother plant from the adult plant’s base and separate unwanted babies.
  3. Prune foliage to stop overgrowing: Spider plants usually grow around 12 in (30 cm) in diameter and 12 in (30 cm) tall. If your plant is getting too large for its space, cut away healthy, growing leaves near the base of the plant.
  4. Prune of some roots: If the spider plant becomes root bound, trim the roots. If your spider plants are producing a lot of foliage, root pruning should be done every 2 years or so. It will also help you to prevent root rot.
  5. Prune annually in Spring: Even if you do not find any reason to prune your spider plant, you can always do an annual pruning to your plant as of its care. You may also do pruning once in two years if you want to do it less. But don’t go below it as it might hamper your plant’s overall health.

How to plant Spider plant babies

Let’s talk now about spider plant babies propagating. The method of plant propagation is as easy as it sounds. select a spider plant baby with some nodes or tuberous roots below the leaves for propagation. Spider babies with tiny nodes bear a better chance of producing a healthy tree.

Follow these steps below to plant a spider plant baby:

At first, separate the baby plant from the parent plant. Cut off the Spider baby from the mother plant and remove the hard branch completely. After removing the hard branch, it is now time to remove the tiny little leaves near the nodes or roots and make the root free from any extra leaves. Now it’s time to plant the tree into the soil pot.

At first, dug out the soil a bit and make a small hole to place the placed the baby plant in and put the plant gently onto the pot of soil and level the ground gently. Add some soil in the pot if needed. Fill up the pot with soil so that the roots or nodes stay under the soil. After that, gently water the soil with a bit of water and try to keep the plant dry or free from moisture. After watering, let the excess water drain out from the moist soil. After water being drained out, place the plant in a shaded area, especially free from direct sunlight, to keep the plant alive. After two weeks, the plant will have some mature roots and you may treat them as mature plants.

How to choose the perfect pot for the spider plant?

Mature Spider plant hates to waterlog and needs to be free from excess water. For the same, you need to get yourself a pot with a good drainage system. A pot containing a bigger drainage hole will help you a lot to keep your plant out of soggy soil.

What soil should I choose to plant spider plants?

As spider plants are water sensitive, you need to get yourself well-drained soil so they can pass through the extra water and keep your plant out of moisture. This kind of potting soil will also help your plant to maintain its preferable humid condition. You may also use some compost or water-soluble fertilizer with fresh soil in your pots of soil and some perlite on the soil surface to make the soil more well-draining soil.

How should I repot my spider plant?

To keep them alive, it’s sometimes necessary to repot them in a larger pot. Repotting spider plants before they outgrow their containers is a must. Their health would likely deteriorate if they become root-bound.

To repot your spider plant, at first, fill up the pot with a good amount of soil so that the pot is ready to plant. After preparing the pot remove the plant from the current pot and lose some dart from the root. Look for damaged and insect-affected roots and cut them off. After cutting off the roots, gently place the plant into the pot of soil and gently sprinkle some tap water to let the soil set.

After the soil dries you can keep the plant in your desired location or your room and treat it like a mature plant with green variegated leaves.

These were some common tips to take care of your spider plants indoors. You may look up some of our other articles related to spider plants to get more detailed information. Happy Gardening!

How to Keep Worms from Freezing in Compost Bin?

0

Are the worms freezing in your compost bin, but you don’t know what to do? You may also be concerned about maintaining an optimum temperature for those worms. In this article, we will try to provide you with a good Insight so that you can save your worms from further freezing conditions.

First, you need to check both outdoors and indoors to find a suitable spot for the compost bin. This spot must have the optimum temperature suitable for vermicomposting.

In addition, you need to learn what extreme conditions your worms can tolerate. Even after depending on nature or taking care indoors, it may not be enough for the worms. You may need to step up to raise the temperature of your compost bins.

Continue to read the rest of the article to get detailed information about these procedures.

How to Keep Worms from Freezing in Compost Bin

The ideal temperature for your worm composting bin

Before starting to compost the worms, you should know the ideal temperature range. The ideal range is 60 to 80 degrees Fahrenheit.

But also remember, whatever the temperature you are feeling from your surroundings, the worms are most likely to feel the same. They are almost equally sensitive as you in terms of temperature toleration.

But if you can maintain this range, your worms will be the most productive.

What extreme conditions can the composting worms tolerate?

The maximum temperature your composting worms can tolerate is 90 to 95 degrees Fahrenheit. But try your best so that the temperature does not reach this range. Because when it gets just over 80 degrees, the composting worms will start to consume and reproduce less.

Getting over 95 degrees Fahrenheit will result in mass death among the worm population. On average, a three-person household needs 1 pound of worms for their kitchen waste and organic wastes.

Never add too many food scraps to a worm bin, because it will generate more heat and make the place uncomfortable for the worms. So, be careful while adding food scraps or kitchen scraps to avoid overfeeding.

As the input ingredients get over wet, it may generate worm tea, leachate, and castings tea.

The minimum temperature for composting worms is 40 degrees Fahrenheit. If the temperature gets anywhere below 40, the worm cocoons will freeze to death. You can’t possibly do anything in that case to revive them.

But try hard to keep the temperature above 60 degrees. Because just after it drops below 60 degrees Fahrenheit, the worms will do less consumption and reproduction. It will eventually slow down the composting process.

So, make sure the organic material is not too wet and there are enough dry materials for good temperature regulation.

Raise the temperature to prevent worms from freezing

prevent worms from freezing

If you arrange for worm composting outdoors in winter, you need to take extra care as the worms are temperature sensitive. Because, if the outside temperature gets lower than the minimum limit, your worms will start to die gradually.

So, before doing vermicomposting or arranging worm compost bins in winter, you need to take note of the climate and average temperature of your region. Always take help from the local worm farmers because they can guide you based on the local temperature.

Consider following the tips shown below to raise the temperature of composting process and learn how to keep worms from freezing in compost bin.

Put the cover on

During the winter, it may become hard for you to keep the heat trapped inside the container. Don’t keep the container open all day long during the winter months, it will lower the temperature below the minimum range resulting in the freezing death of worms.

So, when you buy or make a container for composting worms, make sure that it has a cover on it. Always keep the lid on so that the inside temperature remains warm.

If the container does not have any cover, use waterproof tarpaulins or hardboards on top of the container as a lid.

Ensure insulation

You need to add insulation to the outer portion of the worm bin. For effective insulation, use blankets, Styrofoam, bubble wrap, dry straw bales, dry leaves, a layer of straw, etc. as insulating materials. Do not block the drainage holes while using these things.

Otherwise, the compost will get too wet leaving the worms vulnerable to freezing water. Make sure to leave enough gaps to allow fresh air to flow through the air holes.

If you are a gadget expert, try building a small temperature regulator inside your compost bin. This will help you to maintain an optimum temperature in all seasons, summer, winter, and spring.

In addition to using insulating materials, you can try moving the composting worm bin to a different location. Make sure that the new location has a warmer temperature that can save the worms from freezing conditions.

Build larger compost beds for winter

fruit scrapsIf your worm compost bed is comparatively smaller in size, it is more vulnerable to freezing conditions. Due to the small surface area and volume, it can preserve less amount of heat that can be lost easily.

As a result, if the winter weather gets rough, it will be tough for your worms to survive.

In this condition, try to build a larger system of vermicomposting for the winter months. A larger vermicompost bed will preserve a good amount of heat required for the survival of your worms. Don’t worry, the preserved heat doesn’t get lost easily in larger containers.

In addition, you can also add fruit scraps to keep the temperature optimum. Due to the larger surface area, the worms will have the capacity to move more efficiently and their spots according to necessity.

Use heater for worms

In addition to using natural methods of heating, you can also try to approach artificial methods. While it is not certain that nature will provide you with enough heat, you can always rely on artificial machines.

One good example to provide heat for your worms artificially is using a worm bin heater.

A worm bin heater is a heating mat that you use as a cover on top of the container. This will slowly generate heat for your worms in any season. Moreover, as you use this as a cover, it will prevent any leak or loss of heat. You can also adjust the heat production based on your surrounding temperature.

As this is not a widely used machine, you may not find this at your local stores. So, don’t forget to browse Amazon or any other online retail services to find a suitable heater for your worms depending on the container.

Composting outdoors and indoors, which is better?

Worms are very sensitive to cold temperatures. If you leave the worms outdoors in a compost pile to let mother nature take care of them, sometimes they may become vulnerable to certain environmental factors.

Usually, a traditional outdoor worm composter uses medium-sized bins or barrels to keep the worms. You can set up such a bin or barrel outside where the heat is optimum. You can add beneficial microbes for both cases.

Remember, selecting a perfect spot outdoors is very crucial for vermicomposting. But don’t only stop once you’ve placed the container, because that spot may not have the same temperature next week.

For example, your garage and outside shed may not have the same temperature. Therefore, in addition to spot selection, you also need to continuously check and relocate the barrels to a spot where the heat is ideal.

Otherwise, leaving the containers in one fixed location will become harmful for the worms as the temperature changes gradually.

vermicomposting

Most people will suggest indoor vermicomposting. Because it will be easier to control the indoor temperature near the containers without having the hassle of relocating.

If you use a heater for the worms, it will also be ideal to keep them indoors. Having indoor vermicomposting will mostly help you in cold months because if you leave your worms outside, they will become vulnerable to freezing conditions.

We suggest you use any indoor rooms that have proper ventilation for vermicomposting. Make sure fruit flies don’t become a problem for compost bins.

Vermicomposting indoors and outdoor both has its benefits. So, which one you prefer will depend on your climate and surrounding temperature. If you live in a country having mostly cold weather, you may permanently switch to indoor vermicomposting.

Otherwise, if you want mother nature to take care of the worms, go for outdoor vermicomposting in a compost pile or bin.

Final Words

How to Keep Worms from Freezing in Compost Bin?

If you are an enthusiast worm composter, these worms are your life. Try not to rely on mother nature all the time, because it probably won’t work in the winter season. Contact a local worm farming expert to know different worm farming secrets.

Take precautions to keep the worms properly heated and act quickly to save them from vulnerable situations.

So, work hard to nurture and you will surely get a good outcome from them.

You May Also Like:

How To Make Compost In Plastic Tub

How long do basil plants live?

You might not want your favorite basil plant to die. You may want it to live forever in your garden, right? But like other plants, your basil’s life cycle will come to an end someday. But you surely would want to know how long your favorite basil can keep your company, right?

So, how long do basil plants live?

Basil might survive for 2 years. With proper care and warm environments, your basil may survive for 2 years in warm weather. Also, they may survive longer if you plant them indoors. However, basil is an annual plant that is usually supposed to survive for one year long that starts from growing through seed till perishing after bolting. 

Basil is not a perennial herb that continues its life from season to season. But it may behave as a tender perennial herb in a warm climate.  Besides that, there are some perennial varieties of basil too.

So, if you want to keep your basil living for a long time, you surely have to save it from cold temperatures and give it warmth as much as possible. Let’s dig deeper to know more about basil’s life cycle and how to keep the basil plant alive for a long time.

How long do basil plants live

The life span of basil

As we all know basil is an annual herb but it can survive like a perennial herb under some conditions. However, it is an assumption that basil can live for 2 years or more but usually, their life span is no longer than one year.

Generally, when the basil started bolting, their life cycle almost comes to an end. That means basil will start to produce seeds and die after that. Besides that, basil can’t survive in cold temperatures.

Basically, basil has 3 different life stages during its whole life. We can identify them as:

  • Juvenile Stage
  • Transition Stage
  • Productive Stage

Juvenile Stage

In this stage, basils tend to grow at least 12 to 13 inches long. This is the time when the basil has most of the leaves of its lifetime. During this span, you can cut some leaves for your using or storing purposes.

But you should be careful about cutting the large leaves only. Leave the small leaves to grow fully.

Transition Stage

This is the second stage of basil’s life span. During this time, the number of leaves started to decrease. Your basil can endure two or three cuttings before ending its life. You should have the cuttings of the stem with a gap of two to three weeks.

Productive Stage

The last stage is productive span which basically means the production of seeds. In this stage, the basil started to bolt. When the basil started to produce flowers, it stops growing leaves. You may notice white or purple flowers on your basil.

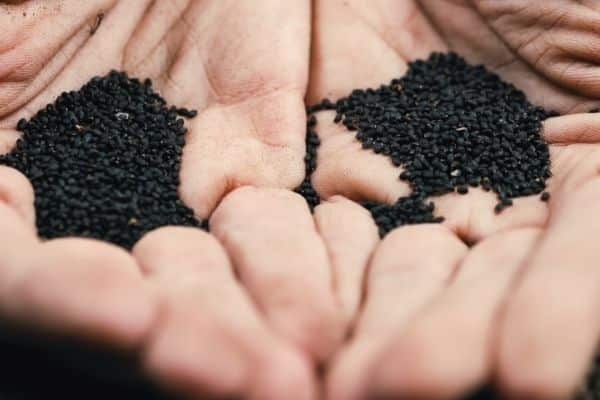
If you don’t want to end this basil’s life then clip off the flower bud from the plant as soon as you notice them. Or else, you can wait for the flowers to turn into seeds. Once the basil seeds dry on the plants, you can brush off the seeds from the plant using your hands.

basil seeds

Which basils are long-lived?

Basils are considered the summer herb. But the perennial types of basil can grow all year round and last longer than the popular annual basil varieties such as sweet basil. There are some perennial basils that you can pick:

Greek columnar basil

This basil usually can grow 30 inches tall and 24 inches wide. The upright growth habit of this basil will make it easy to cultivate for you. It is ideal for a small size garden. The green leaves are full of fragrance and strong flavor.

So, you can add these tasty leaves into your pesto, soup, pasta, or pizzas easily.

Pink perennial basil

This perennial basil can grow to almost 60 inches in height and 40 inches in width. The leaves are a little bit hairy and slightly purple in color. The flowers of this basil cover the basil bush during summer. Provide plenty of water to the plant and you will get some succulent leaves to eat.

This basil is strongly preferred for cooking because of its strong smell. You can add this fresh basil to your Italian meal, soups, stews, or to your mayonnaise.

White perennial basil

This growth of this basil is the same as pink perennial basil. But its leaves are softer and larger than the pink perennial basil. Besides that, it grows white flowers. The fresh basil leaves of this variety are also considered a good one for cooking.

The dos and don’ts to save the basil plant

One day your basil’s life will obviously come to an end. But if you don’t give proper care and attention to your basil, it can die earlier than the usual time. On the other hand, your basil can survive longer than the usual time if you give proper care to it.

That’s why you have to do something and not do something. Well, what are they, right? Don’t worry I am here to share the dos and don’ts for your basil plant. So, let’s jump to the description.

11 dos to follow for your basil plant

basil-plant

1. Many gardeners like to put their basil indoors as their indoor plants. Planting your basil indoors will be a good decision because in this way you can save your basil from winter frost.

2. Use large size containers for planting the potting basils. You can choose a 12-inch container for that. This will give you the scope to use more soil and more soil means longer water retention. Besides this, you can use some mulch for better water retention.

q? encoding=UTF8&ASIN=B07VKS7W92&Format= SL160 &ID=AsinImage&MarketPlace=US&ServiceVersion=20070822&WS=1&tag=gctlove 20&language=en UScontainers for planting

3. Make sure there are enough drainage holes to drain the excess water out from the pots of basil so that you can keep your soil moist not soggy.

4. As basil is a sun-loving plant, make sure it receives almost 5 to 6 hours of sunlight regularly. Besides that, direct sunlight from the morning sun can give warm temperatures to your basil which is an undeniable need for basil. If you don’t get enough sunlight, you can manage it with artificial grow lights.

5. Basil can be tall around 13 to 25 inches based on different variations. So, you should make space of about 12 inches between the plants so that they can get enough space to grow.

6. Basil needs loose and well-drained soil to grow. The soil can be slightly acidic with a pH of 6 to 7.

7. Basil does it best when gets moist soil. It basically needs at least 1 inch of water per week. So, soak the soil and basil’s base with water whenever you feel the dryness of the soil.

8. Prune your basil when it reaches the height of 6 inches. It will help your basil to grow into a bushy plant.

q? encoding=UTF8&ASIN=B07XF81BP3&Format= SL160 &ID=AsinImage&MarketPlace=US&ServiceVersion=20070822&WS=1&tag=gctlove 20&language=en USpruners

Besides that, pinch out the stem with the flower as soon as you notice it. It will help the plant to grow leaves. Or else you can allow the flowers if you want to produce basil seeds.

9. For the healthy growth of the plant try to pick the large leaves from the top. Leave the bottom or young leaves for growth.

10. It’s good to trim your basil once per week as the flavor of the leaves will increase with the increasing number of your harvesting.

11. Companion planting works best for basil. So, plant basil with tomatoes, lettuce, or peppers to increase the taste of both harvests.

9 Don’ts to follow for your basil plant

1. Don’t add too much soil amendment otherwise, the taste of your basil will be ruined.

2. Don’t put in too much fertilizer. It is better to use liquid fertilizer when the basil starts to grow more and more leaves.

q? encoding=UTF8&ASIN=B095H5ZXYK&Format= SL160 &ID=AsinImage&MarketPlace=US&ServiceVersion=20070822&WS=1&tag=gctlove 20&language=en USliquid fertilizer

3. Try to avoid the afternoon shades by not putting your basil on an east-facing windowsill.

4. Don’t over-water your plant as it can affect the flavor intensity and color of your basil. Besides that, wet soil can attract fungal diseases.

5. Under-watering is another cause of the death of the basil. Like over-watering, under-watering can be a threat to your basil. Basil thrives in water, so without water, the leaves will start wilting or your basil may droop.

6. Cold weather is not for basil. Basil can’t survive at a temperature lower than 10 degrees Celsius. That’s why don’t put your basil in a cold place. It’s better to keep the basil indoors during winter. Low temperatures can turn the leaves brown.

7. Don’t put your basil in a shady place. Your basil will die if it gets less than 4 hours of light. So, it’s better to put the basil on a sunny windowsill or under grow lights.

8. Don’t overcrowd your basil. Basil likes to grow with space. That’s why put the basils keeping at least 12 inches gap between them. In this way, your plants won’t have to fight for nutrition.

9. Last but not least, basils tend to bloom in adverse conditions. So try to give your basil enough sunlight, water, and fertilizer.

Few last words for you

This popular herb can live a little bit longer with a little bit of care and love. Besides that, there are some perennial basils that can provide you with a bountiful harvest of fresh herbs throughout the year.

So, feed you basil sunlight, water, and fertilizers. Also, follow the dos and don’ts. That will be enough to get a healthy basil plant that will live for a longer period.

Happy gardening!

Does basil need a lot of water?

Basil is one of the easiest annual herbs to grow indoors or outdoors. Basil is a vascular plant that has no woody stem. That’s why it is dependent on soil for moisture and transpiration systems to survive. So, it is clear that you need to keep the soil moist.

But does basil need a lot of water?

Basil doesn’t need a lot of water. It needs almost 1 inch of water that is equal to 0.623 gallons or 2.36 liters every week. You just have to take care of the fact that the soil should not get dried out. If the soil dried out, your basil leaves will start to wilt.

The amount of water to put in the basil plant may vary with the change of the type of the basil or temperature. Besides this, the amount of soil you need to soak, or the weather demand may make a variation in the amount of water.

That’s why I am here to make proper guidance about watering your basil plant. Let’s dig in deeper.

watering basil plant

How much water you will need for your basil plant?

This annual herb might not need a lot of water but it surely needs consistent moisture. Basil is a thirsty plant. You need to keep the soil moist otherwise your basil may have drooping leaves. You can use drip irrigation for watering basil in a large space or a sprinkler for watering basil in a container. But how much water you should put in and how often you should water your plant, right?

Well, as we said earlier, your basil will need 1 inch of water per week. Besides that, you need to ensure the moisture of the soil is appropriate. But how will you maintain the timing for not do over-watering or under-watering, right?

For this, an assumption chart is presented here. This chart will guide you with the approximate watering time for your basil. Let’s go to check the chart.

Conditions Approximate time for watering
Basil in container Water once with a gap of 3 or 4 days to soak the soil properly
Basil in garden Water deeply once a week. Mist the soil after every 3 or 4 days.
Indoors basil Water once with a gap of 4 or 5 days. Check the soil moisture first to prevent the soil from being soggy.
Hot weather Water once with a gap of 1 or 2 days (container). Water once with a gap of 2 or 3 days (garden).
Cold, Overcast weather During rainfall, water once per week (based on moisture requirement).
Seedlings Water them once with a gap of 2 days. But if you feel the soil is drying out, you can water them every day.

Water for potting basil

When the temperature is high, you have to water the basil with an interval of 3 days. Due to warm temperatures under direct sunlight, the basil gets a good growth of leaves, flavor, and aroma. That’s why it needs a lot of water during this period of time. During rainfall, watering it once per week will be enough.
To prevent the soil from drying out, you need to check the soil moisture. Water the plant when the soil feels dry.
Try to put the plant in a larger container. Larger pots mean more soil that will give better water retention. This way, the soil won’t dry out quickly too. Besides this, using clay, terracotta, or ceramic pot can stop the soil from drying out too quickly.

Water for garden basil

If your garden soil is amended with compost or mulch and has good water retention then you can water the soil two days per week during hot days and once per week on cold days. Always water the base of the basil to maintain the healthy growth of the roots.
You can use 1 inch of compost for better water retention. If your soil is heavy clay soil then use compost for improving the drainage quality of the soil. Poor drainage can be the cause of rotting. Besides this, the more compost you use during preparing the soil, the more survival ability your basil will have.

Water for indoors basil

If you are planting basil indoors then you need to water it after every 4 or 5 days. There are some places in the house like the kitchen where there is more humidity. If you place the plant in the kitchen, you can water less frequently because high humidity will cause the water to evaporate less.

On the other hand, in the air conditioning room, the water may evaporate quickly and the soil will dry out soon. So, water the plant after every 3 or 4 days if you place them in an air conditioning room. Similarly, if you use smaller pots, the soil will dry out quickly. Along with that if you provide the plant a spot with afternoon shade, the soil will get fewer hours of Sun directly. As a result, it will be moist for some more time.

Water for basil seedlings

During developing roots, it is important to provide the seedlings proper moisture. Water the basil seedlings after every 2 days. But make sure the soil has better water retention quality. Soggy soil can lead to fungal diseases and root rot.
Basil seedling is more sensitive to drought than the entire plant. Without having an established healthy root, the seedling needs your extra attention with moisture balance.

What can happen due to under-watering?

Basil is a popular herb because of its easy maintenance. It can easily compromise with sunlight or fertilizer but it can’t survive without water. Without water, the basil leaves will start to wilt or drooping.

The leaves will look pale and turn out yellow. When the need for water increases, the leaves became dry. That’s why you must have to maintain proper watering. If needed, water them regularly to save them from wilting or dying off.

What can happen due to over-watering?

Many of you may think now that you can add water as much as you want. But why? Just because it can’t survive without water. But that’s not right. You need more or less than 1 inch of water per week but not too excessive.

Even over-watering can cause the leaves to turn yellow just like under-watering. The stems and roots of the plant may get rot. The plant may also stop growing and become tiny in size. You may also notice some blisters or corky bumps on the leaves. Besides this, an over-watering plant is friendly to fungal diseases.

9 Extra tips regarding watering

Besides all these, you can follow some extra tips for balancing the proper amount of water for your basil.

  1. You can add mulch to the soil or potting mix for retaining the soil moisture.
  2. Morning is the best time to water your basil plant.
  3. Every time you water the plant, just make sure you are not putting in too much water. Basil loves the moist soil but not the soggy soil.
  4. Make sure your container has enough drainage holes to drain water properly. Too much water can cause roots to rot as well as hamper the growth of roots.
  5. Avoid using trays under containers. It will hold the excess water and can make the water soggy.
  6. Just put your finger under the soil surface and check the moisture of the soil. If you feel the soil is dry under the surface, then adjust the water quantity with more water to maintain moisture.
  7. During the cold days, the soil surface might feel wet but under the surface, the soil might be dry. So, check the moisture of the soil properly. Then decide whether to water it or not.
  8. Basil in containers needs frequent watering. So don’t get the wrong ideas about the separate watering frequency for basil in your containers and garden.
  9. Some types of basil plants need less water such as African blue basil. So, if you have issues with frequent watering, then you can choose the drought-resistant varieties.

How to grow basil in water

Many people don’t like to work with soil but love to keep some nature around them. This bushy plant can be an ideal one to deal with then. This herb can be grown in water too. As a result, you won’t have to deal with soil.

So, now let’s get to know some more about how to grow basil in water. Here I have share 5 easy steps to grow basil in water.

Step 01: Choose the right basil cuttings

You can only use cuttings if you want to grow the plant in water. But you need to choose the right cutting to grow a successful plant out of it.
First, select a healthy and young branch from the mother plant. If you don’t collect the cutting directly from a garden center then you must be careful while cutting it from the mother plant. Remember to cut the branch with a length ranging between 4 to 6 inches. Make an angled cut just from below a leaf node. Try to make the cut from the bottom of the stem.

Step 02: Get the cuttings ready for planting

The cutting from the branch is your stem that you will plant in water. But before planting, you need to prepare it for planting.
Remove all the leaves from the bottom of the stem. Keep the leaves from the top one-third of the stem. It is better to leave 2 to 3 sets of leaves at the top. Remove all the flowers, buds, or large leaves too if there are any. Be gentle while removing as your stem is still a delicate branch and can get damaged easily.

Step 03: Plant the stem in water

Select a transparent glass jar with enough space. As your stem will grow and develop the roots inside the jar, the jar needs to quite spacious. Use non-chlorinated water for filling the jar. Fill the water until it covers 2/3 of the stem from the bottom. There should be no leaves left near the water surface or under the water.

Step 04: Taking care of the plant while growing

  • Basil is a sun-loving herb. That’s why it’s better to keep your basil pot in a sunny spot where it can receive at least 5 to 6 hours of light daily. A windowsill is a perfect place for keeping your jar where it can receive the morning hours of Sun. But it is good to avoid the harsh afternoon sunlight.
  • The little thing that needs your attention is to change the water of the jar after every 2 days. This will keep your plant free from bacterial and fungal attacks.  Besides this, make sure that the water temperature is moderate, neither too hot nor too cold. But if you are growing more than one plant in a large jar then you can change the water after 30 days.
  • Also, it will be better if you mix each 1 liter of water with 1 gram of N-P-K 20-20-20 that is a balanced fertilizer. It is better to fertilize it once per month.

Step 05: Time to harvest some basil

You can collect harvest once your plant starts to develop roots. It may take about one or two weeks to develop the roots. Young roots will appear at this time. This means you can collect your first harvest after one or two weeks of planting.
But it is recommended to wait at least for 4 weeks as during earlier days the roots are fragile. Within 4 weeks the plant will get stronger. So it is better to have some patience for collecting harvest.

Few last words for you

If you want to enjoy having some fresh basil throughout the year then you can easily grow some. Ensuring the right amount of water, adequate hours of sunlight, and light liquid fertilizer are all you need to grow basil.  But as we have already said that basil can consider sunlight and fertilizer but no consideration with water. So you need to put extra attention to water your basil plant.

Besides this, it is more convenient to grow basil in water as your hands won’t get dirty by those muds. Though you can’t grow basil from seed in water, it is still easier to grow with cuttings. So, I hope this article was helpful with your basil gardening. Happy gardening!

Can I grow basil indoors?

If you are looking for some easy plants to grow, then you can choose basil. You can easily have some fresh herbs like basil direct from their own plant. But now you may say that you don’t have outdoor space to grow fresh basil. So, how’s that possible to have a basil plant without having outdoor space?

Can you grow basil indoors?

Yes, you can grow basil indoors. If you can provide plenty of sunshine, a good growing medium, and adequate moisture, your basil will grow well indoors. On the other hand, you can plant basil under an artificial lighting system also. With a regular compact fluorescent bulb, you can get enough harvestable leaves to keep your kitchen stocked.

If you are new to indoor gardening, you can easily choose to grow basil. Besides this, this fragrant herb will give a fresh feel to your food and kitchen. Right after my sharing some valuable information on growing basil indoors, you will find it easier. So let’s dig in deeper.

Basil plant indoor

The perfect environment for growing basil

Though basil is an easy-growing plant, it needs some extra attention too. You just need to make sure that your basil is getting the right environment for growth. Here I have attached a chart of the requirements and next will explain them briefly. So let’s move forward.

Light 4 hours of sunlight minimum or 12 hours of artificial light
Water Mist regularly
Temperature Around 72-85 Degree F
Soil Loose and well-drained
Fertilizer Weak liquid fertilizer every 4 to 6 weeks

Adequate light for your sun-loving basil

Basil is a sun-loving plant. It needs sunlight for about 6 hours but 4 hours will do too. While choosing a spot, try to pick the south or west-facing sunny windowsill or room for getting the best sun exposure.

South-facing windows will give maximum sunlight with light streaming through them all day long. Besides this, the west-facing location will receive direct sunlight for a long period but miss the hottest, most intense sunlight of the day.

However, if you don’t get have a sunny spot, you can use grow light for providing light to your plant. Buy a simple fluorescent light or high-intensity discharge growing light to supplement the natural sunlight.  Put your plant under the artificial source for providing at least 12 hours of light per day. Also, make sure the light is 2 to 4 inches up from the plant and the light mustn’t touch the leaves as the leaves can get burnt.

Keep the soil moist

Basil likes to stay moist. You can mist the plants on a regular basis to maintain the moisture of the soil. You can also water the plant if you notice wilting.

Basil needs almost about 1 inch of water every week. You should water deeply at least once per week. This will keep the soil moist as well as the roots will grow deeper. As you are growing basil indoors, it is more important to water them frequently to prevent the soil from drying out. So, water the plant whenever you notice dry soil. Morning is the best time to water your basil.

High temperature is appropriate for basil

Basil is very sensitive to cold temperatures. The temperature must need to be kept between 72-85°F for better and healthy growth. During winter months keep them away from the drafty window, frequently opened doors or any open space that lets in cold air. Research shows that the basil gets a 106% increase in fresh weight along with a marked increase in the flavor when it is grown at 28°C instead of growing at 18°C.

Perfect soil type for your basil plant

Well, no matter what growing media you can choose, either garden soil or potting mix, it has to be loose and well-drained. But as you are growing basil indoors in the container it is better to choose potting mix rather than soil. If you use garden soil, you may need to use soil amendments for improving the soil quality.

You can choose commercial potting mixes as well as coconut coir as growing media. As you know potting soil is a mixture of peat moss or coconut coir, pine bark, perlite, and vermiculite. On the other hand, coconut coir is a sustainable product made from brown and white fibers that are known as the outer coating of a coconut seed. Both potting mixes and coir have loose and light textures and perfect water drainage capacity.

Fertilizer for providing nutrition

It is important to provide nutrition to your plants to have a healthy plant, right? Basil may not need a lot of fertilizers but you can use liquid fertilizer for your basil.

You can use a liquid fertilizer at a certain portion that is mentioned on the seed packages. As basil is a fast-growing herb, it will use the nutrients of the soil too quickly. So you need to refill the nutrients of the soil again by providing fertilizer. You can use any weak fertilizer on your plants with a regular interval of 4 to 6 weeks with consistency.

Some planting tips for your basil planting

I know basil is easy to grow but it doesn’t mean that you can just put your basil plant in the soil and it will grow. There are various ways to grow basil plants such as you can grow it from seeds, seedlings, or even stem cuttings. So here I am telling you about those planting methods and some extra tips for growing plants from different planting methods.

Suggestions for growing basil from seed

  • So for growing basil indoors, the first thing you need is a container full of growing media that you select for your plant. You can also add some seed starter mix into it.
  • Next, sprinkle some seeds on the top of the soil and cover it with a thin layer of about 1/4 inch soil or mixer.
  • After that, you need to make sure the growing media is moist enough but not too soggy as too much water can block the oxygen in the soil.
  • Then place the container in a warm place where the plant can receive enough sunlight and proper temperature for its germination. Make sure the temperature is at least 70 degrees for optimal growth.
  • Within 7 to 10 days the seedlings will start to appear and you can thin the plants when they are at least 2 or 3 inches tall.
  • As for basil seedlings you can directly purchase them from a nearby garden center and plant them in the container. You can put a single seedling in an 8-inch container or else you can plant 3 seedlings at once in a 12-inch container marinating some distance.

Suggestions for growing basil cutting (the stem cutting)

  • For growing basil from cuttings, you need to take a 4-inch long stem that is just cut from under a node and remove all the leaves from the bottom of the stem. Make sure there are no leaves left for about 2 inches at the downside of the stem.
  • Now put the cutting stem into the water in a jar or glass. Wait until there are roots coming out from the stem and the roots should be at least 2 or 3 inches long.
  • Next, you just have to fill up the container with your selected potting mix or soil and cautiously plant the cutting stem removing the substrate.
  • Like seedlings, you can plant one stem per 8 inches container and 3 stems per 12 inches container.

How to care for a basil plant indoor

Though basil is an easy plant to grow, it still needs your attention. I mean to say you have to take care of your basil plant after planting it. So let me tell you what you can do for taking care of your basil plant.

Water your basil plant regularly

As we said earlier, you need to keep your basil moist and mist it regularly. But be careful about not watering your plant too much. Try not to water the leaves and put water directly on the soil.

Don’t put too much fertilizer

Basil is already a fast-growing herb, so you don’t need to put too much fertilizer in your plant. Too much fertilizer can ruin the taste of your basil leaves. You just need to add fertilizer for refilling the nutrients that might be washed by your frequent watering or might be used by plants for growth.

Pinch back the leaves and flowers

If you pinch the leaves from the top of your basil at the time of having 2 sets of true leaves, you can force your plant to grow. By pinching back the leaves, you can have a thick and bushy plant. In the same way, you can pinch back or clipping off the flowers from the plant as allowing flowers on your basil plant can harm the plant. Allowing the flowers means your plant will die soon and your leaves will turn bitter.

Combine your basil with other companion plants

When you combine basil with other plants for companion planting, both of the harvests become tastier! According to some gardeners, if you combine basil with tomato plants, pepper plants, oregano, or lettuce, both the basil will grow tasty leaves and other plants will have a good harvest too. You may think that it is an old gardener’s tale but try once you will know it.

Try to avoid bolting during summer

During hot summer days, basils tend to bolt. With proper heat, the basil started to bloom which also indicates that it is going to produce seeds. Once the basil started bolting means it is in the last stage of its life cycle. So, for stopping the basil from bolting, keep the soil moist and use shade during high-temperature days. You can also pinch back the blooming stem from under the flowers to prevent the plants from generating seeds.

Few last words for you

I hope this information will help you a lot with your basil plant. Now that you can plant this popular herb indoors, so what are you waiting for? There are wide varieties of basil, so choose your one out of the option. Bring the seeds, seedlings, and cutting stems, prepare the growing media, fulfill the required conditions for basil planting and start growing basil. Take care of your basil plant. So, now it’s time to say goodbye. Happy gardening!

How to prune a spider plant

Spider plants, also known as airplane plants, are very easy-growing plants. These plants are famous for in-house gardening for their sharp green leaves and the green vivid environment they create.

These popular indoor plants are also famous for better living as they bear tremendous air purifying capacity. These tropical plants outgrow any other plant without almost any care just by keeping it free from moist and direct sunlight.

Pruning or trimming spider plants is sometimes necessary to keep the plants healthy and happy to grow spider plants.

How to prune a spider plant
Garden Up / YouTube

Pruning spider plants helps to cut off excess leaves and spider plant babies, furthermore, keep your spider plants in a nice, beautiful shape.

Why pruning?

Pruning is a necessary step for growing wholesome spider plants. Pruning helps to keep the leaf count at an optimum rate and keep the plant in a good shape.

Pruning also helps keep the number of spiderettes or baby spider plants at a minimum or almost zero to keep the plants healthy and nutritious.

As the baby plants take a large portion of food and nutrition from the mother plant, adult plants suffer from malnutrition or suffer from various other problems like brown leaves, blunt leaf tips, etc.

So to take a stand against these uses and make sure not to face them, you must prune your spider plants once in a while.

What tools to use while pruning

You may use your regular pair of scissors to prune your spider plant. You may also buy a pair of garden scissors or pruning shears as you will be pruning the spider plants very often.

You can look into your nearest gardening store for them.

You can also use some disinfectant measures before pruning your plants. You can use available sanitization methods like hand sanitizing or boiling in water on the stove or any other simple method easily available near you.

Disinfectants will help you to reduce the scope for possible bacterial and fungal contaminations and keep your plant safe and strong. To disinfect you may also use:

  • 10% bleach solution. Bleach will destroy your blades’ sharpness and eventually harm your blade if used frequently.
  • You may opt for a household cleaner if you are a nature lover.
  • Rubbing alcohol or white vinegar is also a good option.

How to prune spider plants

As you have come this far, you may have basic insight into spider plant pruning or trimming.

Now, let’s get into action and cut off some unnecessary leaves from our beloved spider plant.

At first cut of the unhealthy-looking brown or yellowish leaves:

Take your pair of scissors and cut off the damaged or unhygienic-looking brown or yellow leaves directly from the base of the plant.

Cutting off the brown part of the leaves will keep an open wound to the plants with a scope of bacterial infections including spider mites.

Cutting off unhygienic leaves will also help you to provide enough space for healthy leaves.

Cut off some babies:

Spider plant babies sprung off a lot of babies at a time. As the babies drink up a large portion of nutrition from the mother plant, it’s better to cut them off to keep it at a minimum number.

It would help you keep your spider plants healthy and cheerful besides providing you with good-looking spider plants.

To do this, you may simply cut off the stem that connects the baby with the mother plant from the adult plant’s base and separate unwanted babies.

Prune foliage to stop overgrowing:

Spider plants usually grow around 12 in (30 cm) in diameter and 12 in (30 cm) tall. If your plant is getting too large for its space, cut away healthy, growing leaves near the base of the plant until you’ve removed some of the excess growth.

Punning away some green leaves will make space for the rest and give your one a natural green and vivid look.

Prune of some roots:

If the spider plant becomes root bound, trim the roots. If your spider plant’s leaves continue to yellow, take it out of its pot to inspect the roots.

Rootbound means that the plant’s roots have taken up all of the available space inside the pot, preventing it from growing further unless you cut it.

If your spider plants are producing a lot of foliage, root pruning should be done every 2 years or so. It will also help you to prevent root rot.

Trim away the outside sides and bottom of the roots with your shears. Remove around 1 inch (2.5 cm) of roots to give your plant more room and dirt when you place it back in the pot.

Remember to replenish the dirt and use fresh soil in the pot so that your plant receives adequate nutrition. While the plant is healing from the pruning, keep the soil moist by using tap water and protect it from direct sunshine.

Once your offsets are well-rooted, treat them as if they were a potted plant.

Prune annually in Spring

Even if you do not find any reason to prune your spider plant, you can always do an annual pruning to your plant as of its care. As trees grow rapidly in springs, you may opt to cut them at the beginning of spring.

You may also do pruning once in two years if you want to do it less. But don’t go below it as it might hamper your plant’s overall health.

Final Word:

Pruning your plants is a great way to restore the vitality and strength of your spider plant. Pruning will help you to groom your beautiful plants besides aiding you to care for them.

Pruning will help you to prevent issues like brown leaves, root rot, yellow leaves, nutrition deficiency, too many spider plant babies, spider mites,  and so forth. Pruning will also help you to get healthy and nutrient baby plants besides mother plants.

Don’t forget to prune your spider plants on a regular basis for a healthy, happy spider plant extending the scenic beauty of your sweet home.

Happy gardening!

Why are spider plant leaves turning brown in the middle?

Spider plants are very easy-growing plants. These plants are famous for in-house gardening for their sharp green leaves and the green vivid environment they create. Also known as airplane plants are also good for better living as they bear tremendous air purifying capacity.

These tropical plants outgrow any other plant without almost any care just by keeping it free from moist and direct sunlight. One of the most common spider plant problems is brown leaves.

Although these spider plants are very easy to grow, they may often react due to any kind of irregularity. Owing to watering issues and light issues, Spider plant leaves can turn brown in the middle. Brown leaves may even mean that you need to repot or cut off some leaves from your plant.

spider plant leaves turning brown in the middle

Should you remove the Brown Leaves

Yes, as the brown leaves are not going to turn green again, you should remove them. It will allow your plant to provide sufficient nutrition to the other leaves and let the plant come around in no time.

To remove the brown leaves, you may use your regular scissors and remove the leaves from the base of the plant. Remember to rub the blades with alcohol between each snip and avoid brown spots or bacterial leaf spots.

It will help you to protect the leaves from spreading the bacteria and other microorganisms turning the leaves brown. You should also maintain a rule to cut off the brown leaves in multiple stages.

If you remove more than 20% of the plant at once, the plant might get into a shock and might never recover.

If you are done are on track up to now, then go and remove the brown leaves or all of the bacterial leaf spots before they affect the rest of your airplane plant.

How watering can turn your leaves brown

Sometimes, spider plants’ leaves turn brown due to the water quality you are feeding the plant. Often our tap water contains salts, chlorine, minerals, fluoride, and other chemicals or minerals which may not harm you but surely will cause harm to your little in-house plants.

Plants may often feel these chemicals as a threat and turn the leaves brown or these chemicals may actually cause harm to your plants and take their liveliness.

To cope with such issues, you may think of filtering your tap’s chlorinated water before might be your best option at hand. Filtering tap water will also ensure safe drinking for you and your dear ones besides your indoor plant. You may also pour distilled water into the soil if don’t want to use filtered water.

watering in spider plant

Often people face brown leaves issues because they fail to give their plant the amount of water it needs. For that, often plants face overwatering and underwatering issues. You might test your soil to know if it’s time to water your plant.

Simply put your finger into the ground and check if your finger damps or not. If damps, wait and test again in 2/3 days. If the soil is dry pour some water before it faces de-hydration and keeps your spider plant free from water stress. Be careful of root rot caused by overhead watering.

Can Humidity Cause Brown Leaves

The humid condition can also become the reason for your potted plants to turn brown. Levels of humidity may interface with the plant’s food generation process and make it go brown.

For this issue, at first, be sure that there is a lack of humidity in your area. You may check the local weather report and match them with previous humidity levels.

If the humidity is really low, then you might just spray some or sprinkle some water near the plant. Avoid direct watering of the plant. Rather, spray water into the air. You may also use a pebble tray or a saucer of water.

Pebble tray will ensure supply of water to air and resulting in an increase in humidity. You may also get yourself a humidifier to make the job more convenient and fruitful.

q? encoding=UTF8&ASIN=B01MYGNGKK&Format= SL160 &ID=AsinImage&MarketPlace=US&ServiceVersion=20070822&WS=1&tag=gctlove 20&language=en UShumidifier

Can Dry Soil be the Reason Behind Brown Leaves?

Just like overwatering, underwatering may also make your plants lose liveliness and turn dark. Lack of water caused by drainage holes draining all the water and making the soil dry may also create a lack of hydration and make your spider plants go brown.

In this scenario, you should try to bring back the moisture level to the potting soil.

If your potting soil becomes excessively dry and fails to keep water for your plant, you may go for soak water from your spider plant.

For this, you may simply use a bigger pot or bowl than your plant’s pot and fill it up with 3/4th of water. After that gently put your plant with the pot into the water. Wait for the soil to soak up and be moistured.

After that drain the water and let the plant dry out. After the soil drains out excess water, you may put up the plant in your regular indoor spider plant spot. You may not need to do this more than once in a while.

Should You use Fertilizer to Cope up with Brown Leaves?

Many times, brown leaves may be caused by a lack of proper nutrition for your spider plant. Remember, a healthy mother plant or parent plant will ensure you healthy spider plant babies.

So, do add some water-soluble fertilizer or compost to keep your plants lively and beautiful. You can also change the soil to get them fresh soil and add some water-soluble fertilizer or any kind of ready-to-use fertilizers to recover from this problem.

q? encoding=UTF8&ASIN=B09WZMRXRB&Format= SL160 &ID=AsinImage&MarketPlace=US&ServiceVersion=20070822&WS=1&tag=gctlove 20&language=en USfertilzer

Excess fertilizer may also create problems in the future.

Can Improper Light cause Brown Leaves

Spider plant loves to be stayed under indirect light to be specific. Improper lighting is another common issue for spider plants to get frown Although these plants are native to the South African region, they can hardly stay in bright light.

For that are best to keep away from sunlight and in a shady area consisting of indirect sunlight. Shady spots and moderate light are best for a parent plant to grow and give healthy baby plants.

These are the basic reasons behind Spider plants’ getting brown or losing vivid green color or liveliness.

If you need any more tips and tricks relating to spider plants, got visit our other articles on spider plant and their care. Hope you have a blooming garden with lots of healthy plants.

Some Words for You

Hope you understand why are spider plant leaves turning brown in the middle, and what to do?