Home Blog Page 6

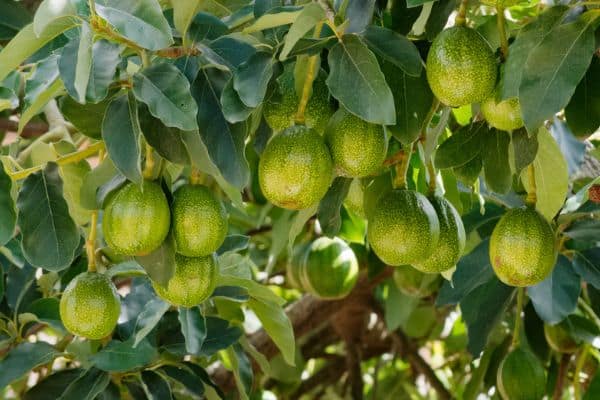
When to Fertilize Avocado Tree?

Have you already started growing avocado trees but don’t know when to fertilize them? A few years back, when I started growing my avocado trees, I also had the same question and many other fertilizers issues.

In this article, I’ll try to explain when you should fertilize your avocado trees based on my practical knowledge and experiences.

You need to fertilize your avocado trees three times during the first year. You should do the first feeding in spring, the second one in summer, and the last one in fall. You can stop fertilizing in late autumn once the trees become dormant.

You should also know how frequently you should fertilize your trees. Along with the timing, you should also select and apply the correct fertilizer in the right proportion. There are quite a lot of factors you must consider to get the timing of fertilizing right.

So, continue to read the rest of the article to know about all these factors that will help you to fertilize avocado trees timely, thus ensuring their good health.

When to Fertilize Avocado Tree

Which minerals are essential for avocado trees?

If you just apply fertilizer without maintaining a balanced ratio, it may not benefit your trees at all. As the number of leaf minerals, size of the fruit and its seed, growth of flowers, etc. are different, you need to apply fertilizer in the correct proportion.

Among all the minerals Nitrogen, Potassium, Boron, and Zinc are the most important ones. They are significant for the growth and development, fruit-bearing capacity, and taste and size of the fruit.

q? encoding=UTF8&ASIN=B09QPCP3NC&Format= SL160 &ID=AsinImage&MarketPlace=US&ServiceVersion=20070822&WS=1&tag=gctlove 20&language=en USir?t=gctlove 20&language=en US&l=li2&o=1&a=B09QPCP3NC

Moreover, Phosphorus, Calcium, Magnesium, Sulphur, Iron, and Manganese play a vital role in the body. These minerals are required to maintain a healthy metabolism, strong root structure, effective photosynthesis, and disease recovery.

So, monitor closely what minerals your trees receive in what proportion. Because at the end of the day, the number of fruits you get from each tree will be affected by their overall mineral consumption.

What should I do before fertilizing avocado trees?

The soil composition of your garden will determine the amount of fertilizer to be applied. You need to apply fertilizer to the soil to recover the inadequacy of essential nutrients in the soil.

Avocado trees need nitrogen, zinc, compost, fish emulsion, etc. to boost growth. These components are very suitable to make your soil nutritious.

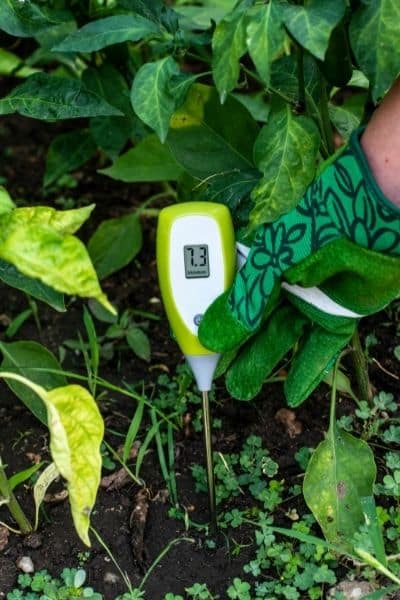
First, use a soil test kit to check the pH of your soil. The value of pH should be 7 or lower. If you find the soil alkaline, you can amend it using organic matter. Sphagnum moss and peat moss are suitable organic matter for your application.

If you add about 1 kg of peat moss to 1 square yard, the pH of your soil will significantly become low by 1 unit.

fertilizing avocado trees

Select a sunny location for the avocado tree. Then dig a hole that is a little wider and has the same depth as the root ball. Then gently put the tree into the hole. You need to loosen the soil and trim the roots if the tree is root-bound.

Sometimes, loosening the soil may create small air pockets inside the soil surface that help in air circulation. Fill the hole with soil. Don’t press the soil too hard against the roots, or you may end up damaging the root structure.

Apply mulches around the tree. You can use a mixture of redwood bark, wood chips, shredded tree bark, and cocoa bean husks. Apply this mixture at the rate of 0.25 cubic meters per tree. Don’t apply mulches too close to the tree trunk. Maintain a minimum of 6 to 8 inches away from the trunk.

You need to water the trees, only application of fertilizer is not enough. If you manage to water your plants before applying fertilizer, it will help the fertilizer to get mixed well with the soil and the plant can absorb it faster along with minerals.

Watering regularly depends on the weather condition of your location. But don’t water your plants excessively, because if the soil near the root structure becomes too soggy, it will result in root rot.

Sometimes, if the soil has enough moisture you can skip watering up to some period. Then let the soil dry out itself before you can water it again. Remember, the new trees can hold up to two gallons of water upon planting. Water the plants two or three times per week to keep them healthy.

How frequently should I fertilize avocado trees?

No matter how much fertilizer you apply each time, always remember that smaller applications are more effective for the trees to consume. Although a continuous injection of fertilizer seems ideal, you shouldn’t do it too much. Always prepare a fixed schedule for injection.

You should apply nitrogen fertilizer during the summer and spring months. You can also apply in the fall or winter, but do not use the same amount as the summer months. Keep in mind that among all the fertilizers, nitrogen deficiencies will affect your trees badly.

If you want to keep your plants healthy, you must keep track of your nitrogen application regularly.

q? encoding=UTF8&ASIN=B095BP65VY&Format= SL160 &ID=AsinImage&MarketPlace=US&ServiceVersion=20070822&WS=1&tag=gctlove 20&language=en USnitrogen

In the case of potassium fertilizer, you can apply it almost anytime. This fertilizer will not easily wash away or evaporate. They are generally stored near the root system for absorption. Do not apply iron and zinc if the trees do not have an actively growing root system.

Moreover, the application of these microelements should be limited to the summer period.

How much fertilizer should you use for avocado trees?

Keep in mind that the number of fertilizers you use in the initial stage will not stay the same as the trees become mature. You need to constantly change the amount of fertilizer to be applied depending on the change of nutritional needs of your mature trees.

During the initial stage, continue to apply nitrogen to the soil surface around the tree. However, in the second year, increase this amount of nitrogen fertilizer to 0.25 lbs, divide it into three equal portions and then apply one by one.

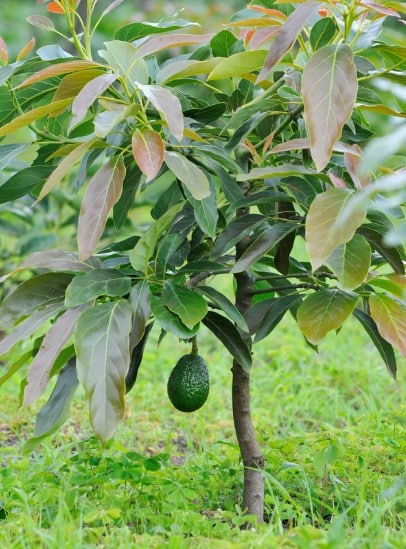
avocado

Follow the same steps in the third year, you only need to increase the amount of nitrogen fertilizer up to 0.5 lbs before application. Continue increasing the amount of Nitrogen per tree by 0.25 lbs each year for all temperatures as they grow gradually.

You probably don’t need to fertilize or use organic matter more than this, because over-application of fertilizer may even cause harm to the trees.

If you find that your garden has alkaline soil, then you must add peat moss to regulate the level of pH of that soil. Do not add in excess amounts, stop adding peat moss once the pH value becomes neutral.

You can add coarse yard mulch just after planting that will help you to keep the soil moisture intact.

Check the canopy of the trees properly to find out if the new leaves have yellow margins and green veins. Always keep an eye on them to find out any kinds of symptoms related to infections.

As a result, you will be able to treat them immediately. Just continue to follow the steps above and you will have healthy fruit trees throughout the year.

When do I contact a soil specialist for my avocado grove?

Your avocado trees will tend to have a variety of demands for nutrients. It depends on where the trees are currently in their cycle. If you are not experienced enough with fertilizer application, you should take help from a specialist. Contact your local garden centers or fellow gardeners nearby to gather knowledge about fertilizer application.

Because if you apply the wrong fertilizer in an excess amount, it will do no good to your trees. There are chances that it will yield a negative outcome.

So, you need a specialist to determine the correct number of fertilizers to apply. He will also monitor the avocado grove, and perform various tests on soil, leaf, and water.

The specialist will find out the correct fertilizer based on the number of fruit growth, leaf analysis, the number of times cropped, growth cycle, irrigation schedule, the surrounding temperature, and other conditions.

After a proper investigation is done by the specialist, he will conclude the correct amount of fertilizer to use for your trees. Continue to follow his instructions and consult from time to time if you find any new situations.

Besides, you can also arrange meetings with them online to keep them updated about any symptoms related to infections or diseases.

Final Words:

Avocado trees are generally very sensitive to several issues. Any over-application or inadequacy of fertilizer may cause damage to its root structure and overall health.

So, make sure you have the proper knowledge about when to fertilize the Avocado Tree. If any issue occurs, feel free to contact your local garden centers and soil specialists.

As you manage to get the timing of fertilizing correct, your plants will stay healthy for a longer period giving you an abundance of fruits at the end of the season.

Should I cover my vegetable garden in winter?

0

You should definitely cover your vegetable garden for winter. Winter is the toughest season for the garden and you should definitely give some protection to your plants and soil. You need to cover your garden to protect it from winter rain, frost, and freezing.

During the time of frosting, many plants get injured. So don’t wait for the winter to come and ruin your garden. You better prepare your garden for winter.

If you are new to gardening and don’t know how to cover your garden, here I am to help you in this matter.

So, relax and let’s find out what you can do. Let’s dig in deeper!

Should I cover my vegetable garden in winter
CaliKim29 / YouTube

When should I cover my vegetable garden?

Many of you may think now when should I cover my vegetable garden? At the beginning of winter? In the middle of the winter? Oh, this may seem too confusing, right?

Don’t worry, for clearing all the confusion, I am adding a chart here. That chart will represent the lowest tolerable temperature of some veggies.

So let’s take a look.

VegetableTemperature (F)
Artichoke, Beans, Beets (tops), Celery, Pumpkins31 – 32
Asparagus30 – 31
Beets (roots), Broccoli, Okra29 – 30
Cabbage26 – 28
Carrots, Peas, Potato tubers28 – 30
Cauliflower, Kale27 – 29
Cucumber, Radishes, Spinach, Squash (winter)30 – 32
Squash (summer)31 – 33
Sweet corn, Sweet potatoes32 -33
Tomatoes32 – 34

So according to the tolerance level of the veggies, you need to give them protection during the time of frosting.

Frost protection is needed to protect tender plants like tomatoes, eggplant, pepper, beans, cucumbers, sweet corn, and squash. If you can’t protect these tender plants, then harvest them as early as possible.

The root crops like beets, carrots, and potatoes will withstand a light frost. Also, the cold season crops like cabbage, Swiss chard, broccoli, onions, parsley, peas, radish, spinach, turnips, and Brussels sprouts withstand a hard frost.

So, based on the weather forecasting, you need to give coverage to your garden. Keep a close look at the frost dates during the cold months.

Note: On weather sites, many frost dates are based on a 50% chance of frost. However, as a gardener, you should look at a 30% chance of frost. After all, you must not want your plant to die because of frosting.

What you can do for covering the garden?

What you can do for covering the garden

So, now you know that you need to protect the garden during frost times. But have you thought that what are you going to do for the protection?

Well, you can use physical covers like plastic, and fabrics, for covering plants with organic materials like straw mulch, and leaf mold, covering the soil and underground veggies, or plant winter cover crops for saving the garden soil in the cold months.

Here is a chart of the coverage products that you can use to cover the garden.

Let’s take a look.

Product nameProduct typeUsageExtra note
Bedsheets, Drop Cloths, Blankets, Polythene covers, Plastic sheets, row coversPhysical coverCover the perennial plantsUsed for giving protection during frost times by covering the plants. Don’t let the cover touch the plant leaves.
Old carpet, Layer of cardboard, Black PlasticWinter cropsCover the perennial plantsUsed for covering the ground to prevent weeds.
Mustard, Corn salads, Mache, Clover, Field peas, Fava beans, VetchOrganic matterCover the groundPlanted in the ground for giving protection during frost times
Straw mulch, Wood mulch, Shredded leaf mulch, Leaf mold, Pine needles, Grass clippings, Kitchen waste, Newspaper mulchOrganic matterCover the groundPlanted them for providing nitrogen to the plants.
Inorganic mulchOrganic matterCover the groundApplied them for preventing weeds as well as providing nutrition during the winter weather. These organic matters are also known as winter mulch.

So, you need to cover your perennial plants and ground during the cold season. Let’s know about the guards one by one.

What you can use to protect the perennial plants?

  • Bed sheets, drop cloths, blankets, polythene covers, and plastic sheets can make suitable covers for vulnerable plants. It is easy to create a temporary cover for the perennial plants or annual plants to give them warm air and protection.
  • For vegetable gardens, covering with black plastic or a layer of cardboard, or even an old carpet, is another option. Cover the ground with this product for the whole winter months and remove them before spring planting. Your land will also remain good till the spring.
  • You can buy “row covers” from your nearby garden center. It will give you better protection.

Note: Drape the plants loosely for proper air circulation. Stake them with bricks or sticks and don’t let the coverage touch the leaves.

Use clean and dry materials to cover the garden. Before covering plants, you can water them lightly.

Apply the cover in the early evening when the winds go down and remove it the next day in the mid-morning to give warm sunlight to your plants.

What you can use to protect the ground?

Well, you need to cover the empty garden space so that the weeds can’t make their habitat there or the soil temperature doesn’t go down and freeze the soil. On the other hand, if you are growing root vegetables, you need to give them protection too, right?

The ground covers will help you to resolve these issues as well as they will also work as soil amendments.

So, let’s know about 5 amazing ground coverage materials that you can use to cover your ground.

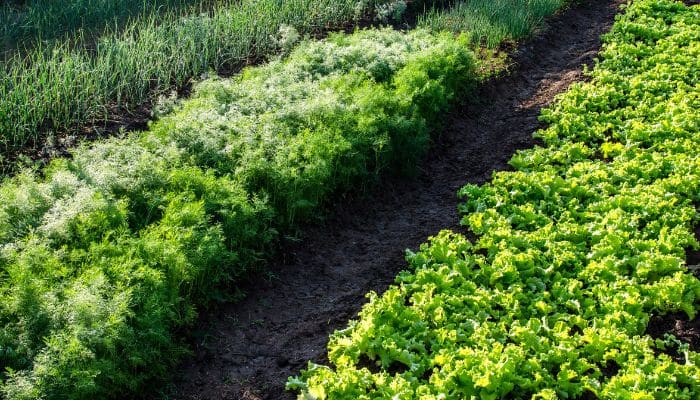
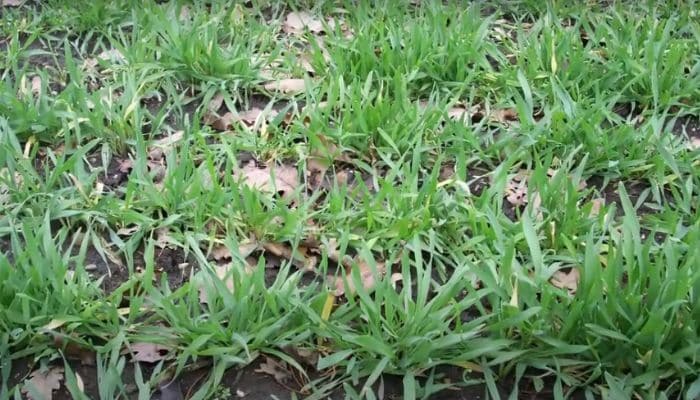
1. Winter Cover Crops

Winter Cover Crops

These cover crops are also known as green manure. It is basically planted for giving protection against weeds or for improving the soil quality. These crops cover the ground and prevent the soil from erosion during the winter rain or frost. They also prevent the weeds from growing.

The cover crops with deep roots help to improve the soil structure. They break the soil. For example, there is mustard that has lush foliage. By the time the foliage of this plant mixed with soil and works for boosting the organic materials of the soil.

Mustard is good for heavy soil like clay soil. Dig in some of this cover crop seed before winter so the frost will break the plants instead of the soil. Prolific salads such as mache or corn salad can also be grown in this way.

However, some cover crops add nutrients to the soil directly by working as a nitrogen fixer through their roots. Winter field peas, fava beans, clover, and vetch are some of them.

These legume-type veggies are great and plant them before the planting of some nitrogen-hungry brassicas like cabbage.

It is good to plant these cover crops in winter as there may be a lacking of nitrogen in the soil during the time of winter.

2. Straw Mulch

q? encoding=UTF8&ASIN=B07NCM9QKQ&Format= SL110 &ID=AsinImage&MarketPlace=US&ServiceVersion=20070822&WS=1&tag=gctlove 20&language=en USStraw mulch

Straw mulch provides effective ground coverage in dormant garden beds. It is mainly used in vegetable gardens.

Put a 2-inches thick layer of mulch and it will prevent the weeds from germinating in the empty ground. A thick layer of 4-inches will insulate the soil and protect the tender perennials from temperature fluctuation.

Also, it protects the plant roots from dying because of the cold weather.

3. Wood Mulch

q? encoding=UTF8&ASIN=B08NC53MB5&Format= SL160 &ID=AsinImage&MarketPlace=US&ServiceVersion=20070822&WS=1&tag=gctlove 20&language=en USWood chips

A deep layer of it will help you to insulate the soil as well as keep the weeds away. Wood chips mulch breaks down slowly and so it works well in perennial beds where you basically don’t till in the mulch each year. 

As this mulch decomposes slowly, you need to replenish the layer during each fall to maintain the layer of mulch throughout the cold weather.

4. Yard Waste

Yard waste, including grass clippings, pine needles, and shredded leaves, also can provide cover over dormant winter beds. Dry leaves or cut grass can help reduce weeds although these materials decompose quickly and some perennial weeds can penetrate them.

Especially, the shredded leaf mulch can work as insulate over tender perennials. Just apply a 4-inch-deep layer. 

Yard waste quickly breaks down into compost and this compost nutrient leaching into the soil improves the soil quality. You can add your kitchen waste to the compost pile too.

5. Inorganic Mulch and Newspaper Mulch

If you want to keep the weeds away and that’s the motive behind using cover, then you can easily choose inorganic mulch. Cover the empty beds with black plastics or traps.

Weeds can’t penetrate them at all and so there will be no weeds during spring planting.

The inorganic winter covers work best for annual vegetable garden beds as the soil beneath the covers receives no moisture and air during winter. Besides, black plastic helps to get the soil warm quickly.

Alternatively, you can use newspaper sheets to cover the garden area for the winter months. It is an organic matter and you can till it into the soil during spring planting.

Few Last Words for You

Should I cover my vegetable garden in winter?

During the month of winter, you need to cover everything if you don’t want frost damage, starting from the garden to bed.  

Besides, if you want to keep your garden space free from weeds or weed seeds for next summer or spring planting, you need to cover the garden soil.

You can add physical cover for covering the plants. You can use winter mulch to cover the garden soil for increasing soil nutrients, reduce soil erosion, and getting healthy plants for the next gardening season.

So, give your garden winter preparation by covering the ground, plants, or bed for winter.

Happy gardening!

Raised bed vegetable gardening for beginners

0

What else will be better than a raised bed vegetable gardening when you are a beginner and want to make an outdoor vegetable garden?

Many beginners select a big size land for their vegetable garden, as a result, they can’t handle their garden properly. They get frustrated at their failure and decide to give up. Don’t do this mistake!

Guess what? Now I am going to give you some amazing tips about making a raised bed vegetable garden. So let’s dive in deeper!

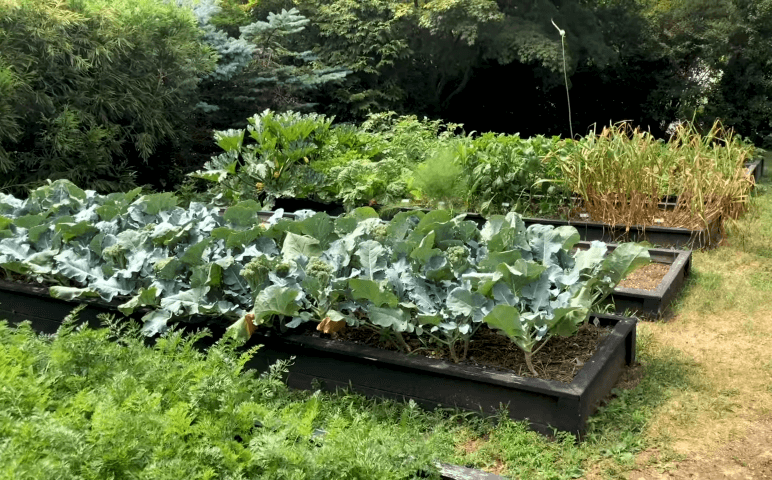
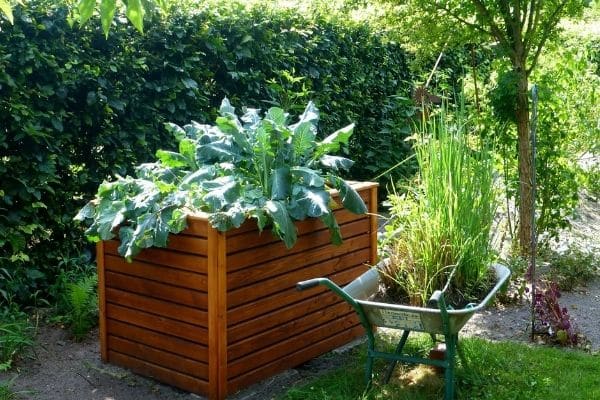
Raised bed vegetable gardening for beginners
 

6 easy steps to make your raised bed vegetable garden

Many people think that making a garden is really hard work. But believe me, it’s not. Especially, it’s easier to make and handle a raised bed garden though you have to work a little bit.

Just follow the following steps to make your raised bed vegetable garden.

1. Choose a land

The first thing you have to do for making the garden is select suitable land. This is not a tough task, right? All you have to make sure that your location should have enough sunlight, a proper drainage system, and nutrient-rich soil.

Sunlight for your bright veggies

Most vegetables need plenty of sunlight to grow. So it’s good to place your garden in a sunny place. But too much sunlight can be harmful too!

The fastest-growing vegetable plants need direct sunlight for 6 to 8 hours daily. On the other hand, some leafy veggies and root veggies can’t tolerate too much sunlight.

You can plant some leafy plants like salad leaves, and lettuce in the shady part of your garden. Also, you can plant the root vegetables in a place where the sunlight stays for at least 4 hours.

Besides, in the case of growing cool-season vegetables, you can give the plants a summer shade.

Keep the soil hydrated but don’t let the water stay

Good soil is well-drained as well as holds onto enough soil moisture for steady growth. Too much water can cause rotting roots while too little water can dry out the soil. Both situations are harmful to your plant.

So make sure your land has a better drainage system. Also, it will be convenient for watering the garden if there is a water source near your garden.

Besides, don’t water too frequently if they don’t need it. If you water them regularly they won’t be able to adjust to the environment and survival chances will get low without water.

Don’t forget to check whether the water is reaching the root properly or not. Otherwise, you will continue watering the plants, and still, they will die.

Good airflow but that doesn’t mean too windy

raised-bed-garden

An open space is good but too much wind can harm your garden. If the location is too windy, it can uproot the young plants of the garden. Besides, wind can keep the pollinators away from the plants.

Also don’t plant the plants too close to the fence as the wind can make them fall on your plants. However, don’t think that air is not necessary.

Good airflow is needed not too much! Proper airflow will keep the disease and pests away from your garden. Also, it is needed for the sturdy growth of your garden.

Your plants need nutrient-rich soil

The plant collects all its basic nutrients from the soil through its roots. So, along with sunlight and water, you have ensured that the soil of your selected land has enough of this food. Well, I mean to say nutrients.

For providing nutrients make sure you know what your soil need. You can test the sample of the soil in a nearby lab to find out the nutrition lacking.

Also, check your soil texture. Based on the texture you can add fertilizer, compost, mulch, or soil amendments to your soil. Besides, the water drainage level and presence of nutrients sometimes depend on your soil texture.

2. Select the appropriate bed size

After choosing the location, it’s time to know the bed size of your garden. Here are the guidelines for the bed size for your garden –

Height: the ideal height for your garden beds is 12-18″. Most feeder roots are in the first 6″ so it will also work for your beds. But the higher the beds, the roots will go deeper.

However, a height of more than 18 inches is not preferable.  For root veggies, your beds need more height, and for herbs, you can allocate little space.

Width: 4 feet is perfect, but 3 feet will also work. 4 feet allows more flexibility for spacing rows as you need some space to reach the beds for taking care of them. It is important that you don’t have to step into the bed to weed or for planting crops as this can affect the health of both soil and the plant.

Length: You can 4×4 square feet or 4×20 square feet. As long as you keep the width at least 4 feet, your length is only limited by your space and budget.

Shape: You can choose any shape of your choice like squares, rectangles, T’s, circles, ovals, etc. As long as you can ensure that there is enough space around your beds to reach them, it is okay with any type of shape.

3. Prepare the ground

raised based gardening

It is very important for you to give your plant a perfect growing medium. The native soil may be sandy soil or clay soil. But it is rare to have a perfect type of soil texture where there are no weeds in it or the ground is beautifully level.

So let’s know how you can prepare the ground for your beds.

Healthy soil is the most important thing for your garden. A raised bed is super beneficial to you as you can add a soil blend that’s more nutrient-rich than your native soil. Loose and nutritious soil will allow your plant roots to grow freely ensuring water and sufficient nutrients.

At first, remove the grass and perennial weeds from your garden soil. Use a fork or shovel to loosen the soil for about 6-10″ to improve the drainage and moisture retention of the bed soil. It will give your plant a feeling of growing in a 12-18″ deep bed while the real height can be 6″ only. It will give the root crops like carrots, potatoes, or full-size tomato plants enough space to grow.

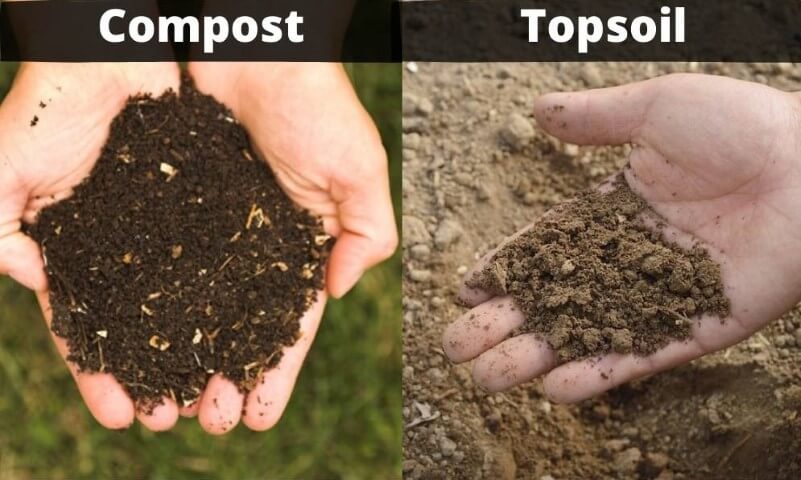
In the case of filling more than one bed, you can buy your soil in bulk by cubic foot. You can make your bed soil by combining 60% topsoil, 30% compost, and 10% potting soil (soilless mixture of peat moss, perlite, or vermiculite).

However, these proportions can be varied as per your soil volume. You can also use a soil calculator for measuring the portions.

If you don’t get good-quality topsoil, then go for a 50-50 blend of soil mix and compost. Also, you can add peat moss of about less than 20 percent of the total mix as its acidic nature isn’t that good for growing vegetables.

Some extra tips for amending your garden space

If your space is currently lawn:

You can use a sod cutter to remove the turf pretty quickly and easily. After that, you will get smooth ground. Use compost to remove the high-maintenance grass away and this compost will provide nutrients for your soil as well.

If your space is currently weed-infested:

Solarize the area to get rid of weeds. It will take some time but it is effective. You can do it during summer to get better results.

Besides this, if you have Bermuda grass in the soil, you can build some inches of soil or cardboard borders around the edge of your gardening beds. Bermuda grass needs a lot of sunlight but under the soil layer, it can’t receive that light.

If your location is hardscape:

This type of land has drainage problems and the water can’t reach the bottom of your bed. So, make a better drainage system for this type of land.

If your space is currently full of shrubs:

You don’t need to remove the shrubs from the soil as this woody material will break down inside the garden beds over time.

Besides, for leveling the ground, you can till the ground. But be careful as tilling can harm the important elements of the soil structure.

Moreover, using topical lawn or weed-killing products can harm your garden beds in the long run though they may work instantly.

4. What you will grow in your raised beds?

Now it’s time to select what you will grow in your garden. You can grow tomatoes, peppers, summer squash, melons, cucumbers, pole beans, peas, onions, eggplant, root crops like beets and carrots, potatoes, and sweet potatoes in your deep beds.

Though you can choose anything you like to grow, there are certain veggies that may need some extra care or may need a specific time to grow. So, here I am talking about the type of vegetables you can grow and the time to grow.

You have to take care of the fact that you are growing the vegetables you and your family like to eat. Otherwise, it will be both a waste of your time and energy as well as money.

If you’re big on salads, you can plant head lettuce, a lettuce cutting mix, cherry tomatoes, cucumbers, and carrots. If you love cooking, you can plant onions, peppers, leeks, potatoes, and herbs. Also, you can add some new variety to discover your taste in a new vegetable.

Raised bed gardening will maximize your productivity. It will enable you to grow the maximum amount of veggies at a small place but that doesn’t mean you can crowd the plants. Plants may have lacked in water, nutrition, and root space due to overcrowding.

It is also important to keep in mind the growing habit of the plants some plants are bushy while some may be climbing or trailing. If you mix bushy veggies with climbing veggies, the companion plants will hurt each other. You can use a cage or ladder for climbing vegetables.

Besides this, take care of which plants need and how many hours of sunlight, and water and based on that make your garden segment. Also, you can plant them based on the harvesting time. You can plant the quick harvest crops on the front side and the late harvest crops on the back side so that you can harvest the veggies easily.

raised bed vegetable gardening

You also need to know whether you want to grow vegetables from seeds or from young plants. Seeds of annual veggies (peas, beans, squash, lettuce beets) should be planted indoors first about at least 6 weeks before the last frost dates. Seeds of root crops like carrots and potatoes can be directly sown in the garden.

For slow-growing plants like broccoli, celery, and kale, you can use seedlings and transplant them into the garden. This will give you an earlier harvest than seeds. Transplants also do a better job in case of resisting pests.

But don’t put your young plants in the beds when the frost is about to arrive. Put them in the garden after all the danger of frost has passed.

The final thing you can do is to know every detail of your vegetables so that you can easily choose what to put in your garden beds or what to not. Here I have given the details of 5 vegetables just to let you know how you can make a detailing list of the veggies. Just take a look!

Vegetable Name Harvest time Ideal temperature Planting time Spacing Germination time Light preferences
Lettuce 65 – 80 days) 45-75 F Spring, Fall 6 – 18 inches 2-15 days Sun or partial shade
Spinach 40 – 50 days 35 -75 F Spring, fall 8 inches 6 – 21 days Sun or partial shade
Green Beans 55 – 65 days 55 -85 F Early Summer 6, 18 inches (row) 8 – 16 days Sun or partial shade where hot
Cucumber 48 – 65 days 70 – 85 F Summer 12 inches, 3 feet (row) 4 – 13 days Sun or partial shade
Yellow Summer Squash 48 – 65 days 70 – 90 F Summer 12 inches, 3 feet (row) 6 – 12 days Sun or partial shade

5. Plan a garden layout

For planning your garden layout take paper and pencil. Start with your selected vegetable list. Then consult catalogs for varieties you are interested in.

Sometimes you can’t grow everything you want, and that’s okay. It’s better to have just a few crops that do well, rather than a bite or two of many different vegetables.

Then use these example plans for inspiration, look on the backs of your seed packets for recommended spacing, and start sketching. Expect to refine many, many times. That’s all part of the planning!

raised bed vegetable gardening

Take care of the few things while making the plan mentioned here as follows:

If you follow the intensive planting approach, you can plant 2 or 3 plants really close in a 4 feet wide row without worrying about overcrowding your mature plants. This way you can use every square inch of your garden but it is difficult to reach the plants when needed. Moreover, you can’t use it for vining plants like cucumber.

There is another method called the square foot method that is derived from the intensive cropping method. Here you have to use a physical gridding system and divide a raised 4×4 garden bed into 1-foot squares per portion.

Besides this, you can use succession planting, which involves planting more than for getting more crops in a season from a small garden space.

Tall plants like tomato plants and vertical supported plants like peas, beans, and cucumbers can be planted on the north side of the garden. If you plant tall veggies in the north, they won’t shade the other vegetables.

Use the shady (unavoidable shades) parts of your garden for cold seasons and use the sunny part for summer and spring. Moreover, you can use your DIY frame trellis for growing veggies.

Try to plant vegetables seasonally. After harvesting, plant another vegetable for the next season. If you want to plant annual or perennial crops like asparagus, and herbs, then give them the permanent location of your garden as per their requirements.

Sometimes it so happened that you don’t want to harvest all your spinach at the same time. So use stagger planting. Plant the seed with a couple of week’s gap or as you wish to harvest.

Finally, you can use some modern technologies too. There are many websites or software that will help you to make a foolproof layout for your garden.

Using a garden planner to plan the layout and contents of your garden is a great way to stay organized and get everything you want out of a garden like Better Homes and Gardens, GardenPuzzle, Gardeners.com, Vegetable Gardening Online, Marshalls, Small Blue Printer, and so on.

Besides this, there is also some free trial software like Home Designer, Garden Planner, Landscape Creator, Realtime Landscaping Architect, and Smartdraw.

6. Finally it’s time to make the garden

When you get every element ready for your garden, start planting the crops in your garden and make the garden. Fill the beds with the selected growing medium. Use compost or other fertilizers as per the requirements.

Remove the rocks or debris from the soil. Started planting the crops according to your garden layout planning.

Plant lettuce by making holes with fingers keeping a 6-inches difference between every hole. Sprinkle a few seeds in each hole and separate the seedlings after germinating.

You can also spread the seeds of some veggies over the surface. Plant climbing veggies at the edge of the beds using ladders.

Water the garden immediately after planting as well as apply some organic mulch to keep the soil temperatures down and the weeds out.

Few last words for you

Your willpower can make this hard work easy for you. Besides, I have shared the easiest steps for you to make a raised bed vegetable garden.

I hope following these steps you can make a healthy vegetable-raised bed garden. Don’t forget to take care of your garden. Happy gardening!

What vegetables are best for raised beds?

0

Many beginners struggle with the thought that what vegetables are best for raised beds gardening. Raised bed vegetable gardening is becoming popular day by day because of its flexibility.

But many people choose the wrong vegetable for raised beds as a result they find the raised bed gardening too hard. So, it is important for you to know which vegetables will be best for your raised beds.

Here in this article, I am going to suggest to you some of the best vegetables for your raised beds vegetable garden. Let’s dig in deeper!

What vegetables are best for raised beds

16 best vegetables to grow in your raised bed garden

After preparing the soil of your bed, you need to choose the raised bed crops. There may be a wide range of vegetables to grow but certain types of them grow well in the raised beds.

Some deep roots vegetables and root crops also need deep soil to grow. Some may need wider space to grow.  To your surprise, raised beds can give all these facilities. Besides, the soil temperature of the raised beds is perfect for growing vegetables.

So let’s see some delicious vegetables you can grow in your limited space raised beds.

Vegetable Name Harvest Time Germination Time Planting
Time
Spacing
Lettuce 65 – 80 days 2 – 15 days Spring, Fall 6 – 18 inches
Leafy Greens (Spinach) 40 – 50 days 6 – 21 days Spring, fall 8 inches
Radishes 20 – 30 days 5 – 7 days Spring, fall 2 -3 inches,
8-12inches(row)
Carrots 70 – 80 days 14 – 21 days Fall, Winter 4inches,
12inches (row)
Parsnips 100 – 120 days 12 – 14 days Fall, Winter 4 inches,
18 – 24 inches (row)
Beetroot 49 – 56 days 10 – 14 days Spring, Fall 4 inches,
12 inches (row)
Potatoes 60 – 80 days 14 – 28 days Spring 12 – 15 inches
3 feet (row)
Tomatoes 50 – 80 days 5 – 10 days Late Spring, Early Summer 18 – 24 inches
Cherry Tomatoes 55 – 65 days 5 – 10 days Early Spring 6 – 12 inches
Bush Beans (Green) 55 – 65 days 8 – 16 days Early Summer 6, 18 inches (row)
Peas 60 – 70 days 21 – 30 days Early Spring 4 inches,
18 – 24 inches (row)
Onions 100 – 120 days 7 – 10 days Early Spring 2 – 3 inches,
12 – 15inches (row)
Garlic 28 – 56 days 7 – 14 days Mid-autumn 4 – 6 inches,
1 foot (row)
Summer Squash 48 – 65 days 6 – 12 days Summer 12inches,
3 feet (row)
Cucumbers 48 – 65 days 4 – 13 days Summer 12inches,
3 feet (row)
The 3 sisters 90 days almost 25 days for corn Summer 4 feet apart

Lettuce
For growing lettuce, you directly sow the seeds in your garden beds. It is good to sow the seeds in early spring as cool weather won’t bother lettuce. The warm soil of the beds will help the seeds to germinate quickly. You will get healthy seedlings for transplanting too.

If you collect a single leave from the plant during harvesting, you can get at least four or five pickings from each lettuce. It is better than pulling out the whole plant.

Sow new seeds until late June or early July and you’ll get fresh homegrown leaves for most of the summer.

Leafy Greens
Greens such as spinach and kale are some awesome vegetables to grow in your garden beds. These cool-weather crops need to be planted as soon as you can get a trowel into your soil. The warm bed soil of the raised beds can give you the chance to start earlier and get several harvests before the arrival of the summer.

Besides, the leafy greens don’t like soggy roots. So, it’s better to choose soil with proper drainage for the beds of greeny leaves.

Radishes
As a beginner, you can easily go with planting radishes in your garden beds. They are one of the quickest growing vegetables. You will get to see their rosy-red shoulders within just a few weeks after sowing.

Sow the seeds from March to mid-August at regular intervals and you will get constant supplies to add them to your salads or stir-fries.

Carrots
Growing carrots in your ground garden seem quite impossible because of the stones in your soil. The stones will cause the plant roots to ‘fork’. But in a raised bed, you can ensure that the growing medium is okay for them and they are getting enough ground space.

Sow the seeds from April to early July in the loose and roc-free soil and harvest them a couple of months later.

Parsnips

Like other root vegetables, they also hate the stones in the soil. They need loose rock-free soil where they can get the space to spread out. While growing root crops, it’s important to have complete control over the soil. Raised beds can be filled with the perfect soil to suit your requirements.

It is also free of rocks, clay, and debris and protects the growth or reduces the chance of having misshapen parsnips.

Beetroot
A fresh, tender, golf-ball-size, home-grown beetroot is all that you want, right? The plants thrive in raised beds. Just sow seeds directly into the soil or compost in early April and keep moist.

Sow more seeds at two-weekly intervals until June and you’ll keep harvesting beetroot over several months.

Potatoes
Potatoes will grow greatly in your garden beds as well as you can harvest them easily in this way. These plants will get benefit from hilling soil around the shoots during their growth. In a raised bed, it is more convenient to make the soil pile and so it is easier to grow potatoes.

However, potatoes need loose and loamy soil for proper drainage. They grow the best while spreading out in the soil. The loamy soil will save the potatoes from rotting as well.

Tomatoes
Tomato plants demand good, rich soil as well as proper watering. You can achieve both by planting them in a raised bed. They don’t need deep soil to grow but because of being a large plants, their roots need enough big space to grow.

Tomato plants need space horizontally and so they are able to grow in the shallowest raised bed also. You can sow the seeds indoors in February and then depending on the weather you can transplant the seedlings outdoor and start getting the harvest in early July.

Cherry Tomatoes
Cherry tomatoes started to grow after two months of planting. Start with planting the seeds in the seedbeds and then plant them in the beds once the risk of spring frost has passed.

Provide a sturdy stake or support to the plants while planting.

Bush Beans
Bush beans are so easy to grow and ready to harvest just 50 to 60 days after seeding. They need warm soil and warm weather to grow. So you don’t need to rush for spring planting.

Sow the seed 2 inches apart from each other in the 18 inches apart rows. When the seedlings grow, plant the seedling 6 inches apart.

You can grow a rainbow of beans by planting green beans, purple beans, yellow beans, and even red varieties.

Peas
There are a few types of beans that you can grow like snow peas, sugar snap, and shell peas. Sow the seeds in early spring soon after loosening the soil about 4 to 6 weeks ago before the last expected frost.

Sow the pea seeds one or two inches apart in the double row keeping the row distance to six inches.

If your chosen variety plant needs to be staked, then you can use a pea trellis or hang netting before planting.

Onions
Onions are perfect to grow as you can fulfill the requirements of these needy plants by planting them in the beds. Onions need proper drainage and for this, they need a lot of organic matter during the long-term growing season.

By choosing onions for putting them in the raised beds, you can provide all these to your onions. You can use loose soil and add plenty of compost to the raised bed before planting onions.

Onions take almost about 100 days after sowing the seeds. So if you want them to grow faster start earlier with them and the warm soil of the raised beds will make them ready early for harvesting.

Garlic
Garlic is a ‘plant it and forget about it’ type vegetable. Tuck individual cloves in the ground beds during mid-autumn and do not harvest them until the next year’s early mid-summer. Though the plants are bothered by a few pests or diseases, they will grow well in your raised beds.

It’s better to buy garlic from your nearby local garden center than the sprayed ones from the supermarket for planting.

After planting you can add some mulch to hold the soil moisture and reduce weeds. Harvest them when half of the leaves have yellowed and hang them to cure in a dry spot for 2 weeks.

After that, they are ready for your kitchen.

Summer Squash
No matter how many summer squash plants you grow, you will always have more squash than you can eat. Even if you are planting only one plant!

Direct sow the seeds in a bed well amended with compost or manure after the last spring frost. You can harvest them once the fruits started to form and pick them often for peak quality and flavor.

For pattypan and round varieties, pick the fruits when they are 2 or 3 inches in diameter. Pick the zucchini when they are 4 to 6 inches long.

Cucumbers
The cucumber plant is a hot-weather veggie. Direct sow the seeds or seedlings in garden beds a week after the last spring frost. Provide them plenty of compost and water consistently for the highest quality cucumbers.

If you don’t have enough space, then you can try compact varieties of bush cucumbers like Pick-a-Bushel, Saladmore Bush, and Spacemaster. Just provide them a tomato cage to grow.

And in case you have a large space, then you can choose Suyu Long, Lemon, and Diva.

The Three Sisters
The combination of sweetcorn, beans, and squash are known as the three sisters. The tall sweetcorn plants give support for climbing beans, while a squash plant scrambles around their feed and suppresses the weeds as well as gives shade to the ground for moisture retention.

Spread a good layer of well-rotted horse manure over the bed before your plants go into the ground. That is all needed to give these three crops a boost.

They should then supply you with an excellent harvest of these summer crops towards the end of summer.

Best vegetable combination for raised beds

raised-beds-mixed-garden

In the raised beds you are definitely going to plant more than one vegetable, right? But you can’t simply plant them in the place you like.

You can’t plant vining plants like cucumber with larger plants like tomatoes or corn as that can damage the growth of both plants. That’s it is important for you to know which plants you can plant together to grow healthy plants.

So, the following chart will help you with that. Go ahead and read it!

Type of Vegetable Friends Enemies
Beans Beets, carrots, corn, cucumbers, peas, radishes Garlic, onions
Beets Broccoli, Brussels sprouts, bush beans, cabbage, cauliflower, chard, kohlrabi, onions Charlock, field mustard, pole beans
Carrots Beans, lettuce, onions, peas, peppers, tomatoes Dill
Corn Climbing beans, cucumber, peas, pumpkins, squash, zucchini Tomatoes
Onions Cabbage, carrots, chard, lettuce, peppers, tomatoes Beans, peas
Potatoes Basil, beans, celery, corn, garlic, horseradish, lettuce, marigolds, onions, peas, radishes, spinach Asparagus, broccoli, Brussels sprouts, cabbage, cauliflower, carrots, cucumbers, eggplant, kohlrabi, peppers, squash, tomatoes
Radishes Beets, cabbage, carrots, chives, cucumbers, kale, lettuce, spinach, squash Hyssops
Squash Beans, corn, dill, nasturtiums, peas, radishes Potatoes
Tomatoes Asparagus, carrots, celery, onions, parsley, peppers Corn, dill, kohlrabi, potatoes
Zucchini Beans, corn, dill, garlic, nasturtiums, oregano, peas, radishes, spinach Potatoes and pumpkin

Few Last words for you

You can plant almost every type of vegetable in the raised beds but out of them, some are the best. Here I have tried to suggest to you almost every best vegetable for your raised beds. You can choose a wide variety of them too.

Also, be cautious while paring them in your beds.  Hope this was helpful for you. Happy gardening!

Does a vegetable garden need water every day?

0

You know water is an essential element for your plant, right? It can save your plant from dying as well as it can drag your plants to death.

For this reason, you need to know the proper use of water in your vegetable garden. There are chances that as a beginner it will be difficult for you to understand the watering system. So, what can be the proper use of water in vegetable gardening?

Does a vegetable garden need water every day?

A vegetable garden doesn’t need water every day. Your garden needs the right amount of water to moist soil and to feed the plant.

However, you need to know what can be the right amount of water for your vegetable garden. You need to keep in mind some other factors that can affect your watering the garden.

Some more to keep in mind! Oh, don’t worry I will try to make it easy for you without missing the extra caring. Let’s dig in deeper!

Does a vegetable garden need water every day
 

The plants in your garden need water as much as you need water

The first thing that may knock on your mind is why you need to water your garden, right? Whether it is often or regularly, why do your plants need water?

It’s because they drink water just like we humans! Well, just kidding!

Plants need water as they are mostly made of water as well as it is needed to maintain their internal temperature. Plants need water for the photosynthesis process to create sugar and oxygen.

Besides, we all know the plant gets all the essential nutrients through the root cells. Without water, it is quite impossible for these nutrients to move inside the plants. So, lack of water means a lack of nutrients too!

So, it is quite impossible to have a successful vegetable garden without proper watering.

When your garden needs water?

Daily watering is not necessary but that doesn’t mean you can water it anytime you want. You need to understand the perfect time for watering as too much or too little water is harmful to your vegetable garden.

Watering time based on soil texture

Feel the soil of your garden as the type of soil can tell when it needs water. If you feel that the soil surface is dry, baked, or hard, it may be the right time for watering!

If your soil is sandy soil and well-drained, you can water your garden twice a week or more often during summer. If the soil is heavier clay soil or loamy soil that holds moisture properly, you can water it once a week.

If the soil is covered in a layer of mulch, you may water your garden less often.

Time to water and Weather Conditions

Early in the morning is the ideal time to water as the foliage can dry off by evening. If you water them at the night, the foliage stays wet for a long time, and diseases can attack. Besides, the soil surface that is under the sunlight for a long time, will leave the water to evaporation and so needs more irrigation.

A sunny and dry climate requires more water while ones with frequent rain may need less amount of water. Sometimes it is best for your plants to water immediately after a rain shower of about half-inch.

Because if you add water after the rain shower, you can ensure penetration down to 5 or 6 inches by providing enough water.

However, if you add water after one or two days of a rain shower, you will add water only to the surface. It won’t be able to moist the soil enough as frequent light water can’t build up a reserve of water in the soil.

Especially, during the summer season when the weather is hot and dry, the plants need more irrigation.

Watering time based on the growth of the veggies

There are many vegetables that need extra water when in flower or when fruiting. For instance, beans and peas, sweet potatoes, and corn require more water during flowering time.

Tomatoes and squash plants such as zucchini and pumpkins need extra water when their fruit is developing. Peas and beans will develop heavier pods if watered regularly after flowering.

But too much water at an early stage can harm the growth of peas and beans. Leafy greens and root vegetables require regular watering throughout their growth.

vegetable-garden

Notice the wilt of the plants

When the plants started to wilt and look droopy, it may be time for watering. But temporary wilting of the plants during the midday heat doesn’t indicate the need for water.

During very hot days some plants may go through a midday slump but that is for adapting to their environment. Check those wilted plants again in the evening.

If you find them to look perkier, you don’t need to water them.

Measurement of the water

You are checking the water timing now. Though you are applying water twice a week, you are applying water immensely. As a result, the roots have started to rot.

So, you have to know the right quantity of water.

Right quantity of water

One inch of water or rain per week is adequate water for your vegetable garden. For a 100 square-foot area, one inch of rain equals 62 gallons means a large amount of water. So try to find out the actual size of your garden.

If there is no rain and the area size of your garden is 600 square feet, you would need 372 gallons of water for a week.

Now there might be rain and the amount of rain was only about 3/8 of an inch. So, you need to supply the deficit amount of water to the garden which means the remaining 5/8 of an inch of rain. The 5/8 of 372 is almost about 232 gallons.

If the soil is sandy soil, water twice a week and divides the amount of water into two. That means amounts of water will be 31 gallons per 100 square feet.

watering in garden

Measure the right quantity

You can simply use a rain gauge that will let you know about the quantity of water your garden is receiving and how much more you need to add. Or else, you can use a clock and a bucket to figure out the water quantity.

For this, you need a bucket like a 5-gallon pail. Measure water into the pail and mark the actual 5-gallon level line. Now turn on your hose and attach your pistol grip or sprinkler with it to fill water into the pail. Keep the water volume as usual for watering the plants.

Next, check the time of filling water and find out how much time it takes to fill 5 gallons of water. It may be a matter of a few seconds. Do the same thing again to confirm the timing.

Suppose it takes 10 seconds to fill the pail. As you know for watering a 100 square feet garden, you need 62 gallons of water per week which means almost 12 pails of water and 120 seconds.

So, water your garden for almost 2 minutes and some more. It will be enough for the week.

Another way for overhead watering is to place 4 or 5 small containers around the garden while watering. When the water in the containers reaches up to the 1-inch mark means you are done with watering.

Or else, you can use a water meter on your hoes to know how much water you have used in your garden and that would be much more convenient.

Critical times to water and gallons needed

Though you don’t need to water your vegetable garden regularly, you need to take special care of some type of plant. Some plants need extra water during their growth or during summertime.

So here are some of that special vegetable plants that need extra irrigation!

Needs a lot of water during dry spells for a 5-foot row

  • Cabbage: 2 gallons per week for head development during dry weather.
  • Cauliflower: 2 gallons per week for best crop and during head development.
  • Celery: 2 gallons per week for best crop
  • Cucumbers: 1 gallon per week during flowering and fruit development.
  • Squash: 1 gallon per week for the best crop.
  • Peppers: 2 gallons of steady water supply per week from flowering through harvest.
  • Lettuce/Spinach: 2 gallons per week for best crops.
  • Radishes: 2 gallons of plenty of water per week for consistent moisture to enlarge the root.

Needs water at critical stages of development for a 5-foot row

  • Beans: 2 gallons per week (depending on rainfall) when flowers form and during pod development
  • Corn: 2 gallons per week only when tassels form and when cobs swell
  • Peas: 2 gallons per week when flowers form and during pod-forming and picking
  • Potatoes: 2 gallons per week when Tuber set and enlargement when the size of marbles
  • Tomatoes: 1 gallon twice a week or more for 3 to 4 weeks after transplanting and when flowers and fruit form

What can too much water do to your veggies?

To avoid over-water check the soil moisture below the surface before watering as too much watering can cause the following difficulties:

  • Plants may die due to wet roots
  • Over-watering can invite some plant leaves diseases as well as slugs and snails to the garden.
  • Valuable nutrients may wash away along with the soil by the overflow of water.
  • Plants will develop a weak, shallow root system that is less drought-resistant.
  • There will be a lack of oxygen when plants are sitting in the water for a long time

Besides this, your crops can wilt due to too much water or too little water. If you find the soil dry under the surface, water immediately and try to give some shade to your plants.

On the other hand, if there is an overflow of water, then look for the water drainage system. If the soil is waterlogged, use a fork to puncture the soil as well as don’t water until the soil becomes dry again.

How to water your vegetable garden

soil moisture

Deep root penetration is all you need in a healthy plant and when the water goes deep inside the soil, a deep root is formed. For watering the garden you need to saturate each plant hole first during seedling transplant.

When you water the garden, make sure that the soil is saturated enough to moisten the percolates several inches down. If you use a sprinkle for watering, then the leaves get wet easily due to overhead application. This could lead to various diseases of leaves as the leaves stay wet for a long time.

That’s why you could use the hoes directly on the ground near the plant root so that the water can go directly into the soil. You can place a rock or board under the water flow so that the soil will not get eroded. Or else, you can dig a little trench around the plants for easy water flow.

Drip irrigation is another way that you can use for watering. Using a hose or plastic tubes with small holes in them, you can supply a relatively small amount of water to the root zone.

You can place the hose down the garden rows and water will slowly supply maximum moisture without thinking about the period of watering.

Moreover, you can use this drip irrigation for watering your container vegetable gardens.

Some more watering tips!

Well, now it’s time to give you some extra tips as you love to get some extra, I know.

Use mulch for preserving the soil moisture

A heavily mulched garden will need much less frequent watering and will save your time! Besides, if your garden receives less than 40 inches of rainfall annually, then you should use mulch for preserving the soil moisture.

Mulch won’t let your water evaporate from the soil as it cools down the heat of the soil. But don’t mix the mulch with soil. Lay a thick layer of it on the soil surface and renew it for the entire growing season.

Water thoroughly

Don’t be a stingy person and water your garden thoroughly! If you only sprinkle water on the soil surface, it will need water more often as well as will build a shallow root system.

On the other hand, a thorough soak will penetrate the surface and ensure a healthy nourished plant.

Plan your garden layout properly

When you’re planning for the garden layout, try to put those thirsty vegetables in a different segment. This will be helpful for you to water them as well as the right amount of water will be ensured for the plants.

Moreover, you can use a special irrigation system for them if necessary during the summer months.

Few words before goodbye!

I hope now you know how to water your garden in a proper way. Don’t add too much or too little water!

Besides this, provide sufficient water according to your soil type, weather, and time of day. Some vegetables need frequent and shallow watering and some may need a large amount of water per week. So take care of that!

Moreover, be aware of the wet leaves as they can invite some diseases. That’s all for now and oh, don’t forget to add a mulch layer!

Happy gardening!

How Tall Does an Avocado Tree Grow?

Do you want to grow avocados as houseplants but are concerned about “how tall does an avocado tree grow?”

You might also be worried if you grow them in your garden. Because the trees fail to reach an average height in due time, you may not get the expected number of fruits. But don’t worry, I’ll try to explain this issue as much as possible with my practical knowledge.

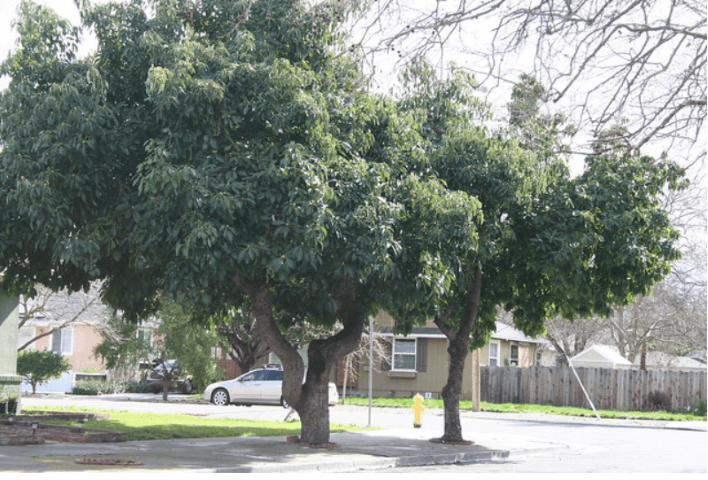
Avocado trees can grow up to 15 to 20 meters or 50 to 70 feet in height if you can provide the necessary care. In some cases, the trees can even cross 80 feet tall. But if you grow trees from a seed as a houseplant, their height will be much smaller compared to the garden or nursery trees.

How Tall Does an Avocado Tree Grow
Bakerina / Flicker

Along with the environmental influence, it is your nurturing process that can affect the growth of the trees. You will eventually notice that regular care and preventive measures can enhance the growth of both standard and dwarf trees.

Provided you can take enough care, you will receive more avocado fruit at the end of the season. So, follow along with us if you want to know more about how to enhance the growth of your grace to obtain better results.

What are Dwarf Avocado Trees and How Tall Do They Grow?

As you can guess from the name, these dwarf trees do not grow much tall. There are several types of avocado dwarf trees but the most popular one is the Wurtz avocado tree.

You will find that in certain parts of California, these trees grow well in the mild winter months. These dwarf trees can produce fruits from May to October as they become mature day by day.

Compared to the standard trees that grow up to 80 feet in height, these dwarf trees cannot grow more than 10 feet.

You can easily grow these dwarf trees as a houseplant in a container. You will even get feedback from gardeners that the Wurtz avocado is the best one to grow indoors.

Wurtz avocado
Wurtz avocado

If you can provide the necessary care and take precautions, you will receive a significant number of fruits within 12 to 24 months after plantation.

So, be sure to contact any local gardener and check your local nursery or garden centers if you want to start growing avocado plants.

How to get Dwarf Avocado Trees to their maximum height?

Provide them with soil that has adequate drainage, rich with compost, and has enough air pockets. Make sure you fulfill these three criteria if you want to grow the dwarf varieties in homemade containers.

1. Always choose such a container to grow a dwarf variety that can accommodate their large root system. The dwarf avocado plants have a larger root structure than any other plants of their height.

Dwarf Avocado Trees

2. Make sure that there are enough water drainage holes at the bottom of the container. In this way, you can prevent waterlogging and root rot.

You may have already known that adding manure to the soil or potting mix for standard avocado trees is good for their growth enhancement.

q? encoding=UTF8&ASIN=B08GYFDWHF&Format= SL160 &ID=AsinImage&MarketPlace=US&ServiceVersion=20070822&WS=1&tag=gctlove 20&language=en USpotting mix

But in the case of dwarf trees, do not add manure and excess fertilizer because it will possibly make the soil too salty for the root system.

3. Water the avocado trees every day, especially during the hot summer months. You can lessen the amount of water during winter as there is less evaporation and water loss from the soil surface.

4. Provide adequate light but remember that these dwarf varieties can tolerate up to 25 degrees Fahrenheit temperature. However, you will find it convenient to grow them in locations with mild winters.

5. Provide your trees with enough shade during summer. If you fail to provide the necessary shade from bright light in time, it is possible that the branches, bark, and leaves will burn. You can also use greenhouse shade netting for the first one and half years after plantation.

q? encoding=UTF8&ASIN=B08SBP1NPM&Format= SL160 &ID=AsinImage&MarketPlace=US&ServiceVersion=20070822&WS=1&tag=gctlove 20&language=en USgreen house shed

After that, they will eventually get strong enough to take direct sunlight without requiring shade.

Factors that decide the Height of a Standard Avocado Tree:

As you start to grow avocado trees in your garden, you will eventually notice that there are significant factors that can affect the height of those trees.

If you can take good care during the juvenile period of growth, be confident that your trees will have a good height bearing an abundance of fruits.

Read about these factors carefully to understand what decides the height of your trees.

Varieties of Avocado:

Keep in mind that different varieties of avocado trees have different heights. Along with the variety, the weather and atmosphere around the trees can affect their growth. You can find a dwarf and standard varieties.

There are also differences regarding the flowering of fruits. You can easily find nursery-grown trees of standard varieties in your local garden centers.

For example, Guatemalan, Mexican, and West Indian are the prominent ones. In the case of dwarf varieties, the Wurtz avocado is the ideal one to grow as an indoor plant. They reach a height of up to 10 feet only.

Depending on the maturity rate and size of fruits, the average height of the trees will be around 30 and 40 feet and in width about 15 to 20 feet.

However, in some cases, you may find that the trees can even grow up to 80 feet in height.

Pollination:

Remember that avocados are divided into two groups based on flower types. These are A-type and B-type. The trees carrying A-type flowers shred pollen in the afternoon and become receptive to pollen during the morning.

On the other hand, the trees carrying B-type flowers work vice-versa. You may find Stewart, Mexicola and Hass, etc. which are good examples of A-type flowers.

Also, Zutano and Bacon are popular for B-type flowers. These types of avocado flowers are very popular among gardeners.

The shape of Trees:

Although you might think the shape of a tree doesn’t have anything to do with its size, it has an impact on it. If you consider an avocado tree, check its canopy.

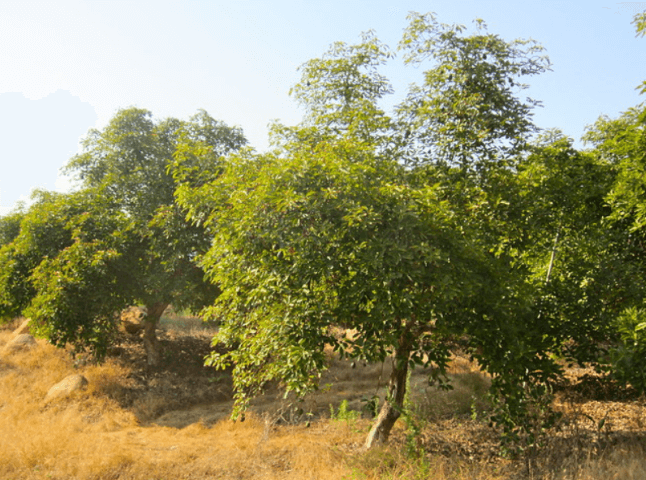
avocado tree

You will find its shape regular, symmetrical, and smooth. In this case, its branches and leaves are usually filled in the crown following a uniform fashion.

The trees will continue to grow more like a pyramid shape in the initial stage and get rounded as they become old.

Rate of Pruning:

You must not over-prune the lateral branches; it may impact negatively the growth of the tree.

Although cutting some random branches here and there might look efficient at the beginning, the trees will seriously get damaged if you cut too much.

As a result, it will require a recovery period that will slow down the growth. So, always take precautions when you prune the branches of the tree and try not to damage it.

Age of the Trees:

If your avocado trees are middle-aged or younger, they will follow a pyramid-shaped structure, and the top of the trees will become round gradually as time passes.

Growth Rate:

The trees will have a quick growth rate if your avocado trees are grown from grafted avocado plants of nurseries or gardening centers.

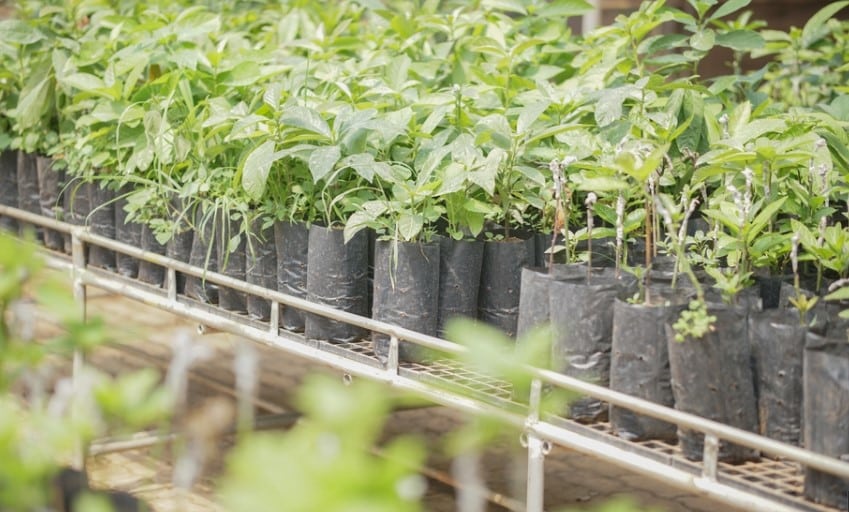
grafted avocado plants

On the other hand, if you grow trees from seed, it is a very time-consuming process that can take up to 15 years for the young plants to become mature trees.

They can grow more than two feet tall in a single season and gain maturity within 20 years.

Climate & Temperature:

Don’t let your trees get exposed to freezing temperatures. This harsh and cold climate can cause your trees to die to the ground.

Always grow avocado trees at a warmer temperature. This will allow a higher growth rate. But if you continue to grow in cold weather, it will slow down the growth process.

As a result, the trees will require a longer time to gain maturity, attain maximum height and give you fruits.

Conclusion

Avocados are considered one of the most sensitive trees to grow as a houseplant.

That is why you must take precautions and nurture them properly so that they can reach their maximum height in due time.

Only after that can you expect them to become mature and provide fruits every season. Nevertheless, don’t lose hope and always be patient while growing from an avocado seed.

We hope that all your hard work and patience will get rewarded with an abundance of wonderful fruits.

How Much Sun Does an Avocado Tree Need?

Are you concerned about “how much sun does an avocado tree need?” When I started gardening a few years ago, I was also worried about this issue.

But now as experienced enough, I can easily provide you with the answer. In this article, I’ll try to explain how much sunlight your avocado trees will need based on my practical knowledge.

On average, an avocado tree needs a minimum of 6 hours of sunlight per day. It is also recommended by researchers that keeping the surrounding temperature between 68 to 75 degrees Fahrenheit results in the best outcome.

You also need to ensure several factors for avocado plants to maintain the ideal temperature and provide adequate sunlight. This will prevent your trees from getting sunburned and slow down growth. Frequent watering, shading, applying mulches, etc. will keep the plants cool.

So, don’t leave, continue reading the rest of the article to know about these factors so that you can realize how much temperature your trees can tolerate.

How Much Sun Does an Avocado Tree Need

What is the Optimum temperature for avocado trees?

Research conducted at the University of California shows that 68 and 75 degrees are the ideal or optimum temperatures in which avocados grow best.

You must also remember that although this fruit originates in the tropics, it comes from higher soil locations or elevations where the temperature is usually cooler.

If you are fortunate enough, you can find some varieties of avocados that thrive well in heat above 75 degrees if they are watered regularly. But these varieties have problems functioning above 90 degrees Fahrenheit.

So, it is best for you to maintain the optimum temperature for any avocado varieties to ensure a constant growth that will yield expected fruits.

Some tips related to temperature and light required by avocado trees

Don’t keep your trees under direct sunlight for a longer period:

Always monitor how many hours of sunlight the trees are getting; it doesn’t matter if they’re indoor plants or outdoor ones.

If your trees are less than 3 to 5 years old or grown from avocado seed, they can easily get burns on their green leaves, stems, and tree trunk from bright light. It indicates that the chlorophylls on the leaves have died resulting in an inadequate photosynthesis process.

As a result, your plants will not be able to produce enough food for their growth. So, you will not get enough production of fruit from the trees at the end of the season.

Don’t leave the trees out in the cold:

If you find your local temperature below 50 degrees Fahrenheit, don’t leave the avocado trees outside your house.

No matter what age your tree is, spending in cold temperatures below 50 degrees Fahrenheit can become a cause of death for it.

avocado trees

In some cases, it has also been found that some sensitive varieties grown from avocado seed cannot even survive below 60 degrees Fahrenheit.

So, be sure to check if your plants are suffering on harsh winter nights or not.

Don’t abandon your trees in complete darkness:

Lack of adequate sunlight can become a similar problem for avocado trees just like receiving excessive sunlight.

Don’t keep the trees in total darkness inside your house, it will result in poor growth over the years. Always make sure that you place the trees near a window that faces the South or East direction.

Moreover, you can also arrange for supplementary lights to enhance the growth of the trees.

Tips for sunburned fruits and leaves on new trees

Avocado fruits are so sensitive that they can get sunburned on the West or South side of the tree. Observe carefully if there are any yellow spots on the fruits.

This is a prominent symptom of sunburned fruits. If you still leave them there, the fruits may get exposed further to the direct sunlight and those yellow spots may even turn black.

You can leave those fruits hanging in the trees if you don’t notice any major damage or disintegration. But make sure that they get enough shade for protection.

avocado fruit

However, if the fruits have already become ripe, you can pick them for consumption.

If you start to grow an avocado tree in the heat of the summer season, there is a possibility that the leaves will get sunburned during the initial weeks after plantation.

In addition, if your local temperature gets more than 80 to 90 degrees Fahrenheit and the tree you planted received nursery at a greenhouse before, there are chances that it will not be able to tolerate the intense sunlight of your garden.

To prevent this issue, shade your trees, especially on the west and south sides. You can remove and replace those shades from time to time to ensure adequate sunlight for them.

In addition to this, always keep in mind that the trees must be well-watered which will be very much helpful to tolerate extreme heat.

How to prevent avocado trees from getting sunburned?

Don’t leave your trees completely exposed to direct sunlight

You need to keep the avocado seed in the brightest spot of sunlight, maybe on a bright windowsill until roots form.

As they have started to become trees, you must have noticed that they are very sensitive to certain issues.

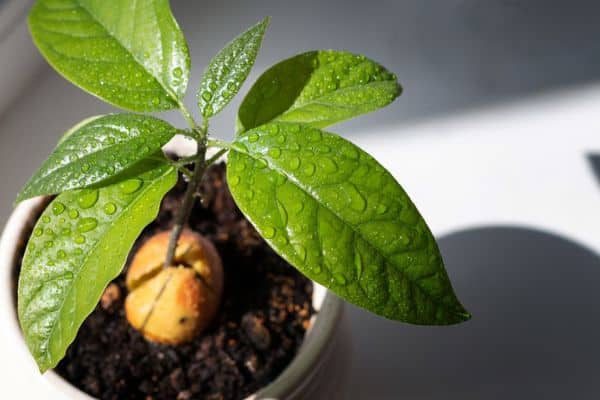
avocado plant

One of them is that their barks are light sensitive and can get easily sunburned like human skin.

If you leave the trees completely exposed and unprotected directly to sunlight for a longer period, it will result in burned leaves and branches.

Paint the exposed parts of the trees

Just like you protect your skin from direct sunlight using sunscreen, the plants need to be treated as well. In the case of avocado trees, use latex paint as sunscreen.

Most gardeners recommend a white color to use. You can mix some water with the paint to make it dilute. But make sure that the mixture has at least 50% latex paint.

q? encoding=UTF8&ASIN=B000ZOKT5W&Format= SL160 &ID=AsinImage&MarketPlace=US&ServiceVersion=20070822&WS=1&tag=gctlove 20&language=en UScolor for tree

Then use a medium-sized paintbrush and paint on the branches that have the most possibility to get exposed to direct sunlight.

After you have painted the branches with white latex sunscreen, you will notice a significant difference. If you didn’t use the paint, the branches might get burnt so badly that they can even turn totally black.

But now, the branches are more protected now and they tend to get less burned in the future.

As a result, your plants will not lose many chlorophylls, perform the photosynthesis processes better and give you an abundance of fruits during the season.

Water the trees sufficiently

You must water the root and nearby soil of the trees regularly to avoid any sunburn if the heat goes above their comfort zone.

Some trees tend to function less if the temperature goes above 75 to 80 degrees Fahrenheit. Try to add water and fertilizer to the soil maintaining a regular schedule so that you do not miss any days, especially during the hot summer.

This will keep the soil moist enough. But try to avoid overwatering, a wet soil will result in root rot.

To avoid this, make sure that there are excellent drainage holes at the bottom of the container if your plants are indoors.

Shade the Young Trees

You can use clothes for shading your trees if the temperature goes beyond 80 degrees Fahrenheit. Use clothespins to fasten them to the top of a cage.

avocado young tree under sun

If your trees are younger, then using the cloth to provide shading will be very suitable for you. Even if you leave your house for a few days, the shading will keep the plants protected from excess sunlight, thus reducing bleached leaves.

While using a cage to provide shading, make sure that you put it high enough above the trees. Because the cage is put very close to the top of the tree, the tree won’t get adequate sunlight resulting in slow growth.

You can also use a big beach umbrella if the trees are small enough to fit under it. It will be easy for you to set up and remove depending on the sunlight.

Grow Companion Plants and Use Mulch

Apply mulches near the root of the trees. Because mulches can keep the soil level comfortably cool for the roots. You can also use wood chips around the avocado trees.

q? encoding=UTF8&ASIN=B08NC53MB5&Format= SL160 &ID=AsinImage&MarketPlace=US&ServiceVersion=20070822&WS=1&tag=gctlove 20&language=en USwood chips

In addition to this, you can even grow companion or nearby plants like vines near any young avocado trees. It will reduce a significant amount of heat and increase the humidity near the surrounding of your plants.

Use sprinklers during heatwaves

As your local temperature goes over 80 to 90 degrees Fahrenheit, you can use micro-sprinklers to water for around 30 minutes under the trees. You can do it once after every 2 hours.

q? encoding=UTF8&ASIN=B091KTCZV6&Format= SL160 &ID=AsinImage&MarketPlace=US&ServiceVersion=20070822&WS=1&tag=gctlove 20&language=en USmicro-sprinklers

In addition to regular watering, this will be very helpful to raise the humidity within the canopy of the trees.

Use Hand Sprinklers

Along with micro-sprinklers and regular watering, you can also spray water on the soil by using a handheld hose.

q? encoding=UTF8&ASIN=B096VGWKD9&Format= SL160 &ID=AsinImage&MarketPlace=US&ServiceVersion=20070822&WS=1&tag=gctlove 20&language=en UShandheld hose

In this method, the trees will instantly show change and the leaves will in turn normal as a significant amount of heat is released.

It is most suitable if your local temperature goes beyond 90 degrees and you have young plants in your garden.

Final Words

So, how much sun does an avocado tree need?

Avocado trees are very temperature sensitive. If you fail to maintain the required temperature around your trees, it will cause damage over time resulting in poor outcomes.

So, make sure you water your plants regularly while providing shade.

In this way, you can protect your plants from sunburn and get an abundance of fruits at the end of the season.
Topsoil or compost for raised beds

0

Raised bed gardening is an easy option for gardeners especially when you are a beginner in gardening. But a question always bothered the gardeners what growing medium will be the best one for a raised bed?

Should you choose topsoil or compost for your raised bed?

Both topsoil and compost are good for raised beds depending on your soil condition and usage of the products. Compost is richer in nutrients on the contrary topsoil can contain the nutrients of it much longer. Thus, the soil condition can make a difference in the case of receiving benefits. 

Native soil or your usual garden soil isn’t an ideal option for your garden beds. For this, you need to use the proper medium to make it more convenient, right?

There are more things to add about using compost and topsoil that you need to know to make the right choice, so, let’s dig in deeper!

Topsoil or compost

Let’s know about topsoil

Why you will choose topsoil for your raised beds? I mean you can choose compost too, right? Well, before you decide on what to use, let’s know some more about topsoil.

What is topsoil?

Topsoil is basically filler soil and makes up the bulk of most soil mixes. It is the upper layer of the soil that is high in organic materials and nutrients.

It is formed by the slow weathering of rocks and decaying organic matter over thousands of years. Usually, the top 5 to 10 inches (13-25 cm) is considered topsoil.

Usage of topsoil

Topsoil is basically used for planting on the ground or on raised beds. It has a heavy texture that can hold moisture and water for a long period. Topsoil is regarded as a speck of dirt.

One of the popular uses of topsoil is to make a new plant bed or refurbish your garden. If you want to replenish the nutrients lacking in the plants, topsoil is a good choice. You can also get the desired depth of soil for your garden bed by using a topsoil layer on the top of the garden soil.

Besides, plants and flowers draw their nutrients from the dirt they live in and that’s why topsoil beds are best for it. Using topsoil for a bed vegetable garden is also a good choice, no doubt. The organic nutrients of topsoil will encourage your plant bed to grow and flourish thus providing a healthy medium for your plant,

Moreover, you can add sandy topsoil to the garden beds if there are water delivery issues. Sandy topsoil will help to improve the packed soil that is blocking the water to soak. You can also add some topsoil to the grassy lawn to make garden beds and start a garden from scratch.

Let’s know about compost

Okay, it’s time to know our other option compost. Compost is also beneficial for your soil. But, is it good to use in your garden beds?

Before reaching that point let’s know some basic things about compost.

What is compost?

Compost is made by decomposing organic materials into simpler organic and inorganic compounds in a process known as composting. Good compost contains beneficial nutrients and organisms.

It is basically a short-term processed product and is mostly used as a fertilizer in the soil.

Usage of compost

compost

Compost is mainly considered a fertilizer. It is used for conditioning the soil and increasing the fertility as well as nutrients of the soil. It is also used for retaining the moisture of the soil.

Besides, it is good for suppressing plant diseases and pests. It encourages the production of beneficial bacteria and fungi that help in breaking down the organic matter to create humus.

Compost helps the sandy soil retain water to hold the soil moisture as well as helps the tightly bound particles of clay or silt soil to break. Using good quality compost can ensure the spread of roots, proper water drainage, and aeration.

It also prevents soil erosion and holds the soil’s nutrients for a long time.

Which will be better for your garden beds

After knowing about the topsoil and compost now it is time to know whether you should apply topsoil or compost for your garden bed.

When you should apply topsoil?

Basically, bulk topsoil is collected from fields or building sites or you can simply buy them from any local garden center. It’s sometimes combined with organic materials for making it more nutrient-rich. Whether full of clay or sand, this soil is used for building up soil height to the desired level.

The organic matter of the topsoil stays in the soil for a long time. But when the organic matter started to decompose, the sand and clay still remained. That’s why when you start a vegetable or flower garden from scratch, it is good to choose topsoil for making deeper beds.

Besides, you can put topsoil layers on the surface as much as the layer of soil you need. You can use it too for leveling the spot where you just removed a large tree.

However, topsoil may contain weed seeds and that can damage the growth of your planted crop. So, take care of this fact.

When should you use compost?

When you want to improve the quality of your soil, it is good to choose compost.  Compost is enriched with more nutrients than topsoil. Though the organic matter decomposed very soon, the nutrients are slow-released.

It has a neutral pH level and due to its microbial activity, it can prevent disease. Besides, it has no weed seeds, so, there is no risk of weeds. Whenever you are installing sod or sowing seed, you should add compost by trilling.

However, compost is not a good option to use as a whole for planting the crop. You need to mix compost with ground soil.

Can you use both for the garden beds?

Yes, you can use both for your garden beds. Deep inside the soil, you can put the compost and on top of that, you can make the layer of topsoil. Or else, you can mix the compost with the topsoil and then make the layer of soil.

This will help to amend the soil of your garden beds, provide essential elements, and also you will have the garden beds with the desired depth.

Extra materials to add to your topsoil and compost for raised beds

The soil matters a lot for the growth of your plant in a healthy way. To ensure rich soil beds topsoil or compost is not enough. You can put some additional materials with your topsoil and compost mix or to your individual topsoil or compost layer.

Let’s talk about them.

Leaves:  Well-aged, shredded leaves are one the best additions. They add great bulk. For using them in your garden, you need to shred the leaves and wet them down for about six months to one year. After that, they will rot and you will be able to mix them in the soil.

Mineralized Soil Blend:  Minerals are one of the most important ingredients for plants. Mineralized soil blend is widely available and, typically, locally sourced. You can choose to use a Granite or Azomite blend of soil.

Worm Castings: Worm castings aka worm manure are significantly higher in all the primary nutrients your plants need to thrive. In fact, they add five times the nitrogen, seven times the phosphorus, and ten times the potassium than ordinary topsoil.

Castings add one more layer of complexity to the overall soil makeup. It is great for making high-quality garden soil.

Mushroom Compost:  This dark brown, pliable organic material is a byproduct of ingredients in which mushrooms grow. Mushrooms are grown in mixtures of natural materials and by the time that materials get composted, bagged, and sold as mushroom compost; it’s light and crumbly.

It contains about 3% nitrogen and potassium, a bit of phosphorus, and other bonus elements, like magnesium and calcium. Since it’s a neutral pH (6.5-7.0), it won’t have an impact on your soil pH.

Ground Bark:  Ground bark is a good carbon source. It will break down over time, and its coarse texture provides space for the movement of water and oxygen through your garden beds. Ground bark brings a diversity of particle sizes that can really amp up your plant health.

Use shredded bark instead of fresh wood chips.

Composted Cow or Poultry Manure:  Composted manures added to today’s garden soil can contain synthetic herbicides that are still active, even in well-composted manure. For that reason, use cow or poultry manure but not horse manure. Horse manure can be a killer compost in your compost pile.

Peat Moss:   Peat moss is not a sustainable material. It takes hundreds of years for peat to develop in peat bogs. However, it can aid water retention, but once peat moss dries out, it is difficult to re-hydrate.

Some additional materials worth consideration as additives:

Biochar: Biochar does have some nutrient value. It’s a pure carbon source that doesn’t break down, but it does help make existing soil nutrients available to plants.

Fire Ash: If your fire ash is all wood-based, it can be a good addition to your compost pile. Don’t use charcoal fire ash, as that may not be good for your organic garden soil.

So, you can add the above-mentioned additional to your raised beds

Final words for you

As you can see that both topsoil and compost can work for making your flower or vegetable garden beds, you can choose them based on your soil texture and condition.

If you want to increase the soil level and you have higher soil quality, you can choose bulk topsoil. If you have clay soils, then you can use sandy topsoil and in the case of sandy soils, it is vice versa.

If your soil surface lack nutrients then you can mix bulk compost with your native soil or topsoil. There are many sources of compost you can use, cow manure, kitchen scraps, grass clippings, and so on.

Or you can use a bed soil mix that contains both topsoil and bulk of compost. The choice is yours.

But make sure your plants and plant roots get enough plant food. Hope this article helps you understand which one is the best, topsoil or compost for raised beds. Happy gardening!

Learn How to Care for a Snake Plant

0

If the weather is warm and the soil is free of over-moisture, snake plants will grow anywhere and literally everywhere. It doesn’t take much to understand how to care for a snake plant properly. For the most part, they are very sturdy, and if they can be cared a little for, they’ll grow big and beautiful in no time.

We’ll talk about how to take care of snake plants and the other relevant stuff you should know if you ever decide to keep these long-leaf plants. Surely, they’re a beauty and will be a charmer in your house.

How to Care for a Snake Plant

Before Buying a Plant

Before you get your sansevieria, aka snake plant, there are a few things you should have in mind. Let’s talk you through those.

Plant Choosing

Although sansevieria plants are hardy and will try to live even if you give them nearly zero care, they will die if they don’t get the minimal nutrition they need to survive.

Similarly, not all plants in your plant shop will be in good condition. Avoid buying ones that have lesser dark-colored leaves. They’re dying plants.

Look for dark, deep-colored leaves. It’s a sign that the plant is getting enough nutrients and water it needs. Buying a pale-leaved plant or a plant with stuttered growth won’t be a good idea. It’ll die quickly.

Planting Pot and Water Drainage System

Snake plants are a type of succulent plant like cactus. Succulent basically means a type of plant family with thick leaves and can retain water for a long time.

You’ll find succulents in extremely dry areas, including deserts. However, they can be found in warm, humid, and well-watered regions as well.

Sansevieria is native to South Africa. Since the weather and soil condition is similar in some parts of the United States, these now growing rapidly in the humid areas across the country.

One of the major factors that decide whether a snake plant will flourish or wither is the water drainage system. This plant will retain water for several days once water and rewatering while the soil is still wet, or overwatering can decompose the root.

Try to get a pot with several holes in the bottom. Some people like to get a terra cotta or soil-based pot for planting these because these pots can help in easier water evaporation through the thousands of microscopic holes around its body.

q? encoding=UTF8&ASIN=B07T5ZRMFQ&Format= SL160 &ID=AsinImage&MarketPlace=US&ServiceVersion=20070822&WS=1&tag=gctlove 20&language=en USpot with several holes

Having holes to flush out excess water will help keep this plant alive, save its root and let the root get a solid foundation in the soil to have a strong base as the leaves grow large and heavy.

Potting Base

If possible, don’t use plain soil to fill the pot up since sansevieria has different water requirements than most plants.

You can purchase any succulent or cactus potting mix for use as a base with your snake plant. These mixtures help drain the water easily and keep the soil free of excess dampness, which is necessary.

q? encoding=UTF8&ASIN=B08DHDLRYN&Format= SL160 &ID=AsinImage&MarketPlace=US&ServiceVersion=20070822&WS=1&tag=gctlove 20&language=en UScactus potting mix

The pot mixture level should be shallow. Don’t fill the base high so that it covers much more area than the root.

The deeper the soil, the higher the chances of the root getting damaged from stuck water.

How to Care for a Snake Plant

We’ve talked about what you should look for before getting a snake plant. Now let’s discuss how to take care of this plant.

Watering

Succulents have thick leaves and roots; which help to store water for the plant’s survival. This is basically because of where the succulents are native.

As we have said before, succulents grow mainly in dry areas where there’s hardly a good water source. There isn’t ample rain and any proper reservoir to get enough water on a regular basis for the plants.

Therefore, having thick, meaty leaves and roots help the plants to store water for some time before there is another rain or a water source is available.

Once you water your snake plant, give it some break before another watering session. Overwatering will only harm your plant and likely kill it.

watering snake plant

Understanding when it’s time to rewater isn’t complicated at all. There are a few methods. The first and easiest way is to check the stem connected to the root of the plant. If the stem seems saturated with water, then wait a few more days before watering again.

Another simple yet effective way is to use a pencil to check the wetness in the soil. Take a pencil and push it through the soil a few inches deep. Then take the pencil out, and if it seems wet, then it’s a sign that there’s still enough moisture in the soil. It’s time to wait for a few more days.

There’s a misconception that snake plants and other succulents should be watered regularly as soon as the previous water is cleared in the pot. But this is wrong. These plants are designed to stay hydrated for some time and then dry for some time.

The main idea is to let the soil get tried in between the watering sessions for the best results.

Lighting

Snake plants can live in all different lighting conditions. In the wild, these plants grow in both sunny as well as dry, damp areas. They’re accustomed to handling a range of lighting and will survive in all conditions.

However, surviving and flourishing aren’t the same, and if you want to get your plant in the best condition, proper lighting management is necessary.

Try to keep your plant beside a window or anywhere where there’s enough indirect sunlight. Direct sunlight won’t kill a sansevieria but may damage its leaves’ coloration and natural texture. Better to avoid positioning the plant directly in front of sunlight.

snake plant

However, if you’ve been keeping your plant in a shady area and want to change the position to a well-lit area, you should keep in mind two things.

First of all, the change in lighting means a change in the average heat level too. Higher heat will dry off water sooner, so you should adjust the watering interval accordingly.

Another thing is the adaptation of the plant. Sudden lighting changes can put your plant under stress and should be avoided. Try to change its position slowly so that it has some time to adjust its internal mechanism to cope with the change.

A drastic change is better to avoid increasing the lifespan of the plant.

Leaf Cleaning

A common misconception is that snake plant’s leaves should be misted to keep them free from dirt. This is not right.

You can clean the dirt off of the leaves with a cloth, or even if you decide to mist them, clean the leaves dry with a dry cloth.

Don’t let excess water stay on the leaves, or they can get over-soaked and grow fungus.

Final Words

Now you’ve got some ideas on how to care for a snake plant and what to look for before planting one.

If you can maintain the fundamental necessities of your sansevieria and avoid overwatering it, this plant can last for years without breaking a sweat.

How Long Does It Take for Avocado Tree to Grow?

Are you worried about how long your avocado trees may take to grow fully? In fact, when I started to grow my own avocados as beautiful houseplants, I was also concerned about this issue. Along with this, I also got worried about when my plants will start to give me fruits. So, don’t worry, I will try to provide you information based on my knowledge and practical experiences. If you have grown an avocado plant from a seed, it might take 5 to 13 years to become a mature tree that can give fruits. On the other hand, if you plant a grafted plant bought from a nursery or garden center, you can expect it to become a fully mature and fruit-bearing tree in 3 to 5 years. You might notice that as the trees start flowering, they tend to fall without giving you fruits. This is quite natural at the initial stage. You must be patient and optimistic to grow fruit from an avocado plant. In addition to this, you must take care of many factors that can affect and reduce the time taken by the trees to bear fruits. So, don’t leave us just yet, follow the rest of this comprehensive guide to know about these factors and grow your avocado fruits in the quickest possible time.
grown avocado tree on sunlight
The Millennial Gardener / YouTube

How Long Does It Take for An Avocado Seed to Germinate?

If you are to grow an avocado seedling and given the right conditions, it would grow into a tree. But there is a question that can often strike your mind. That is, how long would an avocado seed take to germinate? In fact, some people say the time is between 2 and 4 weeks while some say it can take up to 8 weeks. It depends on three factors that can affect the germination period of an avocado seed. These factors are water, heat, and oxygen. As you can grow them in all seasons, you also need to take the humidity and temperature into consideration.

Why do Avocado Trees Grow from Seed Take so Long to Bear Fruits?

You can use the leftover seed to grow young plants and then eventually bigger trees from them. But remember, growing an avocado tree from a seed is extremely long, tedious and might seem like an unproductive process. You are most likely to succeed in the germination process of the seed. You can easily get the first few leaves and root system developed from the seed. However, you may have to wait up to 15 years until you can harvest your own fruits from the tree. This happens because the avocado trees have a longer juvenile phase. The juvenile phase is the time during the development process of trees where flowering does not occur. The trees need longer time to develop and grow fruits before they can reproduce. If you ever notice a mature avocado tree, you will easily see how large the tree trunk and canopy is. To develop these parts of the tree properly, a lot of carbon is synthesized during the photosynthesis process. This carbon is used to grow and develop the larger parts of the trees during the juvenile phase. As you notice that the tree has fully grown and matured, it will start flowering and grow ripe fruits as well. Therefore, your trees will take the longest time during the juvenile growth phase. However, if you can manage to take preventative measures against diseases and take care of the plants properly during these years, you can expect wonderful fruits from your plants at the end of the phase.

Factors that Affect Growth of Avocado Tree

1. Initial Propagation

You can grow an avocado tree by suspending the seed over a container full of water. But remember, growing trees in this way can take from 7 up to 15 years to produce fruit. On the other hand, the grafted trees take two or three years. If you want to have fruits in the fastest possible time, then you must buy grafted trees from nursery. However, if you are passionate and patient enough, grow trees from seed inside your house. They can easily become a part of your daily life.

2. Suitable climates

Grow avocados in high rainfall areas, you can grow them near the coast. Be cautious so that the area is not too cold, otherwise, the fruits will take longer to ripen. On the other hand, too hot or dry conditions can cause the fruits and flowers to drop which will result in lower yields. In addition, the cultivars need enough irrigation wire rainfall that occurs less than 1000 mm per year.

Growing requirements

  • Maintain a distance of at least 7 meters with one another while planting trees. In this way, there will be less competition related to nutrition and water. Also, the plant will receive direct sunlight and air circulation.
  • The trees have a sensitive root system. If they are overwatered there is a chance of root rot. So, it is very essential for you to make sure that the soil has enough drainage holes.
  • Plant your trees in a sunny area that has adequate shelter from the wind. The soil should be well composted. After the trees have become well established and mature sized, you can give fertilizers slowly. It is best to apply then in July, December, and April. Be careful so that the fertilizers and mulches are applied maintaining a distance from the stem of the tree. Otherwise, excess inches of mulch down the soil level can damage the root structure.

How to get an avocado tree to bear fruit?

As you start to grow trees on your own, you will eventually notice that they are very sensitive about certain factors. If you can take precautions about this, your trees will certainly bear fruit and give more than the expected outcome at the end of the season.
  1. Choose Soil Carefully: The trees grow well in coarse and sandy soil. But make sure that the soil is not too sandy. There should be enough soil moist and nutrition for the roots. In most cases, the level of pH is not an important issue for the growth of the tree. Just avoid sandy soils that have a higher level of salinity. Also, your soil should contain an adequate amount of minerals, especially iron.
  2. Water Regularly: You have already known that overwatering and a poor drainage system can cause damage to your trees, especially the root system. Be sure to water the soil until water runs out of the drainage holes. Frequent watering will keep it wet enough. Check your soil with your hands to ensure that they don’t make a crumble. If you have a good number of avocado plants in your field, watering trees with around 20 gallons of water during the irrigation season will keep the soil moisture intact.
  3. Prune Timely: Sometimes you can cut out the terminal birds of the branches for better growth. Trim them occasionally to keep a good size and shape. Don’t ruin the structure by over pruning, it can further cause delay in the production of fruits.
  4. Select Better Location: Place your trees under the sun. Ensure that they receive enough bright light and shade from time to time. Avoid planting closely to one another in your house or garden. Maintain 7 meters between two trees. In addition, make sure that your plants are not vulnerable to heavy winds that can damage the growth of initial buds.
  5. Check Temperature: Your plants will stay better in warm temperatures. Maintain a temperature between 70 to 100 degrees near the plants. If it drops down or crosses this limit, it can damage the plant that will yield you less production.
  6. Apply Fertilizers Cautiously: During the first three years of plantation, you should fertilize the trees to boost up the growth of the plant. You can fertilizer them six times per year. Use a minimum of 1.5 lbs fertilizer per application. Eventually, you will use up to 20 lbs of fertilizers in 5 or 6 years. Nitrogen rich food will keep up their growth along with better fruit size.You can also mix boron, zinc, manganese, molybdenum, etc. to spray around your plants. Do this regularly between the intervals of April to August.
  7. Allow Pollination: To successfully produce fruits from avocado pits, at least two trees need to pollinate between each other. You need to keep the avocado trees at warmer temperatures, it may affect pollination process in some cases.You will find that the trees bloom two varieties of avocado flowers depending on the flowering pattern: A-type and B-type. Surely you are to get a better outcome if you can manage to plant these types of avocado trees containing both types of flowers. As they are open to pollination, your avocado fruit production rate will be much higher after pollination.
Therefore, always allow pollination in your garden and remember that the higher the kinds of flowers and plants, the better will be the pollination and it will eventually result in an abundance of fruits.

Conclusion:

Avocado trees can be quite sensitive to some environmental factors. Also, you need to take care in their juvenile period, otherwise they will not have enough growth. Always be patient while growing avocado from seed. You can also contact your garden center or grocery store avocado sellers to get grafted young plants. As you manage to pull off a successful growth, be confident that you will receive an abundance of fruits.