Home Blog Page 5

How to Save A Dying Avocado Tree?

Are you concerned about saving your avocado trees from death? Nobody wants to let go of their trees after dedicating hard work to them. Back when I started my first avocado gardening, I lost quite a few trees. But over the years, I have gained more practical knowledge related to this issue.

Now I am a successful avocado gardener, and I know how to treat my trees properly. Hopefully, by the end of this article, you will get your answer about how to save a dying avocado tree.

First, you need to look for any symptoms that show your avocado trees are seriously damaged or diseased. Note down all those signs and make a blueprint to work on them. Apply gypsum and mulches, use fertilizer in the right proportion, and ensure proper drainage for your trees. Use fungicide as a last resort.

Continue to read the rest of the article to know more about how to save your avocado trees from death.

How to Save A Dying Avocado Tree

How Do I Know if My Avocado Tree is Dying?

Continue to check daily if your trees show any signs and symptoms that indicate they are damaged. Generally, you can get an overview of your tree’s health just by looking at the leaves. Please go through the following symptoms carefully.

  • The leaves of the avocado trees are falling off while getting brownish.
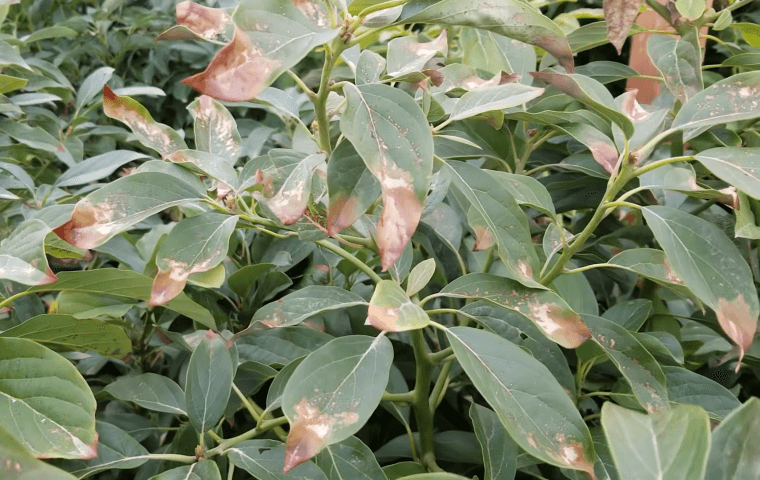
  • The upper part of the canopy has small and pale green leaves with brown tips. Moreover, they tend to fall off easily.
  • If new avocado tree shoots grow, they easily turn brown and get off from the tips. Thus, the bare branches are only left after this happens.

Try to remember these symptoms of avocado trees, it will help you a lot to detect any damaged or dying trees. If you find any of them in your trees, you need to take quick action to save them from dying.

How Do I Save My Avocado Trees from Dying?

1. Take notes and consult the professionals

As soon as you notice any symptoms on your trees, your first task is to take notes of all of them. This will help you a lot to plan a step-by-step solution.

After identifying the problems, decide if you think you handle this on your own. Otherwise, seek out the professionals of your local gardening center.

Moreover, if you manage to find any specialists, consult them. You can also talk with avocado farmers nearby. They will further aid you to find suitable solutions related to your issues.

2. Give Protection from Excess Sunburn

Check your avocado trees daily to find out if any of the avocado leaves and branches have turned black or brownish. If you notice any black spots, it may be the result of excess sunburn.

This will eventually damage the chlorophyll of the leaves, slow down the fruit production rate and gradually lead the tree to death.

To fix this issue, you need to provide shade to your trees depending on the brightness of the sunshine. You can use cloth and apply white latex paint on the branches to protect them from Sunburn.

To get detailed information about this issue, read the article titled “How Much Sun Does an Avocado Tree Need on our website.

3. Apply gypsum to prevent fungal diseases

Check your avocado trees daily to find out if any of the avocado leaves and branches have turned black or brownish. If you notice any black spots, it may be the result of excess sunburn.

This will eventually damage the chlorophyll of the leaves, slow down the fruit production rate and gradually lead the tree to death.

avocado-tree-brown

To fix this issue, you need to provide shade to your trees depending on the brightness of the sunshine. You can use cloth and apply white latex paint on the branches to protect them from Sunburn.

4. Use wood mulch to promote growth

Spread wood mulch around the base of your avocado trees. Covering up your trees’ base like that will help them to get a boost in growth and help to recover from diseases. The mulches prevent any formation of bacteria or fungal infection.

q? encoding=UTF8&ASIN=B08NC53MB5&Format= SL160 &ID=AsinImage&MarketPlace=US&ServiceVersion=20070822&WS=1&tag=gctlove 20&language=en USmulch

It will also help to keep the soil moisture intact. Make sure that the root area near the base is covered up properly.

5. Never overwater the trees

If you accidentally overwater any of your trees, it can easily lead to tree root rot. Before starting to rot, it will develop fungal and bacterial infections near the base.

As you continue to overwater, the fungal disease will get encouraged more and more leading to avocado root rot.

To prevent this issue, always keep track of your irrigation timing. The fungal spores hate dryer conditions. Make a regular schedule so that you don’t overwater or underwater any of your avocado plants.

As a result, the avocado tree root structure will get the perfect soil moisture it needs.

6. Check for excess water minerals

If your irrigation water has excess minerals in it like boron and chlorine, it can promote the growth of bacteria and fungus. It can also occur if you live near a sea or water source that has saltwater.

Check for any sign of salt accumulation. Try to identify this as soon as possible before your plants start to die.

Try to use rainwater for irrigation if you don’t want to face such issues. If no rainwater is available, make sure that you irrigate fresh water at the base of your trees. Even after your efforts, there can be many reasons why the trees are not getting better.

In this case, take a sample of the soil and irrigation water, and go to your nearby gardening center for testing. The professionals will test those and even provide you with feasible solutions.

7. Ensure adequate drainage

Leaving your trees standing on excess water near the base will make the soil soggy. And if the soil gets more wet day by day, the roots will start to rot being soaked in water. This happens due to the poor drainage system.

To ensure proper drainage around the root structure, you can dig drainage channels around it. You can make the soil loose around the roots to promote adequate drainage. Try to plant your avocado trees on sloping land. Moreover, you can also use pipes for channeling.

For avocado houseplants, always keep them in a container that has enough drainage holes at the bottom.

q? encoding=UTF8&ASIN=B071V7W61G&Format= SL160 &ID=AsinImage&MarketPlace=US&ServiceVersion=20070822&WS=1&tag=gctlove 20&language=en UScontainer

If you can execute this properly, the drainage structure will become more effective and there will be no fungal infection in the roots.

8. Use fertilizers in the right proportion

You have already learned that avocado trees are very sensitive to certain issues. One of them is the proper use of fertilizers. Your avocado trees must get the correct mix of nutrients. If the right balance of nitrogen is not available in the soil, it can promote the growth of pathogens.

Moreover, it will damage the overall health day by day and slow down the growth process.

Therefore, you must provide avocado fertilizer in the correct proportion. If you fail to determine this by yourself, consult a fellow gardener.

q? encoding=UTF8&ASIN=B07FBV717K&Format= SL160 &ID=AsinImage&MarketPlace=US&ServiceVersion=20070822&WS=1&tag=gctlove 20&language=en USfertilizer

You can also take a sample of your soil to the local garden center to test and determine which nutrients are missing.

In addition to maintaining the right proportion, make sure that the fertilizer quality is high. To get more information, read the article titled “When to Fertilize Avocado Tree” on this website.

9. Use fungicides as your last resort

Even after you have tried your best to revive your dying avocado tree, things may go wrong. In this case, if you want to apply multiple treatments at a single time, buy some good-quality fungicide.

But make sure to consult with a specialist to know about the correct application of fungicide.

If done properly, it will help the trees to recover and promote growth by eliminating harmful pathogens.

Final Words

Saving avocado trees from death is not an easy task, so work hard to accomplish this. Remember, preventing such issues earlier will keep your plants healthy and stop any fungal disease from spreading.

So, stay dedicated, and hopefully, your trees will recover soon to provide you with delicious fruits in all seasons, summer, winter, and spring.

Why is My Avocado Tree Leaves Turning Brown?

Are you worried about your avocado leaves turning brown? Just a few years ago, I faced the same problem when I started to grow avocado trees in my garden. But over the years, I have learned enough practical knowledge to provide you with an elaborate answer. So, I hope that after reading this article, you will find a suitable solution to your problem.

The prominent reason for leaf browning is excessive salt accumulation. That happens due to excess chloride in your irrigation water. In addition, anthracnose disease, root rot, mineral deficiency, inadequate irrigation, etc. can turn avocado leaves brown gradually.

To prevent all these issues, you need to leach out your avocado trees. Approach any of the two leaching methods mentioned below. In addition, check your soil and irrigation water carefully to prevent any harmful pathogen from harming your trees. Continue reading the rest of the article to get detailed information about this.

dyeing avocado tree leaves turning brown FI
Shamus O’Leary / YouTube

Five Reasons for Avocado Leaves to Turn Brown

You will find five significant reasons other than bright sunshine responsible for your avocado leaves to turn brown. Read about these five issues carefully and find out which one matches the condition of your trees.

1. Excess Accumulation of Salt

If you live in a region near to a sea or a river that is the source of salty water, there is a chance that your irrigation water for avocado trees will have excess chloride in it. For Southern California of the United States, you will find that most of their water comes from the Colorado River. This may create an issue of salt accumulation.

If you don’t notice in time, this will result in significant damage to your trees. As symptoms, it will appear as burned leaf tips causing an early fruit and leaf drop due to salt accumulation at leaf edges. In addition to your irrigation, shallow watering, improper fertilizer application, soil moisture deficiency, etc. may cause salt accumulation in your avocado leaves.

To put an end to this issue, you need to leach out the excess salt from the root. In this case, you can try watering your trees as close to the soil surface as possible. Most people repeat this process after every 3 or 4 weeks.

2. Inadequate Irrigation

It is very crucial for you to remember that your avocado trees can get brown-tipped leaves during the fall season if they receive inadequate soil moisture. Your tree can only take a certain amount of chloride, any overconsumption or less consumption is both bad for its health. This can also happen if the area you live in gets less rainfall. To prevent this issue, always make sure that the water you use for irrigation has enough nutrients especially minerals. So, check carefully for brown leaves and keep track of your irrigation daily.

3. Anthracnose Disease of Avocado

Notice if your avocado trees have leaves that have turned yellowish. If you don’t check daily, the leaves may get tip burn and later turn brown. This disease in particular is known as avocado anthracnose. It is caused by the fungus known as Colletotrichum gloeosporioides.

If you continue splashing water to the canopy after this, the fungal spores will spread more. As a result, it will cause infection to the fruits and twigs too. You may even notice lesions on the shoots and fruits, fruit drop, fruit decay, etc. which will ruin your trees’ overall health.

To prevent this problem, you need to perform pruning once in a while to remove any damaged part of the tree. Try not to prune in cold weather, this may lead to stunting and slow down the growth process. To know more about the pruning process, read the article titled “How to prune an avocado tree on our website.

4. Deficiency of Iron

Check properly if your soils are alkaline or not. If you are not sure about this, consult a soil specialist or take a sample of your soil to the local garden center. If there is alkaline soil near your trees, it may result in iron deficiency. You will notice the symptoms like tip burn, yellowing of veins, leaf drop, etc. Make sure your soil is not too alkaline. Never encourage poor soil drainage at the base of your trees, it may also result in iron deficiency.

5. Root Rot due to Pathogen Attack

Notice the canopy of your trees carefully. If you find your leaves to be pale, wilted, and have brown tips, there is a chance that your trees are suffering from avocado root rot. In general, it is caused by the Phytophthora cinnamomi algae. It is a soil-borne water mold and one of the worst plant pathogens.

If your avocado trees are affected by this pathogen, they will face slow growth, resulting in smaller canopy and fruits. It may also have significantly smaller roots that are unable to provide enough nutrition to the upper portion of the tree. As a preventive measure, apply enough fungicide to your trees so that the growth of pathogens does not continue near the roots. Make sure you plant those trees on a well-drained site. In addition, take care so that the soil at the base of the tree is not soggy.

Why Does Browning Occur on Indoor Avocado Leaves?

Even after you work so hard on your indoor avocado plants, sometimes the avocado leaves will turn brown due to dry air which has fewer water molecules. During the summer season, your indoor humidity usually falls. And if that air becomes very dry, evapotranspiration occurs i.e. the leaf cells start to lose water more and more. The small and thin leaves of your plants tend to lose more water particles as a result. Slowly, their cells start to die and that initiates leaf browning.

To put an end to this problem, you must increase the humidity near your trees if you feel the air is too dry. If you love your plants so much, then you should buy a humidifier as soon as possible. Using that, try to keep the humidity level in the range of 45% to 55% nearby your plants. This will keep your young leaves enriched with water molecules. Therefore, your plants will stay healthier, and the leaves will stay greener in all seasons, summer, winter, and spring.
Leach Out your Avocado Trees to Prevent Browning

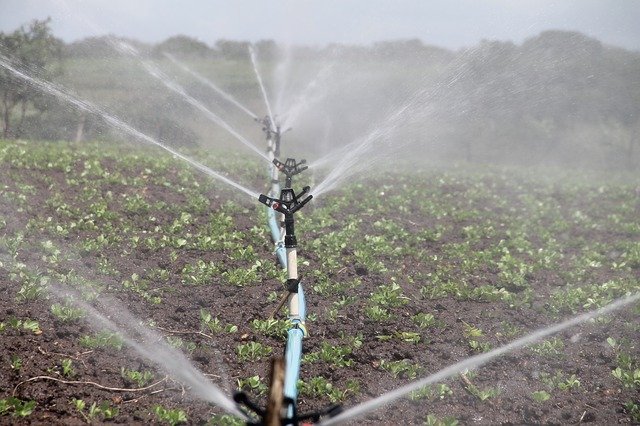
You will find two widely known methods for leaching. One is to use micro-sprinklers and the other one is to add “leaching fraction”. Most farmers apply the first method for better results. But if you ask your fellow gardeners, most of them will talk about the second method if they do not have micro-sprinklers in their garden.

If you have micro-sprinklers available in your garden, use them to run water to the base of the trees for up to 24 hours. Continue to do this once a month for July, August, and September. If your trees are older and more mature, then this method of leaching will be more suitable than the second one.

The other method that you can apply is the addition of “leaching fraction” to your trees. Here, you do not have to use any micro-sprinklers or run continuous water for 24 hours. All you need to do is add a little extra water portion each time you irrigate. But note that this extra portion should be no more than 20 percent of the regular irrigation. You will find this method very useful if your trees are younger.

Final words

Avocado leaves show a variety of symptoms to certain diseases and changes, as it is one of the most sensitive gardening fruit plants. As a good gardener, it is your responsibility to check your plant condition daily to know about its overall health. If you manage to spot leaf browning earlier, you will be able to treat this condition before your plants die or develop fungal diseases. So, irrigate your trees with enough nutrients and take preventive measures before anything goes wrong. Consult a soil specialist and keep in touch with your fellow gardeners for more experience.

How to Prune an Avocado Tree

Are you an avocado gardener and concerned about how to prune your trees? Although it may seem a little tough in the beginning, don’t worry.

Gaining some practical knowledge and experience over time, you can prune your trees like a professional gardener. In this article, I’ll share with you what I have learned over the years about how to prune an avocado tree.

How to Prune an Avocado Tree
The Millennial Gardener / YouTube

First, you need to select the proper tools to start the pruning procedure. Then utilize these tools to approach a variety of pruning methods to reshape your trees.

In addition, you must consider the ideal timing, extensive sanitization, and preventive measures for a better outcome. Continue to read the rest of this article to know more about this.

Select the Best Tools Related to Pruning

1. Hand Pruners

Get yourself some good hand pruners. It will come in handy for branches that are less than 2.5 cm or one inch in diameter.

q? encoding=UTF8&ASIN=B00CWF7YBE&Format= SL160 &ID=AsinImage&MarketPlace=US&ServiceVersion=20070822&WS=1&tag=gctlove 20&language=en USHand Pruners

If any unwanted smaller branches grow in the canopy, it will become a barrier for the tree to let through the sunshine.

So, the earlier you cut them, the better it will be for the trees. These kinds of tools are comparatively smaller and will perfectly fit your hands while pruning. You will find them vital for removing or trimming any small branches in the canopy of the tree.

You can also buy specialty hand pruners online or from the market. They are specially made with rounded tips so that you do not damage any fruits while pruning.

2. Protective Gloves and Sun Hat

You may need to stay out in the sun for a longer period while pruning. In this case, by yourself long-sleeved casual clothes that can be washed easily if they get dirty.

q? encoding=UTF8&ASIN=B089KV2LVK&Format= SL160 &ID=AsinImage&MarketPlace=US&ServiceVersion=20070822&WS=1&tag=gctlove 20&language=en USProtective Gloves

In addition, use a visor or sun hat to protect your skin from sunburn. You can also wear gloves to protect your hand from getting bruises while pruning.

3. Strong Ladder

For easy access to the canopy of the trees, you may consider taking a strong ladder with you. If the ladder is made from steel, it will be strong enough and last long. For extra precaution, you can take help from someone who will hold the ladder for you.

It will help you stabilize as you trim the branches. I recommend you buy an extendable steel ladder that will help you to reach the top of the tree.

q? encoding=UTF8&ASIN=B07XYWKP83&Format= SL160 &ID=AsinImage&MarketPlace=US&ServiceVersion=20070822&WS=1&tag=gctlove 20&language=en USsteel ladder

Because the canopy of the tree gets so congested sometimes, it may become hard for you to reach the top.

In this case, just extend your ladder if you can to finish pruning the upper part of the tree.

4. Hedge Shears and Loppers

Buy Hedge Shears for trimming the excess leaves on the trees. You can also use loppers to cut branches thicker than 2.5 are 1 inch. You can find wooden hedge shears available on the market.

The loppers will help you a lot in removing any large branches acting as a barrier at the base. While making any major cuts, try to keep them within the line of the tree trunk’s contour.

5. Sharpening tools

Don’t overuse these tools, otherwise, they may become damaged or dull. Keep sharpening them often, this will come in handy while pruning.

Clean your tools before pruning:

pruning

The pruning tools you use, for example, loppers and hand pruners may contain fungus and bacteria. So, if you don’t clean them before pruning, your trees might get affected.

Also, you need to clean the tools between each pruning, because you don’t want a healthy tree to get infected by another tree.

To avoid any infection, spray all your tools with disinfectant. Take a spray bottle and fill it up with disinfectant spray. You can use rubbing alcohol or diluted bleach here.

Carry this bottle with you and don’t forget to clean your tools as you move from one tree to another.

Know the correct time for pruning

To prevent shock, you should do major pruning only during early summer or spring. The ideal time for pruning is the initial weeks of summer and spring. You can prune back the branches in spring to promote an overall regrowth of the trees.

In most cases, summertime pruning enhances the capacity for regrowth. As a result, the trees can grow taller and wider.

I recommend you to prune heavily only in warmer temperatures, especially in summer. Because if you cut back excessively during the heavy winter weather or fall season, the avocado trees may get exposed to frost and cold temperatures.

This will further slow down the fruit growth process and even damage the tree. Overall, try to do light pruning throughout the year.

Approach different methods to prune your avocado trees

pruning avocado trees

Trim the canopy where necessary:

As your avocado tree grows faster, it will have a wide and thick canopy of leaves, which will eventually stay hung at the bottom of the branches. In this case, you need to thin out or cut back a smaller portion of the canopy so that the branches at the bottom receive adequate sunlight.

You can cut in such a way that the tree becomes pyramidal or conical. But make sure that you do not clear excess portions because it will expose the tree to direct sunlight that may lead to sunburn.

If you can execute this process properly, this will clear out space in the canopy and create windows for better air ventilation.

Try reshaping the trees:

If you notice that your trees are becoming too wide, you may need to reshape them. Use your loppers to cut off excess side branches. Try to focus on the smaller ones and prune them on each side.

Maintaining a conical shape will provide you with the best sun exposure. Do not prune too much or you may end up damaging the tree which will slow down the fruit growth.

Also, watch out if the branches start to tangle with one another resulting in a blockage of irrigation and mowing.

Trim the extra branches at the top:

As you plant a new avocado tree, you will notice that it doesn’t have a solid root system yet to support any extra height. In this case, utilize your loppers and trim the top branches of your trees to control their height.

The procedure may even take up to 4 years to finalize. But try to do it slowly, a maximum of one branch each summer. If done correctly, you will reduce a significant amount of stress from the tree.

Cut off the dead branches:

Cut off the dead branches

Check the trees properly and find out if there are any dead branches. If you keep them like that, they will do no good. So, take out your loppers and pruners to cut them off.

Make sure to clear the portion above the tree trunk. But be careful that sometimes minor frost damage can make a branch look like a dead one. Therefore, inspect properly before cutting off any branches.

If you can execute in the right way, your trees will grow more healthy branches, resulting in growth promotion.

Trim the water shoots causing imbalance:

Sometimes you will notice that thick and leafy water shoots grow before avocado flowers start to show up in the spring. These shoots grow in the bark vertically. If you do not remove them, they can cause an imbalance in the trees.

So, before the flowering starts, take your hand pruners and trim these leafy shoots. In this way, you can keep the trees healthier by controlling their lateral growth.

Repair broken branches by cutting off:

If you experience any strong wind or storm recently, make sure to check your trees to find any broken branches. These broken branches will do no good to the overall health of the tree.

So, you need to start removing them as soon as you spot them. Take your hand pruners and loppers and cut off any broken branches from their base.

q? encoding=UTF8&ASIN=B000PKFJIS&Format= SL160 &ID=AsinImage&MarketPlace=US&ServiceVersion=20070822&WS=1&tag=gctlove 20&language=en USloppers

If you keep doing this from time to time, the tree will get more chances to recover after a disaster and get a boost for its overall growth.

Cut off any overgrowth of wild branches:

Check properly if there is any excess growth of lateral branches that can be a barrier for the trees to stand vertically. Also, spot the wild growth of branches that may become a problem in the future.

In these cases, use your loppers and trimmers to trim them or completely cut them off while they are still small. Do not wait too long or they may become big and difficult for you to cut.

So, trim them off from the top and lower portions in time and you will remove a significant amount of stress from your trees.

Consider these precautions before pruning

Consider these precautions before pruning

Do not over-prune your avocado trees. Just because you want to relieve your trees by removing stress does not mean you need to do heavy pruning.

In most cases, over-pruning will cause your fruit trees to get damaged and that will take a longer period for recovery. It can even lead to stunt, fruit loss, sun damage, excess leaf growth on horizontal branches, and frost injury.

Consider the season and surrounding atmosphere carefully before heavy pruning.

Wash your hands and tools with disinfectants properly before pruning. This will prevent any infections, bacteria, or germs from spreading from one tree to another.

Do not panic if your avocado fruit production is less during the pruning season. It is quite natural, and you do not need to do anything about it.

While the pruning season gives you less output, you will surely receive a higher number of fruits in the next season.

Final Words

Avocados are very sensitive to pruning. Make sure to take preventive measures before you start pruning avocado trees. If you need any help, contact your nearby fellow gardeners and local garden centers.

They can help you with your field knowledge and experiences.

If you follow the proper pruning procedures and execute them in due time, you will surely receive an abundance of fruits during all seasons, including summer, winter, and spring.

When to Start Pruning Basil

If you complain about the growth of your basil plant that it is too thin or not bushy at all or the leaves taste bitter, then it is high time you focused on pruning your basil plant. When the plant is almost 6 to 8 inches tall, you can start to prune your basil plant. Besides, there should be at least 5 to 6 sets of leaves on the plant when you have planned to prune it. You don’t need to prune smaller size plants.   Pruning your basil plant is important as the more often you prune the plant, the bushier and leafier it will become. That’s why in this article I am going to give you some interesting information for pruning your basil plants. Let’s dig in deeper! Pruning Basil

The top 3 reasons for which you need to prune

You may wonder that why you need to prune your basil if there are so many hassles in doing this. Well, there are many great reasons for pruning your basil, but here I am mentioning the top 3 of them-

1. For a better harvest

You need to prune your basil for getting better harvest. Surely you need plenty of basil for making delicious pesto or just sprinkle some of them over your pizza or pasta. You can get 15 to 25 cups of leaves from each plant per season if you prune your basil regularly. So, for getting more harvest and a bushier basil plant, you need to prune it.

2. For growth stimulation

Pruning your basil will force it to grow bigger and bushier. Clipping basil stems back to the certain fresh sets of leaves, you force them to grow. When you cut the stem into two, you are doubling the growth of the plant. You can cut the stem again and again when they are mature.

3. For removing flowers

If you allowed basil flowers to grow on your plant, it may hamper the growth of your plant. There will be fewer leaves on it as well as the leaves will start to taste bitter because of flower blossoms. For avoiding this problem, you can plant some slow to go to flower varieties of basils such as Everleaf, Emerald Towers, or Pesto Perpetuo. You can get these varieties of basil seed or basil seedlings from the nearby garden center. On the other hand Genovese basil, lemon basil or Thai basil are some basil varieties that bloom quickly.

The right time for pruning your basil

Basil is one of the easiest annual herbs to grow around your home or in your garden. Without pruning your basil, it will grow slim, tall and begin bolting. But before growing basil, you need to know when it is the right time for pruning basil or how you are going to do that. Cutting the basil too soon and you can lose an important leaf vital to the plant’s growth, Or else cutting too much can also hamper the plant growth. When you prune the basil, you are cutting off the central stem allowing the plant to split off. By cutting the central basil stem you will get two center stems that will double the number of leaves. But if you prune too soon, the plant will not receive enough energy. Generally, basil is considered a resilient plant, so even if you cut it back a bit earlier than the right timing, it should grow back normally. But make sure it is not too early.
The best time to prune your basil is when it reaches around 6 inches (15 cm) tall. At this height, it would be able to survive heavy trimming. Or else, you can prune your basil by looking at the set of leaves it has grown so far. Each leaf on the plant represents an additional source of food which means the more leaves it accumulates, the more prepared it is to replace what has been lost. Once your basil grows its fifth or sixth set of leaves, it can be cut back. The leaves usually taste better when they’re younger, but if you wait for your basil to grow more than three sets of leaves on each stem, the plant will become stronger. It will be too late to cut back your basil when it’s about to bloom or already has. When there are flower buds in the plant, the plant is about to finish its life cycle. Blooming usually indicates the time of reproduction or the last stage of life for flowering plants. Besides this, basil leaves become bitter and less flavorful when the plant starts to develop flowers. That’s why pruning is very important for basil when you want to enjoy delicious basil for as long as possible. Since basil is a fast-growing plant, you’ll be able to prune every two weeks once it is fully established. Prune your basil plant more often regularly to get leafy and bushy basil plants.

How you can prune your potted basil just by following the 5 steps

To get fresh basil for cooking, you can grow basil in containers and put it near a window in the kitchen. By this, it can get the sunlight and water properly without creating too many difficulties for you, right? But you can’t escape the basil cuttings thinking that it’s in the container. To get a bushy, multi-branched plant, you need to know the correct pruning process. So, here are 5 easy steps that you can follow to prune your basil properly.

1. Wait until your basil is 6 inches tall or has 5-6 sets of leaves

You certainly wouldn’t want to prune your plant too early. Your basil plant needs to be at least 6 inches (15 cm) tall before you start pruning. This will ensure that there are 5-6 sets of leaves coming from the stem of the plant. Having at least 5-6 sets of leaves is important because you want to have 1-2 sets of leaves left when you cut it. These leaves are essential for converting sunlight into energy for your basil plant.

2. Identify the central stem

A basil plant is made up of one tall, center stem with sets of small leaves growing out of each side. The central stem will be the thickest one in the middle. Cutting the main stem will yield two new stems growing from it. But be gentle while handling your plant as basil is very sensitive and can bruise easily.

3. Cut the central stem 1⁄2 inch (1.3 cm) above the fifth set of leaves

Once you’ve identified the central stem, count the set of leaves from the top of the stem and move your way down the plant until you reach the fifth set of true leaves. Now, make an angled cut about 1⁄4 inch (0.64 cm) to 1⁄2 inch (1.3 cm) above the spot where two leaves are growing.
  • Be sure there are at least 1 or 2 sets of leaves left at the bottom of your stem as these leaves are needed for the continued growth.
  • Always use scissors or pruning shears to cut the stem. Never use your fingers, as this may harm the plant.

4. Cut flower blossoms as soon as they start to form

If you notice flower blossoms in your basil plant, clip them off immediately using fingers. Flower growth is a sign that your basil plant has switched from growth mode to reproductive mode. This is good when you want to plant more basil seeds. But if you want your current basil plants to get bushier and continue growing, you’ll need to cut those flowers off with gardening clippers. To prevent blooming from reoccurring immediately, move down the stem a few sets of leaves before cutting. Besides that, Stressed basil plants begin to flower sooner than those given plenties of sunshine, well-drained soil, and consistent moisture. So, aim to keep your basil happy so that it keeps producing leaves, not flowers. But for most types of basil, you’ll inevitably see flower buds forming by mid-summer.

5. Repeat pruning every 1-2 weeks

Make sure you prune your basil plant throughout the summer season. This will ensure maximum growth and more basil for you! Wait at least 1-2 weeks before trimming again, to avoid cutting too much of the stems.

Few last words for you

For growing up healthy basil plants you need to prune them regularly. There are several types of basil and you can choose your favorite one for your summer garden. Pruning your basil will ensure a bushy and leafier basil plant as well as fresh good basil. Just know the right time and right process for making some happy basil plants. Well, I have shared the easiest ways so that you can get the right time and process. So take care of your basil and happy gardening!

How To Repot A Spider Plant

Spider Plant, also called by the name Airplane Plant, is one of the most seen in-house gardening plants. This quick-growing plant just needs indirect sunlight and to be free from frost or moist to outgrow any other plant with little like almost no care. The plant also bears tremendous air-purifying qualities besides its nice and decent look. These plants are adored for their cute little white flowers besides green leaves. Due to their ever-pleasant look, they can be placed almost anywhere in the house and boost the interior of the house. These popular indoor plants often outgrow their pots. Sometimes it becomes necessary to repot them in a bigger pot to keep them alive. It’s important to repot spider plants before they outgrow their pot. Keep on reading this article to know more about spider plant repotting and how to repot a spider plant.
Spider Plant repotting
Madaise / Flicker

Basics of Spider Plant Repotting

Spider plant repotting means moving plants to a slightly larger pot. It sometimes becomes necessary to repot to keep them growing and lively. As spider plants grow faster than others, it becomes more essential for the plant to repot, at least when a baby spider plant starts to grow into a mature plant. Spider plants are native to the coastal areas of South Africa. The plant’s tuberous roots help the plant to store water which helps them to survive without any water. On the contrary, as the tuberous roots can not stay in excess water, the plant also can not resist water or moist. Moreover, it cannot stand direct sunlight nor low temperature. As baby spider plants grow faster, they might crack open the pot and create extra hazards. It’s high time to plant it as a mature spider plant.

When to Repot Spider Plant

These popular houseplants grow best when they are root-bound or pot-bound. You’ll consider repotting your baby spider plant before it starts to outgrow and crack its pot as it grows faster than other plants. To know about the perfect time to repot your spider plant, you have to keep an eye on the plant first. Because, the plants will grow at a different pace owing to the amount of light, water, and other care they are getting. Wait till you notice small white roots coming above the ground.

What Kind of Pot and Soil to Repot into

You might be wondering what pot to select for a planting spider plant. You might have the information in your mind that spider plant loves to be root bound. So get a pot slightly bigger than the current pot. Don’t use any pot which is a lot bigger than the pot it is currently in now. Also, keep an eye on a pot with a better drainage system. Poor drainage may lead to root rot. As the plant can not stay in excess water, you need a pot with a bigger drainage hole or a better pot drainage system to keep it free from moisture and healthy. For soil, you may use your regular general-purpose potting soil to plant spider babies. However, well-draining soil with the ability to get rid of soil moisture easily will keep you ahead in the game.

How to Repot Spider Plant

Repotting spider plant is way easier than spider plant propagation. You don’t need to follow any plant guide to repot a mature spider plant. Instead, follow the steps below: At first, fill up the pot with a good amount of soil so that the pot is ready to plant. You may use some perlite in your potting mix to improve the soil’s drainage ability. Don’t forget to keep a small hole to put the plant. After preparing the pot let’s move to the baby plant. Remove the plant from the current pot. Then lose some dart from the root. Cut off a portion of the root to make it more convenient for potting. Look and cut off damaged and insect-affected roots. After cutting off the roots, gently place the plant into the pot of soil and fill up the pot with more soil until the roots are submerged in the soil surface. After that, gently sprinkle some tap water to let the soil set.  Remember to put a bit of water and keep dry soil. Don’t keep the plant in water which may result in brown leaf tips or droopy leaves. After the soil dries you can keep the plant in your desired location or your garden centers and treat it like a mature plant with green variegated leaves. Spider plant care

How to Care Spider Plant

It takes very little effort behind spider plant care as it naturally grows quickly without much hustle. However, a little effort will help you keep adult plants green and lively. here is a small plant guide for your use: Spider plant cutting : Pruning the leaves in summer or spring helps the plant stay healthy and manage humidity level to average humidity. For the same, you need to cut off the excess leaves direct from the base of the adult plant. For adult spider plant cutting, you may use a garden scissor or a pair of scissors. Avoid direct sunlight : Spider plant is a sunlight-sensitive plant. For the same, it needs to be kept out of reach from direct sunlight. Keeping it in direct sunlight will burn the leaves, and eventually, the plant will die. But again, the plant needs some light to survive. So, never forget to keep the plant in a place with indirect light. Better Water drainage : Spider plant is also a water-sensitive plant. It would be best to make sure the pot you are using has a better drainage system, and extra water does not stay on the soil for long. You will also need to refrain from watering the plant in winter or cold weather. If you keep feeding them in winter, the plant will eventually die out of water. Winter care : Spider plant hates cold temperature besides extra humidity. So, in these conditions, you will need to give them some artificial heat or light to survive. Repotting spider plant is way easier than propagation. Anyone can be good at this just a little bit of enthusiasm and passion for plants. Remember to get pot and soil with better drainage system to keep the plants cheerful and appealing.

Best Way to Water a Large Garden

Watering a large garden is a challenge that many gardeners have faced during their gardening journey. Many of you sometimes might have wanted to have a large garden for getting more crops at a time. But many times you can’t get the desired results from your large because of not watering it in a proper way.

Now, you may think it might be really difficult to water a large garden. But believe me, it’s not that difficult to water a large garden if you follow the best way for doing it.

So, here I am to share the best ways for watering a large garden. Let’s dive into the digger.

Best Way to Water a Large Garden

6 Best ways you can use to water your large garden

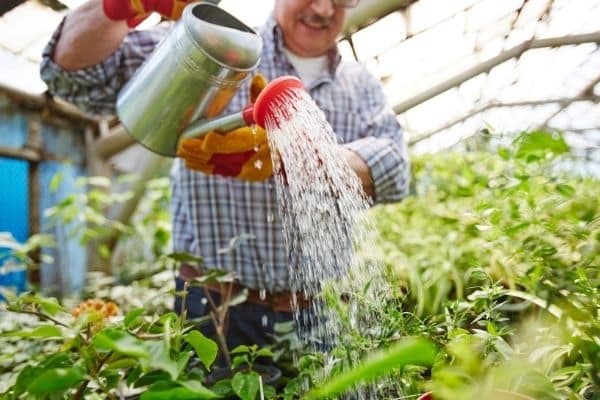
There are several ways you can use to water your large garden and moist soil. You can use some basic watering techniques like creating simple furrow irrigation, or flood irrigation. Or else, you can use sprinkles, regular hoses, or soaker hoses.

However, the most difficult way to water your garden may be the drip system. But don’t worry I will give some hints about that too so that it won’t be that much difficult for you, right?

So, let’s get to know the watering ways better.

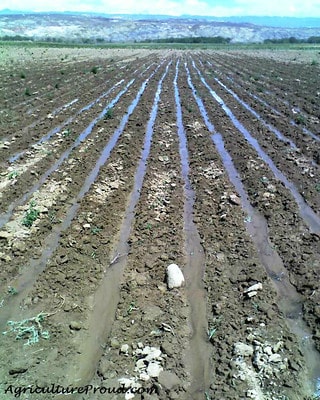
1. Furrow Irrigation

This is kind of making shallow trenches between the garden beds that create water flow to the roots. It is an old farming technique that is good for clay soil.

But in the case of sandy soil, it is good to use for narrowly gapped raised beds. The beds can be 1 to 3 feet away from each other. The wider the gap, the more water you can use in the clay soil.

You can easily irrigate with this method by using a hoe or shovel to make shallow ditches. To test the method, make a shallow ditch from end to end and run water down it.

If the water doesn’t run 20 to 30 feet in a few minutes, then make divide the garden and dig more shallow ditches.

furrows irrigation
 

When you are about to water the garden, fill the furrows completely with water. Wait for a while after that and then poke around the soil with a finger to make sure that the water has penetrated the soil.

Foliage and fruit of erect plants like beans and peppers will stay dry during this watering method. Besides this, you can water new seedlings frequently to keep the seedbed moist. The upper part of the garden beds will not get packed as it gets during sprinkle watering.

However, furrows are not considered an effective way to water the garden for many gardeners as this method is not appropriate for vine crops that rest on the soil. It can rot the fruit because of wet soil. Besides, it takes a lot of time to spread the water in the soil.

The furthermost point of the garden can’t get water properly. That’s why you need to make a lot of furrows around your garden and fill them one by one which is not that much convenient.

As well as too much water may get evaporated sitting in the furrow. That’s why many gardeners seem to avoid this way.

2. Flood irrigation

It is also one kind of the oldest watering systems. It is often used in extremely heated areas. It is a good option to water a large garden.

Flood irrigation systems are more common for horticulture (fruit trees, grapevines, vegetables), and higher-value and more-waterlogging-sensitive staple food and fiber crops such as maize, soybeans, and cotton.

Flood irrigation

For this method, a shallow dam is raised around the entire perimeter of the garden area. Then water is allowed to flow over the soil until the closed area is completely covered.

It is beneficial when the soil is leveled and the soil contains enough clay to spread out the water on the surface for slow and evenly penetration. You should also be careful that the water should not remain more than a few hours on the surface.

Besides this, you can use this method when the alkaline water causes a buildup of salts to toxic levels in the soil. Flooding will flush down these excess soluble salts out of the soil. Before spring fertilizing, tilling, and planting, you can apply this method in your garden.

However, flooding can cause too much waste of water as runoff is hard to avoid. It is quite normal to apply more water than the requirements of your plants in this method.

Also, rapidly growing plants are harmed due to the low oxygen level present in the flooded soil as well as the vine crops also may get rotten due to wet soil.

3. Hoses

It is an ideal choice to water container plants rather than a large garden. However, using a garden hose as a water source for water supply in the furrow or flood irrigation can be the right choice.

q? encoding=UTF8&ASIN=B01E1DANAI&Format= SL160 &ID=AsinImage&MarketPlace=US&ServiceVersion=20070822&WS=1&tag=gctlove 20&language=en UShose

Using a hose to fill in the furrows or covered areas in the flood irrigation method can give you control over the amount of water used in these systems.

Or else, you can leave the hose running at a trickle in a basin near each plant until the water has soaked down at least 6 inches deep.

4. Sprinklers

A sprinkle is a perfect choice for shallow watering or overhead watering. It is good for sandy soil type that absorbs water quickly. The portable sprinkler and in-ground permanent sprinkler are effective ways for watering a large garden when you’re short on time.

On the other hand, if you have a clay soil type or your garden is on a slope, it is not a good idea to use a sprinkler to water the garden as the water may run off without getting into the soil.

q? encoding=UTF8&ASIN=B00K72WU3Q&Format= SL160 &ID=AsinImage&MarketPlace=US&ServiceVersion=20070822&WS=1&tag=gctlove 20&language=en USsprinkler to water the garden

The sprinkler is an inexpensive way to water your garden but improper timing and operating in wind or at night can result in heavy wastage of water as well as damage to the plant.

Some water gets wasted when you try to cover a rectangular or square area moving the sprinkler in a circular pattern. But at the same time, you can apply different amounts of water to different types of plants according to the requirements.

Moving the sprinkler unit at regular intervals may work if the garden is larger than the sprinkle pattern.

However, if you use sprinkler irrigation in the early time of day, the soil surface may become dry too quickly. Besides, strong winds may carry the water out of your garden or may even cause uneven distribution of water in the garden.

Moreover, when you use a sprinkler, the water also touches the foliage and that wet foliage can invite some disease.

5. Soaker-hose irrigation

A soaker hose irrigation system consists of a rubber hose perforated with small holes that leak water. You can lay the hose between rows of raised beds or put it in a circle around your plants.

With a soaker hose, water directly goes into the soil without touching the soil which also reduces evaporation.

q? encoding=UTF8&ASIN=B09BHFYJSC&Format= SL160 &ID=AsinImage&MarketPlace=US&ServiceVersion=20070822&WS=1&tag=gctlove 20&language=en USsoaker hose

If you want to use a soaker hose for deep watering leaving the foliage dry, just let the water run for several hours. Give an hour interval to let the water penetrate the soil and then again run the water for a while.

Using a soaker hose is much easier than using the drip system as there are fewer difficulties to set it up.

6. Drip irrigation

Drip irrigation

One of the best ways for applying water to home landscapes, gardens, and orchards is drip irrigation. A drip irrigation system keeps the water pressure low and provides water slowly through holes, or drip emitters, inflexible pipes laid along each row of plants.

There are many types of drip systems and they can also consist of a single pipe with flexible lines running off it, or a series of pipes.

It is not well suited for solid plantings of shallow-rooted plants such as grass and some ground covers. In drip irrigation, the soil moisture remains relatively constant and the air is always available.

But in other methods, there is fluctuation in soil water, temperature, and aeration. This method also balances the oxygen levels that are appropriate for absorption.

Drip irrigation can reduce water loss by up to 60 percent compared to the typical watering methods as water is delivered drop by drop to the roots. With this method, droplets of water absorb immediately into the soil with thin streams of water.

There is no flood or no runoff of water. Water is not carried away by the wind as well as the evaporation rate is low too.

However, the drip irrigation system is a little bit costly and tricky to install in the garden. But don’t think about that cause all the difficulties will be paid off. You can save some money if you have a proper plan.

q? encoding=UTF8&ASIN=B0819DM5HM&Format= SL160 &ID=AsinImage&MarketPlace=US&ServiceVersion=20070822&WS=1&tag=gctlove 20&language=en USdrip irrigation system

If you can make the water flow of 3 to 5 gallons of water per minute from a house faucet to the system, then it can irrigate 1500 to 2000 square feet adequately. Besides this, proper care and preservation of it can ensure a long life for the system.

Few Last Words for You

To save your plants from dying due to lack of water, you need to water the plants when it’s time to water.

It’s good to choose a watering system that will leave the foliage dry and supply water to the plant root. This can prevent plant disease.

Hope this guide has shown the best way to water a large garden.

HOW TO PLANT SPIDER PLANT BABIES

0

The spider plant, also known as the airplane plant, is one of the most popular plants for gardening, mini-greenhouse, and indoor aesthetics.

Anywhere apart from frost, it can quickly outgrow any other indoor plant without much hassle. They also grow up almost anywhere if there is bright indirect sunlight.

These fast-growing plants bear tremendous air-purifying qualities besides their good look and easy-to-grow qualities. They are also quite famous for spouting off their offspring in almost no time.

If you have plenty of space in the house to spare, you can jump into creating a garden center with the sharp knife ribbon plant from the South African region.

Now let’s talk about the propagation of spider plant babies. The plant propagation method of spider plant is as easy as it sounds. Anyone, even from the beginner gardener, can also propagate spider plant babies without much hassle.

spider plant babies
Johanna Beyenbach / Flicker

Choosing a good baby spider plant

Spider plant propagation is as easy as it sounds. However, some little things are needed to be checked back before diving into planting a baby spider plant.

A mature plant that is root-bound produces more babies. Plants that are rooted also grows fast and healthier. You have to keep an eye on the mother plant and cut unnecessary leaves regularly to get more lively parent plants.

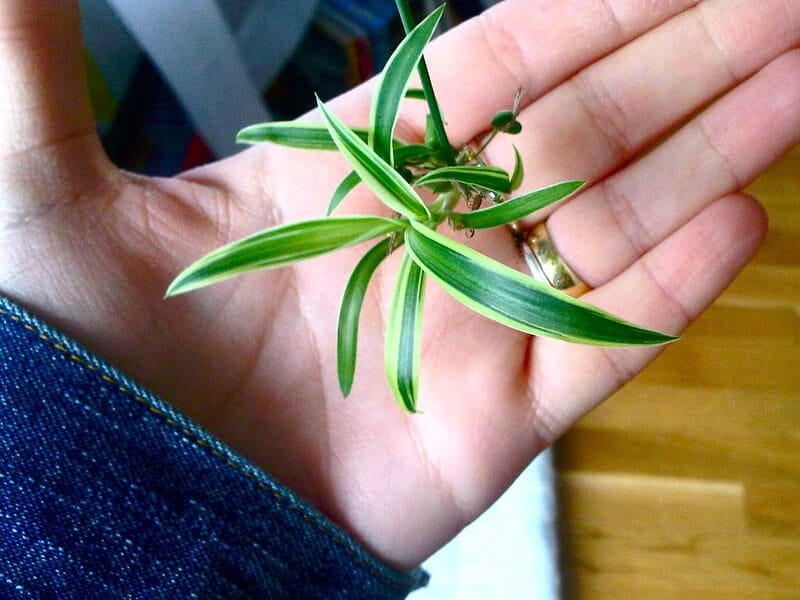
You have to select a spider plant baby with some nodes or tuberous roots below the leaves for propagation. Spider babies with tiny nodes bear a better chance of producing a healthy tree. You may also find some Spider babies with small roots below them. These are better for planting and growing more spider trees.

Choosing good soil and the perfect pot

Don’t forget to get yourself a pot with a better drainage system. A pot with drainage and better ventilation will help you keep the plant out of moisture. So, get yourself a pot with sufficient drainage hole and help you get a healthy baby spider plant as the plant hates soil moist.

Well-draining plotting soil will help you to get a perfect plant. You can also add some compost and perlite to the soil if you want. Perlite will make the potting soil well-draining soil and help the baby plantlet being a nutrient and happy plant.

Spider plant babies in pot
Elizabeth / Flicker

Let’s plant spider plant

Follow these steps below and get a new spider plant for your friends and neighbors:

At first, select a spider baby with which has some tiny nodes and also some little roots on them. Then separate the baby plant from the parent plant. Cut off the Spider baby from the mother plant. After that, remove the hard branch which connects the two plants from the baby spider plant completely. Make sure the hard branch is no more attached to the baby spider plant. After removing the hard branch, it is now time to remove the tiny little leaves near the nodes or roots and make the root free from any extra leaves. Now it’s time to plant the tree into the soil pot.

At first, dug out the soil a bit and make a small hole to place the placed the baby plant in it. You can use your finger and makeup space. Then put the plant gently onto the pot of soil and level the ground gently. Add some soil in the pot if needed. Fill up the pot with soil so that the roots or nodes stay under the soil. After that, gently water the soil with a bit of water and try to keep the plant dry of free from moisture. After watering, let the excess water drain out from the moist soil. After water being drained out, place the plant in a shaded area, especially free from direct sunlight, to keep the plant alive. After two weeks, the plant will have some mature root, and within a couple of weeks, it will fully become a mature plant to place in your garden or gift the extra plant to your friend or neighbor.

Alternative ways

Alternative ways: Using wet tissue or water pot to plant

If you are a little bit curious and want to observe the plant and the root grows in front of your eyes, you can plan the baby spider plant in a whole different way. Just after removing the tiny leaves in the previously mentioned process, you can place the plant in a pot of water instead of soil. But in this case, you have to ensure that the water is at the level of the roots or nodes and the leaves are in the air. You will also need to take care of the water level issue and frequently check back the water level so that the roots stay in the water while the upper part is free from moisture and water. As a water-sensitive plant, the baby spider plant will not grow into a plant rather might die in the process. You need to keep the plant in a shady area and avoid direct sunlight, or the plant will get burned. Also, you can use a tissue instead of a water pot for the same process. For this method, you need to keep a tissue wet or moistured. This method is more tiresome. The plants need to be checked back very frequently so that the tissue stays drenched and does not get dry. This process might get you more tired than any other method, but it will indeed ensure you a healthy baby spider plant. You will also need to provide that the plant stays in a dark shaded area, away from direct sunlight. Or else the plant will get burned in the baby stage.

Taking Care of Spider Plant

As gardening friendly and easy to grow plant, a mature Spider plant does not require must attention. You don’t need any plant care article to plant spider plant. But there are a few measures that will help you get happy, healthy, lively spider plants.

Spider plant cutting: Pruning the leaves in summer or spring helps the plant stay healthy and lively. For the same, you need to cut off the excess leaves direct from the base of the adult plant. For spider plant cutting, you may use a garden scissor or a pair of scissors. It will ensure a compact plant with vibrant leaves resulting in an energetic garden environment.

Avoid direct sunlight: Spider plant is a sunlight-sensitive plant. For the same, it needs to be kept out of reach from direct sunlight. Keeping it in direct sunlight will burn the leaves, and eventually, the plant will die. But again, the plant needs some light to survive. So, never forget to keep the plant in a place with indirect light.

Better Water drainage: Spider plant is also a water-sensitive plant. It would be best to make sure the pot you are using has a better drainage system, and extra water does not stay on the soil for long. You will also need to refrain from watering the plant in winter or cold weather. If you keep feeding them in winter, the plant will eventually die out of water.

Winter care: Spider plant hates cold temperature besides extra humidity. So, in these conditions, you will need to give them some artificial heat or light to survive.

Final words

Now you have an idea about planting a spider plant with two alternatives. Keep your eyes open for sunlight and watering issues. Happy gardening!

How long does vinegar last in the soil?

Gardening is a therapeutic activity that’s great for plants, the environment and your mental health. But how can you take it to the next level? With vinegar! Vinegar has many uses in the garden that can add more fun and increase yields, but one question remains – how long does vinegar last in soil? Find out here as we delve into all things related to using vinegar for gardening, including its benefits and what types of concoctions work best!

Vinegar is a popular and effective way to control weeds in gardens. However, its concentration must be managed with care as applying it directly into the soil could damage your plants and even potentially ruin the texture of your soil if left for an extended period of time.

When you pour high-concentration vinegar directly into the soil, the effect of vinegar may last longer than a month in the soil.

To ensure long-term success without incurring unintended consequences such as damage to your plants or destruction of soil texture, understanding how best to apply high concentration vinegar becomes essential knowledge for any gardener. Here you will learn about proper usage techniques so that these effects are minimized while still achieving results against unwanted vegetation.

vinegar in soil

Why you will use vinegar in the soil?

The acid in vinegar can harm your soil as well as plants if you overuse them or don’t apply them properly. Then why you will use this in your garden, right?

1. You can kill the weeds with vinegar

Basically, many gardeners use vinegar widely as a herbicide in their gardens. Vinegar used as a herbicide may be slightly effective on small annual weeds. Regular kitchen vinegar controls broadleaf weeds more effectively than grass and grassy weeds.

If vinegar concentrates are added directly into the soil, they will kill the weeds by lowering the pH level of the soil to a level that a plant can’t sustain. Depending on the soil type and the weather, this acidifying effect can take from a few months to a year.

It seems that research conducted by the USDA with solutions containing 5% vinegar like white vinegar, and apple cider vinegar, has not been shown to be reliable for weed control.

q? encoding=UTF8&ASIN=B01CSX4N9K&Format= SL160 &ID=AsinImage&MarketPlace=US&ServiceVersion=20070822&WS=1&tag=gctlove 20&language=en USapple cider vinegar

Higher concentrations of vinegar (10% to 20%) found in the commercial vinegar herbicides may retard the growth of some annual weeds and will indeed kill the foliage of perennial weeds such as Canada thistle, but without killing the roots, the weeds will grow again.

2. You can use vinegar to balance the pH level

Sometimes the pH level of the soil goes too high and you need to bring the pH level down. When the pH level goes higher –

  • Plants can’t absorb some nutrients like iron properly, and the plant will turn yellow
  • Soil builds up a toxic level of certain nutrients such as molybdenum can be raised to a high level due to a high pH level.
  • Microorganisms like earthworms can’t function properly and covert nitrogen.

That’s why it is necessary to maintain the pH level of the soil. So, when the pH level goes higher, use vinegar to bring it down.

Proper application of vinegar to avoid long-lasting time

Vinegar is basically used for reducing the pH level of the soil even when you want to kill weeds with vinegar, right? It is better to use natural alternatives than commercial weed killers.

But you need to make the proper application of vinegar in your garden. So, let’s know about it.

The right time for applying vinegar

The best time to apply vinegar in the soil is up to 2 weeks after the weeds have germinated. Wait for a dry, warm one when there is no possibility of having rain.

Check the weather forecast as well as apply it after one or two days after rainfall when the soil feels dry.

How to prepare the vinegar solution

At first, test the pH of the soil

Based on the pH of your soil, determine the need for vinegar. You can use plain vinegar like apple cider vinegar if you don’t need to lower the level that much.

Or else, you can use Horticultural vinegar with a higher concentration (20% acetic acid) if you need a quick fix but be cautious while using horticultural vinegar.

After that, add vinegar with water. Adding water will not alter vinegar’s acidity but water also has a pH, right? So it will be better to test the water pH as it differs from region to region.

You can add 2 to 9 tbsp. of vinegar to a gallon of water and it is the ideal measurement. Stop adding water to vinegar when the vinegar solution’s pH reached to required pH level of the soil. Take note of how much vinegar and water you have added.

Finally, you can put the vinegar solution in the garden beds or ground.

vinger for soil
 

What you can use to put the solution in the soil

To lower the pH level of soil and make it more acidic, vinegar can be applied by hand hose or using an irrigation system.

You can use an injector as an alternative for adding vinegar to irrigation lines, and thus the vinegar is evenly distributed.

Extra notes: 

  • You can add some household vinegar to your soil to fight hard water and lime as well as won’t stay for a long time.
q? encoding=UTF8&ASIN=B07VV73XB2&Format= SL160 &ID=AsinImage&MarketPlace=US&ServiceVersion=20070822&WS=1&tag=gctlove 20&language=en UShousehold vinegar
  • A single application can’t improve the soil pH or kill the weeds. Continue watering with the solution at regular intervals. Test the soil pH frequently. Bacteria can reduce the strength of acetic acid over time.

So, if you don’t use it frequently, it will be only a temporary fix. Also, don’t overdo it as it will last for long days.

  • For basic treatments of vinegar, a cup of vinegar can be mixed with a gallon of water and poured over the soil with a watering can. According to the Vinegar Institute, this is ideal for plants like azaleas and rhododendrons.

Use high-concentration acetic acid or vinegar added to the commercial product to kill the perennial weeds and grass with vinegar. But don’t use too much vinegar as you will have trouble removing them.

  • Many homemade weed killers consist of salts, vinegar, and liquid dishwashing soap. But it’s better not to use salts in the solution of vinegar and dish soap. Salts stay longer than vinegar in the soil and can cause much damage. So, you better not use table salt or Epsom salt in the solution.

Facts you need to be aware of!

  •  There are various kinds of vinegar but it is better not to use strong vinegar unless it is necessary.
  •  Check the amounts of vinegar you put in the soil, don’t add too much. It may take a long time to go out of your soil.
  •  While using vinegar for weeds, take care of other plants. A few drops of concentrated vinegar can damage plant cells, leaves even the roots of your favorite plant.

Few words for you

Vinegar will last for long days in the soil if you overdo it. It may take years to remove the vinegar from the soil when applying too much. But don’t worry, it is not that tough too.

Just keep in mind that the vinegar solution contains acetic acid that can be harmful if it stays long in the soil.

That’s why you just need to be careful about how long does vinegar last in the soil. That’s it! Happy Gardening!

When to Pick Avocado from Tree?

Have you started growing avocados but don’t know when to pick avocado from tree? I had this same question in mind when I started producing avocados as houseplants.

But over the years, I gained enough experience to answer this question. In this article, I will write about when you should pick avocados from trees based on my practical knowledge.

You will find the months of August to September most ideal to harvest avocados. But do not pick all the fruits from trees at once. Pick a few fruits that are the largest and wait for a week. If those fruits ripen properly and become soft and readily eatable, then you can start harvesting avocados.

But keep in mind that the first few fruits you pick from the tree may not ripe as expected. If they shrivel, become rubbery, or even start to rot, you can easily conclude that the fruits of your mature trees are not yet ready to be harvested.

So, continue to pick a couple more largest fruits after one week and keep testing until you get your perfect fruits to harvest. To know more about the avocado harvest season, time of maturity, ripening period, tests for harvest, etc. continue to read the rest of the article.

When to Pick Avocado from Tree

Harvest time for avocados produced at home

If you produce avocado indoors, or in your garden, you are most likely to select any of these three varieties:

  • West Indian avocados
  • Guatemalan avocados
  • Mexican avocados.

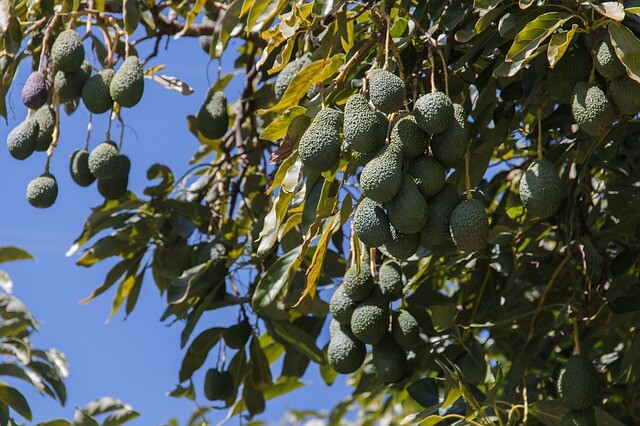
Your avocado fruits can be of many shapes, it can be round, pear-shaped, or oblong. The texture of the skin can also vary, it can be reddish-purple, deep purple, greenish-yellow, or simple black.

To harvest avocado, make sure you know your region and climate properly. Among many types of avocados, the Haas variety is one of the most commonly cultivated cultivars.

It usually becomes ready for harvest during February, but it can even extend up to September. You may find the local weather, fertilization process, and flowering pattern of the tree responsible for a variety of outcomes.

As a home gardener, you should remember that the extended flowering of fruit might result in different stages of fruit maturity for your trees.

So, you may face difficulties to determine the correct avocado harvest time. In this case, pick a couple of avocados from your trees and check if they are ripe enough.

Once you get the correct fat content and softness from the sample fruits, you can be sure that the whole tree has enough ripe avocados.

Harvest time for commercially produced avocados

You need to decide the harvesting time for each avocado cultivar by considering the time of year and the weight of the fruit. If you accidentally pick a lot of avocados while they are immature, it will result in a significant loss to your business.

So, avoid harvesting any avocados when they are shriveled or rubbery.

If you live in the United States, especially in Florida, your avocados will rip at warm temperatures of 60 to 75 degrees Fahrenheit. For the West Indian avocados, make sure to maintain a temperature of 55 degrees Fahrenheit while storing them.

It is also applicable to other Floridian cultivars. Don’t store fruits at any temperatures below these, otherwise, the skin and flesh will be discolored and produce an unusual flavor.

Maturity Seasons of Common Avocado Varieties

  • January to March – Bacon, Santana
  • April to June – Edranol, Hass, Mesa, Rincon, Ryan
  • June to September – Anaheim, Hellen, Nabal
  • July to October – Mac Arthur, Reed
  • October to December – Bonita, Daily, Duke, Jim, Zutano

The range of seasons indicated above is the approximate months for maturity. You will find many seasonal and climatic effects in your region that will result in variations in the maturity period.

You can follow the above-mentioned months for avocado houseplants. But in the case of commercial orchards, you need to determine the oil content through a dry weight test.

In this way, you can ensure better fruit quality in your house and market.

How to know if my avocados are ripe enough to harvest?

ripe avocados

You will find several factors that can affect avocado harvesting. To know if your fruits are ready to harvest or not, first, you need to pick one or two mature fruits from the trees.

After picking those fruits, test several factors and then find out if the rest of the fruits hanging on the trees have ripened or not.

1. Observe the skin color:

If your avocados are ripe enough, they should have uniformly soft flesh and be readily eatable to consume. As you find varieties of avocados, taking color as an indicator of ripeness will not be a good barometer.

Different varieties may show different color changes as time passes by. It can be from yellowish green to reddish-purple to black. It may have brown spots or dark spots. The seed coat can change color from ivory to dark brown too.

For example, the Hass variety starts as dark green, then turns purple-black. If you are experienced enough, you can detect these changes easily to start picking fruits for consumption.

2. Check if they are soft enough:

Instead of getting soft, if the fruits shrivel and become rubbery, they are not ripe yet. Mature fruits have a good consistency, are not too tough, should not be bitter, and do not shrink outside.

So, wait for a few more weeks to get the perfect softness and then harvest. To find out if the fruit is soft enough to eat, hold the fruit in the palm of your hand and squeeze gently.

If the flesh moves with slight pressure it is soft enough to eat.

But if any crop has thick skin or hard shells, it will be tough for you to determine if they are soft inside or not. In this case, remove the button from the stem and gently insert toothpicks through the opening.

If the toothpicks go smoothly through the stem without applying much pressure, you can conclude that the fruit is soft inside.

ripe avocado

3. Check for adequate oil content:

If you leave the fruits hanging on the tree, the oil content inside the fruit will gradually grow higher. Remember, the higher the fat content, the better the fruits will taste.

On the contrary, leaving them for too long on the tree can generate excess oil contents resulting in rancid fruits.

But if you manage to pick fruits having the perfect oil content, the inside of the fruits will be smooth as butter and have a nut-like flavor.

4. Perform commercial dry weight test:

If you are a commercial avocado grower, you can perform a dry weight test on your fruits. A dry weight test measures the oil contents of your fruits that will help you to know the perfect time to harvest.

As a commercial grower, it is very suitable for you to do this test because you grow avocados in a larger portion, and you need to prevent losses of early picking.

If you find the oil content low, conclude that the fruit is still not ripe

How do I ripen avocados quickly?

If you pick fruits early from your avocado trees, there are high chances that they are not ripe enough. In this case, you have to apply some techniques to ripen those fruits.

Of course, you don’t want to waste any fruits, do you?

Place the avocados you want to ripen in a brown paper bag. Close the bag properly. The storage temperature should be your room temperature. You can also use newspapers to wrap around the fruits if you don’t have any paper bags at your home.

Hopefully, this will accelerate the ripening process naturally.

ripening process of avocados

You can also add apple, tomato, or banana with the avocados for quicker ripening. In general, all ripe fruits contain a plant hormone known as ethylene. This ethylene hormone triggers the ripening of the fruits.

When you wrap around the avocado fruits with a newspaper or bag, it traps the ethylene gas from going into the atmosphere. As a result, the ripening process becomes a lot faster.

Be sure to check the bag daily. Notice any color and smell changes. You can also apply slight pressure on the fruits to check their softness. In this way, you can fasten the ripening process of avocados.

Note that some people can advise you to microwave avocados. But please don’t do this, because microwaving fruits can make them a little softer, but it will not make them ripe.

So, don’t ruin your beautiful fruits.

How to slow down the ripening process of avocados?

If you don’t want your avocados to ripen, or you want to eat them later, you need to extend the ripening period. To control this, put the fruits in the crisper area of your refrigerator.

This will slow down the emission of Ethylene gas. As a result, your avocados will ripen slowly.

Final words:

Avocado plants grow into evergreen trees and they give excellent fruits to your home. If you can grow avocados indoors, you can use them for seasoning various dishes, salads, and soups.

You can also make delicious guacamole. But all of these depend on the softness, color, and smell of the fruits. Therefore, you need to know when you should pick your fruits from the avocado trees.

If you can take control measures to get the perfect avocados, you can surely enjoy many simple and delicious dishes in your own home.

How Long Does an Avocado Tree Take to Bear Fruit?

Have you already started growing avocado trees but don’t know how long they will take to bear fruit? I didn’t even have the idea when I started gardening and producing avocados as houseplants. In this article, I’ll write about how long your avocado trees might take to bear fruit based on my practical knowledge gained over the years.

You can grow avocados from either seed or young plants. If you choose to buy a grafted young plant from a nearby nursery or local garden center, it will probably take 3 to 5 years to give you fruits after planting. On the other hand, if you grow avocado from seed, it will take from 5 to 15 years for the tree to become mature enough to give you fruits.

Keep in mind that more factors can influence the fruit production rate of your trees. Your surrounding environment, local climate, frequent watering, fertilizer application, etc. can affect your trees.

If you can manage to nurture your trees properly, you will receive an abundance of fruits throughout the year. So, continue to read the rest of the article to know about these factors.

How Long Does an Avocado Tree Take to Bear Fruit?

How much avocado fruit does a mature tree produce per year?

Once your avocado trees become mature after five to seven years, you can expect around 200 to 300 fruits from each tree. But keep in mind that this number is not constant for all upcoming years. In some seasons, you may get more than the expected amount, while in some seasons you receive less.

You will find a lot of environmental factors responsible for this, even if you take the same care through summer, late winter, and spring.
How much avocado fruit does a mature tree produce per year?

The prominent reason why your trees are taking along to give you fruits is you started to grow trees using avocado seeds. If grown from seed, it will take up to 15 years to become mature trees compared to grafted young plants that take a maximum of 5 years to mature.

You can always use any leftover seed to grow young plants which would eventually turn into bigger trees day by day. But keep in mind that if you grow avocado trees from seed, it will take a very long period, which may seem tedious and worthless after some period. So, be patient and don’t lose hope even if your trees take a longer time to grow from avocado seeds.

If you grow avocado trees from seed using toothpicks, you are most likely to get the first few leaves and root systems developed. However, you may need to wait for a longer period before you can harvest fruits from those trees. This incident occurs due to the long juvenile phase of avocado trees.

In short, the juvenile phase is the time taken by trees to complete the development process where flowering does not occur. As a result, your trees will require more time to develop and grow flowers and fruits.

Look at a mature avocado tree, you will easily notice the big tree trunk and its canopy. For proper development of these parts, the tree synthesizes a lot of carbon during the photosynthesis process. This carbon is further used to grow any larger parts of the tree during the mentioned Juvenile phase.

It is only after the tree has become fully grown and matured, that it will start flowering and give you fruits every season onwards.

So always keep in mind about growing trees from seed along with their Juvenile phase. Besides, take precautionary steps against fungal spots, infection, or diseased roots.

In this way, you can get an abundance of fruits in all seasons, winter, summer, or spring.

What should I do to get more fruits from my avocado trees?

1. Select an ideal soil for the roots:

Choose coarse and sandy soil, not heavy clay soil or bulk soil. It is ideal for avocado trees. But take care that the soil is not very sandy. Moreover, the soil should not be very alkaline. Avoid any soils that have a higher level of salinity. The soil you select should have a good proportion of minerals, especially iron.

It should have adequate soil moisture and nutrients for the root system. If you can choose well-drained soil, then there will not be any issue related to root rot.

2. Maintain a regular schedule for water:

watering in avocado tree
 

You must not overwater your plants. Moreover, a poor drainage system or lack of drainage holes can cause significant damage to your trees and weaken the root system. Weekly watering will help to keep the soil moist and wet enough.

Keep checking your soil from time to time with your hands to make sure that the soil surface doesn’t make a crumble. You can use around 20 gallons of water to keep the soil moisture intact during the irrigation season. Just make sure that you let the trees dry out themselves before watering them again.

You can keep track of your watering on a regular basis. This practice will keep your trees healthy throughout the year.

3. Place your avocado plants in a comfortable location:

Place the trees under bright light or in a sunny spot. But you need to make sure that the trees receive adequate bright light and shade according to the daylight. If you plant trees very close to each other, the place may become too tight for them.

Instead of getting enough nutrition, they might end up competing against each other which will result in slower growth. So, always maintain 7 meters between any two avocado trees.

Moreover, more protect your avocado plants from heavy winds, otherwise, it can damage the weaker buds and avocado seedlings.

4. Prune in time and don’t over prune:

You should cut out the terminal buds in some branches to enhance growth. To maintain the good size and shape of the trees, occasionally you can trim each branch. But don’t trim or prune too much, or you may end up damaging the trees.

q? encoding=UTF8&ASIN=B0001IOYYE&Format= SL160 &ID=AsinImage&MarketPlace=US&ServiceVersion=20070822&WS=1&tag=gctlove 20&language=en USpruner

Then the trees will require more time to recover, resulting in a delay in fruit production.

5. Fertilize in correct proportion:

Fertilizing the trees during the initial 3 years after plantation will help to boost the growth. Each year, you can fertilize them about six times. You can use a minimum of 1.5 lbs of fertilizers per application.

In the first five to seven years of growth, you will eventually use up to 20 lbs of nitrogen per tree. Make a mixture of essential earth minerals like Boron, Zinc, Molybdenum, Manganese, etc., and spray near the stem of your trees.

If done properly between the regular intervals of April to August, your plants will get a fruit size enhancement. Any nitrogen-rich fertilizer will keep your plants healthy and increase the quantity and quality of the crop day by day.

q? encoding=UTF8&ASIN=B095BP65VY&Format= SL160 &ID=AsinImage&MarketPlace=US&ServiceVersion=20070822&WS=1&tag=gctlove 20&language=en US nitrogen-rich fertilizer

6. Use varieties of flowers for pollination:

You must have already known that avocado trees bloom two varieties of avocado flowers in general. They depend on the flowering pattern: A-type or B-type. If you can manage to plant trees that contain both types of flowers, you will surely receive a higher number of fruits at the end of the season.

The more pollination happens, the more fruits you get. For effective pollination, keep the avocado trees at warmer temperatures, because cold temperatures influence the pollination process.

7. Check local temperatures daily:

Although you must keep your trees under direct sunlight after plantation, don’t continue this forever. Your trees need to receive both sunlight and shade from time to time. Otherwise, too much sunlight can burn your branches and leaves. Maintain a warm temperature between 70 to 100 degrees Fahrenheit near the trees.

If this temperature goes down or crosses this limit, your trees will have a significant risk of sun damage, or the growth process will slow down. This will result in less fruit production.

So, always remember to check and maintain an ideal temperature near the trees.

How to know if my avocado fruits are ready to pick?

If you don’t want ripe fruits to stay on the trees, you can pick a couple of them and ripen them as time passes. Instead of getting soft, if you find them rubbery, then be sure that they are not mature enough yet.

You can maintain a schedule or mark on your calendar to keep track of when your fruits will soften. After you find your perfect fruits, you continue picking from your trees as much as you want.

The taste and softness of your fruits will depend on the soil and environmental conditions. In some years, it will be better while in other seasons you may receive worse. You will find the oil content of the fruit increasing throughout the season as you pick more fruits from the trees.

Some species of avocado turn rancid if they have too much oil in them. So, don’t let your fruits stay for too long on the trees, it is good to pick first and ripen later.

How to stop avocado trees from dropping fruit?

Although you cannot count every flower precisely, each avocado tree produces around 1 million flowers. But you will get only 100 to 300 pieces of fruit per tree. That means only one fruit in 10000 has a success rate to become mature.

Sometimes, you may see that after a certain growth of fruit, it will drop before getting matured. But don’t worry, this is quite natural.

However, you don’t want any good and fertilized fruit to drop from your trees before consumption. So, you need to nurture your trees properly to ensure them. Make sure you do not stress the trees by overwatering them.

 avocado fruit
 

Allow cross-pollination through A-type flowers and B-type flowers because cross-pollinated fruits have a higher potential to stay on the tree.

Never use excess fertilizers especially nitrogen during the initial planting stage. Because excess use of fertilizers never does good to your trees, it will only encourage the dropping rate of fruits.

Contact your local garden centers or nearby fellow gardeners to get help if any issue occurs.

Final Words:

Avocado fruits can be very sensitive to certain environmental factors. Although you cannot control those factors, you can nurture your trees properly.

If you grow avocados from seed, you need to be patient and optimistic to get fruits. Try to do your best from your side, and pray so that mother nature stays with you. Hope you got a clear understanding, of how Long does an avocado tree take to bear fruit?

If everything goes right, you must get a good production of fruits from your trees in no time.