Home Blog Page 3

Can a Compost Pile Be In The Sun

0

Are you unsure about keeping your compost pile in the sun? Most compost farmers have the same question in mind at first. When I first started to make compost, I was uncertain when to keep the pile in the sun or in the Shade.

As years passed by, I gathered more experience and knowledge related to this issue. In this article, I will let you know if you can keep your compost file in the sun or not.

Yes, you can keep your compost pile in the sun. Doing this will increase the internal temperature of your pile, making it easier for the microorganisms to work faster. As a result, the composting process occurs quickly. But remember, your pile will dry out a lot faster under the sun.

So, whenever you put your compost bins or piles in full sunlight, make sure to keep them moist enough. Keep reading the rest of the article for more details.

Can a Compost Pile Be In The Sun
MIgardener / YouTube

Which Location is Best For the Compost Pile, Sun, or Shade?

It is best for you to place the compost in the shade. Because in most cases, the worms in the compost cannot operate properly if the pile gets too hot. Also, if you keep the pile in shade, it does not get overheated due to direct sunlight.

This will decrease the process of excess water evaporation, and be helpful for you to retain the best level of moisture.

Moreover, when you place the pile in shade, It is most likely to stay safe from disasters like heavy rainfall or rainstorms. You don’t have to worry about the compost pile getting extra wet.

In addition, keeping the compost tumblers or piles in shade will help you to work on it comfortably. So, you don’t have to go out into the bright sun every day.

Does Compost Break Down Without Direct Sunlight?

The answer is yes, your compost can break down without direct sunlight. In the final stage, the amount of sunlight received doesn’t matter. Your finished compost will depend on how it is managed and what mixture of organic materials you had put inside.

Remember that an ideal compost pile should be slightly warm and moist so that earthworms, nematodes, bacteria, bugs, aerobic microbes, etc. can operate properly.

In addition to the contents of your compost, your regional climate also plays an important role in a better breakdown. If you live in a hot climate region, your compost will break down faster in general, even if you keep it in shade.

On the other hand, if you belong to a colder region, you may want to take help from the sun for speedy decomposition.

What Happens if the Compost is Overheated?

You should ensure the optimum temperature of 160 degrees Fahrenheit for your compost pile. Because at this temperature the microorganisms living inside the pile can work efficiently. If the temperature gets a lot lower or higher than the optimum level, it can hamper the mechanism of decomposition.

If your compost is very hot, it will result in the death of beneficial microbes, aerobic bacteria, anaerobic bacteria, and earthworms. Also, excessive heat can cause some green materials to rot, thus emitting an unpleasant odor in the surrounding area.

Although you will hear many people saying overheated piles catch fire, actually there is no serious threat like that.

To stay on the safe side, make sure that there are enough air pockets inside the pile that allows enough ventilation. In addition, spray water on the pile from time to time to maintain adequate moisture levels.

In this way, you can save the pile from getting overheated. You can take a more accurate approach by using a compost thermometer.

Consider These Issues For The Compost Pile Location

Compost Pile

Keep The Pile Moist Enough In The Sun

Although your composting process works faster in full sun, it dries out quickly too. In this case, you need to water the pile once in a while unless it receives a good amount of rainwater.

In the sun, try not to add too many dry materials to the pile. For example, shredded paper, cardboard, sawdust, dry leaves, wood chips, etc. will make your pile dry out faster.

So, if you place the pile in the sun, make sure to add green materials at the optimum level rather than adding only carbon materials. Examples of green materials are kitchen scraps, food scraps, kitchen peelings, etc.

Composting Slows Down In The Shade

As you place the compost pile in a shady or cooler place, it will decrease the rate of decomposition. But don’t worry, the decomposition is still effective in this state. Check daily if the pile becomes damp or not as there is less water evaporation.

To prevent your pile from getting damp, make sure to add more carbon materials like pieces of paper, sawdust, wood ash, etc. In this way, it won’t get wet and soggy keeping it in shade.

Don’t Abandon Your Compost Too Long

If you only throw waste into your compost tumblers or piles and abandon it afterward, it can take more than 2 years for it to become finished compost. This happens because you didn’t turn the pile to allow air circulation.

As a result, it got contaminated with fungi and microbes that suck up the nutrients from the compost pile. This is generally known as cold composting. Even though the contents will break down, the nutrients may leach, and the pile can start to rot.

On the contrary, you can make the compost ready in just 6 months by using a compost tumbler. This process is widely known as hot composting. In this process, you have to use high nitrogen materials and turn the pile after a definite time to increase aeration inside.

Due to this process, your compost pile will not get contaminated, and your unfinished compost will get completed faster.

Mix The Correct Ingredients

Always ensure the proper mixture of green and brown materials. Keep in mind that the rate of decomposition depends a lot on the optimum mixture of organic matter.

So, make sure to mix the right amount of water along with nitrogen and carbon materials into the pile.

To know more about what amount of green and carbon materials you should put in the pile, read the article titled “How to Make Compost in Plastic Tub” on our website.

Keep Track of Your Daily Weather and Climate

Daily Weather and Climate

Sometimes you need to change the location of the pile depending on the weather and climate. Don’t just leave your compost for too long, keep checking them after 2 or 3 days and take the necessary steps.

Whether your compost pile needs sun or shade sometimes depends on the climate region you live in. If you live in a hot climate region, your compost pile should probably need a shady place so that it doesn’t dry out from the excessive heat of bright sunlight.

On the other hand, if you reside in a cooler climate region, your compost pile may need more heat from the sun to speed up the decomposition process. That is why we recommend you keep track of your daily weather and place the compost pile accordingly.

Few Last Words

Bright sunlight can be helpful for the compost pile, provided you can save it from getting overheated. Yes, of course, you can keep the pile under the sun, but make sure to keep it moist enough.

Otherwise, you will face consequences if the contents start to rot. For successful composting, take good care of your compost piles, and make the best fertilizer out of them.

“Can a Compost Pile Be In The Sun?” Hope you got the proper solutions. Take care!

Can I Clean My Spider Plant Roots in Bleach?

Spider plants are maybe the most suitable indoor plants to start gardening. These indoor plants are so easy to care for and friendly that even beginner gardeners can take care of them without much hassle.

These ribbon plants are also loved and tendered for in-house gardening due to their air purification capabilities and keeping the oxygen level better at your home.

As they are native to the South African region, they bear good surviving skills and only ask you to provide water and indirect sunlight. If you can give them these much, they will give your house a nice, beautiful atmosphere and outgrow any other plants without giving you any pain.

Can I Clean My Spider Plant Roots in Bleach
Pretty in Green / YouTube

Although Spider plants are easy to care for, sometimes they might ask for your attention and bother you to take some small steps. The most hatred thing about spider plants is waterlogging. As a native plant to the South African region, spider plants take a little amount of water.

On the other side, they can not stand in excess water. If the plants are kept in excess water, they suffer from plant diseases, especially root rot.

In case of root rot and other fungal attacks on the root, it becomes a must to bleach the roots of spider plants before repotting them.

Cleaning the roots with bleach can help the plant get rid of root rot and other diseases and help you retain the healthy roots and also the fresh and vivid look on your plant.

What is Root Rot?

Root rot of this loving indoor plant is primarily caused by overwatering. Overwatering compels your healthy plant to suffocate the roots and restricts oxygen flow, which results in damaged roots.

Root rot is characterized by yellowing leaves and squishy roots. You can save your spider plant by repotting it, providing adequate sunlight, and allowing the soil to dry out.

repotting spider plant

Although the primary cause behind root rot is overwatering, there are still a few other reasons which you should have a proper idea about;

Poorly drained soil:

Soil is an essential component of each plant and has a significant impact on its health. For your spider plant, you’ll need a light, aerated soil mix. A well-aerated soil mix will allow water, air, and nutrients to move freely.

It will also quickly absorb water and allow for easy airflow. The thick soil mix will take a long time to dry out, will restrict oxygen flow, and will remain damp from within even though the top appears to be dry.

When the soil mix is heavy and the surplus water cannot drain entirely, the plant owner may have root rot despite properly watering the plant.

Improper Temperature:

When the temperature is unsuitable for spider plants, the plant will suffer. Any temperature below 50 degrees Fahrenheit would be unsuitable for spider plants. The spider plant will struggle if the temperature remains below 50 degrees Fahrenheit for an extended period.

The water in the soil will not evaporate quickly, and the spider plant will be unable to generate energy due to a lack of light. This creates the ideal environment for root rot to thrive.

Poor drainage system:

Plant owners frequently use pots with no drainage holes for aesthetic reasons. If you know how much water the plant needs, these pots are fine.

If you overwater them, the extra water will fill the gap, making it difficult for the oxygen to stay and circulate.

q? encoding=UTF8&ASIN=B097C6PPS9&Format= SL160 &ID=AsinImage&MarketPlace=US&ServiceVersion=20070822&WS=1&tag=gctlove 20&language=en USpot

Even if the pot has drainage holes, pebbles or roots might block them, making it difficult for the water to soak entirely, resulting in soggy soil. The roots will weaken, which can lead to root degradation, fungal illnesses, and other problems.

Excessive fertilization:

Because spider plants are light feeders, overfertilizing them is never a good idea. If you’re a heavy feeder who believes that eating more will result in faster and better growth, Excess fertilization of your spider plant will result in salt buildup in the soil, which will harm the roots.

The roots and soil’s ability to operate will most certainly be harmed. The roots will deteriorate, creating ideal circumstances for root rot.

Thus, make sure you monitor the dosage of fertilizer you use on your spider plant.

q? encoding=UTF8&ASIN=B07QNMBLGQ&Format= SL160 &ID=AsinImage&MarketPlace=US&ServiceVersion=20070822&WS=1&tag=gctlove 20&language=en USfertilizer

Insufficient Lighting:

Light is critical for each plant to grow and perform required functions. Plants require adequate indirect light to convert nutrients into energy, dry off moist soil, and perform other critical processes.

Spider plants require indirect light to thrive, and if you don’t meet their light requirements or water them without first inspecting them, root rot is a possibility. If you suspect the roots are deteriorating, double-check the amount of light and water your plant is getting.

Spider plants require indirect light

Because the plant isn’t getting enough light and you’re not watering it properly, the soil will saturate, creating the ideal habitat for viruses to thrive and cause root rot.

Should I Change the Soil and Pot after Bleaching the Roots?

The potting soil and the pot should be changed after cleansing the roots. This will prevent the plant from further rotten root contamination.

Also changing the soil will get a plant a new life as the potting soil will contain more nourishment and freshness than the root rot-affected soil and pass it to the plant.

Changing the pot may also provide you with positive changes as you might select the newer pot with more spider plant suitability or a better drainage system as a result of the precious spider plant condition.

What Tools are needed to Bleach Spider Plants?

You will need some basic gardening tools to bleach your spider plant. At first, you would need to get the plant out of the pot and remove the soil.

For that, you might need a gardening fork or trowel to get the plant out of the pot. You may also use something to break the pot and bring out the plant if you want to do otherwise.

You will also be required to use some gardening scissors or gardening shears to cut off the affected roots and some leaves.

q? encoding=UTF8&ASIN=B01JZFC9QS&Format= SL160 &ID=AsinImage&MarketPlace=US&ServiceVersion=20070822&WS=1&tag=gctlove 20&language=en USir?t=gctlove 20&language=en US&l=li2&o=1&a=B01JZFC9QS

You will be soaking the plant in bleach after bringing the plant out. For that, you will require a bucket or a bigger pot and a 10 percent bleach solution along with some tap water.

After soaking the plant, you will require to repot the plant and for that, you will be needing some fresh soil, a pot, and the tools you used while potting the point. You may also use your regular household bleach solution.

How to Bleach Spider Plant?

If you have all the required elements to bleach your spider plant, then you should get into work as a delay in work while contaminating the healthy roots and bringing your entire plant to death. You should get to bleach your plant as soon as you can.

At first, separate your plant from the pot. Break the pot if your want or just simply gently pluck out the plant using a gardening fork or trowel.

After getting the plant out, remove the soil completely from the roots. Firmly shake the plant while holding the base and let the soil completely get removed from the plant.

After removing the soil, get your gardening scissors or pruning sheers and get your hands on the roots. Cut off all the affected roots that are suffering from root rot.

You may also cut off the leaves which are a little yellow or brown or not fresh green like before. This will help you to get rid of root rot completely.

cut off the leaves

After getting the soil out and cutting off the affected roots, you will enter into the main action. Get your 10% bleach solution into a bucket and add water. Add four times water for the same amount of bleach and create a minimum amount of mixture which will be sufficient enough to soak the roots.

If you are using household bleach, take the water nine times as bleach to dilute the bleach.

After making the blend of bleach solution and water, soak the plant in the diluted bleach solution. Keep an eye on the plant so that only the roots are soaking only and the base of the plant is above the water.

Keep the roots there for a couple of hours. 5-6 hours will be enough for bleach to kill the bacteria and fungus that are causing the root rot.

After soaking, let the plant dry in the air. Air will help the roots to catch some breath and kill other types of bacteria which can not stand in the air.

This way, your plant’s root will get free from almost maximum types of bacteria and fungus. Keep the plant hanging upright in the air for one entire day or less to get the job done.

After getting all the steps done, you can repot the plant in new soil and a new pot.

Remember to get fresh aerated dry soil mixed will fertilizers and a little bit of perlite to maximize its suitability with spider plants while using a pot with a bigger drainage hole or great drainage system.

After repotting your plant, you are all set to get your plant its previous position.

Final words

You should get your spider plant roots cleansed in bleach as soon as you notice root rot in your plants.

“Can I Clean My Spider Plant Roots in Bleach?”

Cleaning roots with bleach will not harm your plant rather it will enhance the plants’ life if you can do that properly.

Remember to look after the causes behind root rot and try to keep your indoor plants free from it so you might not need to take the hassle.

You may look around Gardening Care Tips for more gardening tips.

How to Make Compost with Dead Animals

0

Are you concerned about the disposal of your dead livestock? Rather than burying them into the ground, you can convert them into natural compost. Among many methods of dealing with dead livestock, my family has been doing this one for a long time.

That is how I learned many things related to this. In this article, I will tell you how to convert your dead animals into compost based on my practical experiences.

First, you need certain tools, machinery, and carbon materials for building and managing the compost pile. Using these, you must select a proper site and prepare it for composting. Then you have to build the base, add the carcass and cover it with composting material.

Take preventive measures and emergency actions along the way. You will get the desired finished compost after 12 to 16 months.

Read the rest of the article to get more information on this process.

Make Compost with Dead Animals
NRSBC / YouTube

Why Should You Compost Dead Animals?

If you are a poultry or livestock producer, you must be concerned about the proper management and disposal of animal mortality. You may find many people abandoning the carcass of an animal in ditches, open pits, sinkholes, canals, ponds, and wells.

This is very much illegal because it promotes disease and biological hazards. It also increases water pollution, pests, rodents, scavengers, and air pollution through pungent odor.

So, you should focus on mortality composting more among various carcass disposal methods. This process is an increasingly popular and efficient alternative in terms of ecosystem management, reduced health hazard, cost savings, and the creation of a usable end product.

Therefore, try to focus on best management practices (BMPs) from now on to deal with dead animals efficiently.

Required Materials and Tools

A long-stemmed thermometer

You can also use a “Compost Soil Thermometer” or “Digital Prima Thermometer” for instant reading. The long stem is very efficient to measure the temperature at the core of the pile.

A Compact Wheel Loader or Front-end Loader

This machine will help you to move the carcass and turn the pile easily. You can also use it to move the finished compost someplace else for storage.

Remember, you will need a bigger loader for bigger carcasses. So, consider the size of the carcass before hiring a loader machine.

A Perforation Tool

The composting process can take longer if the size of the dead animals is large. So, you need to either quarter the carcass into pieces or open it up to allow more surface area for the microorganisms to work.

To do this, you can use a necropsy knife, sharp hunting knife, big blade shears, or scissors.

Materials rich in carbon content

Examples of carbon sources are peanut hulls, wood ash, crop residues, sawdust, shredded sugar beets, broken twigs, corn stalks, rotten hay bales, broken down sticks, grass clippings, coffee filters, thin branches, wood chips, etc.

You must mix water into the composting pile to keep it moist. It will be better for you to use water from wells, nearby ponds, or lagoons.

These natural sources of water usually contain more nitrogen materials for optimal composting.

The Process of Animal Composting

Select the Ideal Site

Process of Animal Composting

  • Your compost site should be in a well-drained area that is higher than surface waters like wells, ponds, canals, and streams. Make sure that the site has a good slope of a maximum of 3% for proper drainage.
  • Select an elevated site away from human residences, which may be on top of a hill for the compost pile. Here the heavy wind will blow away the foul odor rapidly, making it easier for you to operate.
  • You can also build your composting areas downwind of nearby houses to minimize the pungent odor or dust being carried from the compost pile due to heavy winds. It is also better to keep the compost pile away from the public and neighbor’s eyes because they may find the handling of dead livestock offensive and troublesome.
  • Choose a site away from the closest public resources and any water sources. For example, tables, picnic areas, residences, playfields, guest houses, etc.

Prepare Your Chosen Site

Make the base with low permeability soil. If you find predominant soils that are close to groundwater, build a compacted layer of gravel and sand of 15 cm. For more advanced issues, you may need to build a clay pad or concrete pad.

Be sure to contact the local guide and livestock owners for more information and options regarding groundwater issues and other soil categories.

Before starting to build the compost pile, vegetate the area property to reduce environmental impact. If you manage to do proper vegetation, it will soak up pile leachate and prevent drainage into any water table. This will reduce runoff while maintaining soil porosity.

If the compost site is unvegetated, you can pave it with crushed bottom ash, caliche, clay soils, etc. to reduce the permeability of the soil.

Also, you can mix those materials into the soil, and place them compactly for seepage reduction into groundwater.

Build the Base of Your Compost Pile

Use such materials that are both bulky and absorbent as base materials, for example, shredded woods, wood chips, nut hulls, ground hay or straw, dry sawdust, gin trash, green sawdust, and remains of finished compost.

Build at least one foot of base material between the perimeter of the carcass and the edge of the base. These materials are necessary to achieve successful porosity for aeration. Keep the thickness of the base between 12 to 24 inches.

Maintain the moisture content of the compost pile around 50% to 60% by mass. To capture any leachate before reaching the pavement surface or ground soil, it must go through an absorbent base layer.

Remember, the thickness of the base layer depends on the weight of the carcass.

Keep a few open bases ready all the time to insert new carcasses. Before doing this, make sure that the base material is moist, and not excessively dry. You will probably need around 12 cubic yards of materials to fully compost a cow carcass.

In most cases, you will see that a base of 10 feet by 9 feet is ideal to compose mature animals like a cow. But in the case of smaller carcasses, you need to maintain an 8-inch to 12-inch margin around each of them.

Place the Carcass and Cover with Compost Materials

Make a layer of compost mix about 12 inches over the base layer. Ensure that that carcass must be surrounded by 12 inches of composting materials with adequate moisture. The finished compost pile can reach up to a height of 6 feet.

Cover the carcass in such a way that no part of the carcass is exposed. Because if any predators or rodents discover that animal carcass, it will keep returning to the site and disturb the process.

Moreover, covering the carcass properly reduces bad odor and ensures uniform heating.

Monitor the Composting Operation

Do not use the loader too often

Do not access the loader every day. Only use it when you need to build the pile and turn it after every 4 to 6 months. You must wait up to 12 months for the completion of the composting process.

It depends on the size, space of the carcass, and mixture of compost materials.

Manage Compost Pile Timely

Monitor the compost pile daily and only intervene when needed, so try not to disturb the site in the first 4 months. During this time, the microbes and fungi work actively to reduce the carcass into homogeneous organic material.

Even after the process is almost complete, the fungi require extra time to work on the remaining pile. After 4 months, you can access the pile for watering, mixing, and stockpiling.

Compost Pile

Monitor Temperatures Regularly

Measure the pile temperatures and make decisions accordingly. You must use a long-stemmed thermometer or dial-type thermometer and check the temperature by inserting it into the center of the pile.

You can also use a compost thermometer that has a long probe of 18 to 60 inches for measuring the internal temperature. Make sure that the pile has 120°F to 150°F for effective pathogen destruction.

Ensure Proper Moisture Content

Your carbon-based compost materials should have 50 to 60 percent moisture content. If necessary, you can add water to the compost material. The compost feedstock should have 40% to 60% moisture for arid climate regions.

For efficient composting, you may need to create a flat top so that the moisture falling onto the pile gets soaked in. Try using dry materials to get rid of excessive moisture.

Adding a cap to your compost pile will reduce evaporation and help to maintain optimum water levels.

Watch out for These Issues

1. Sharp-ended bones can impact the quality of your compost materials. In addition, shards of large bones from a leg or hip girdles can puncture your farm equipment.

So, we recommend you remove any exposed sharp bone from the entire pile and break it down before using it.

2. Cover and cap the compost pile from all sides so that the carcass is not exposed. This will discourage any scavenger, rodent, and predator activity.

If only covering and capping are not enough, build a strong fence around the pile to stand against coyotes or bears.

3. Never disturb the neighbors with your composting process. Screen your pile from the public eye. Consider the wind direction to prevent the spread of odor and maintain a clean living space.

Take extra precautions before using herbicides. Although flies and other insects can be your worst nuisance, using herbicides too much can impact your dead animal compost.

Response to Emergency Situations Immediately

Use the loader efficiently for emergency issues. For example, if heavy rainfall or flood drenches your compost pile, you can use the loader to rebuild it again.

Also, due to bright sunlight, the compost pile can be too hot to access physically. In that case, use the loader to work on it.

Sometimes strong winds or tornados can cause damage to the compost operation. So, inspect the pile carefully to salvage and minimize the damage.

In this case, contact your local Emergency Management Coordinator for recovery and reduced public health risks.

Final Words

Compost with Dead Animals is a time-consuming process. But if you manage to pull off this method of disposal, you will have plenty of animal compost at the end.

Then you can use those for your field crops and garden plants. You may even sell or give away the surplus compost to other dairy farmers. Make sure to inform the buyers about the ingredients of your compost before selling.

In this way, you can dispose of dead animals by composting them and transforming them into a source of income.

You May Also Like:

Can A Compost Pile Be In The Sun

How to Make Compost in Plastic Tub

0

Do you want to make fresh compost at your home in plastic tubs or bins? You’ve taken the right decision, even my grandfather used such plastic containers for composting purposes.

Since then, my family follows the same process for producing compost for our garden. So in this article, I’ll write about how to make compost in plastic tubs or bins at your home.

Composting is time-consuming, but if you do it in small plastic containers, the process gets accelerated more. First, you need to get the ideal containers and drill them. Then you have to fill them with green and brown material.

Selecting a good location, releasing earthworms, and daily nurture will yield a good quality compost. Then you can use it as a natural fertilizer for your garden.

Continue to read the rest of the article to find more information about this.

Make Compost in Plastic Tub
Great Lakes Prepping

Why Should You Make Compost in a Plastic Container?

Compost acts as fertilizer and soil conditioner for your garden. For indoor composting, the use of plastic storage containers is noteworthy. Because they are widely available, easy to access and move, and very cheap to purchase.

Moreover, it will be easy for you to manage the contents of a small container rather than a larger one.

Also, you can get finished compost straight out of the bottom of the container.

That is why you will find most gardeners producing compost in plastic buckets or bins of their choice.

Materials and Equipment

  • 2 or 3 large size plastic containers or storage bins.
  • Wet decomposable materials, for example, kitchen scraps, yard waste, food scraps, eggs shells, etc.
  • Dry decomposable materials, for example, thin branches, broken twigs, bits of wood, shredded paper, dry leaves, etc.
  • An electric drill. We recommend bit sizes of ¼ inch and ⅛ inch.
q? encoding=UTF8&ASIN=B07CR1GPBQ&Format= SL160 &ID=AsinImage&MarketPlace=US&ServiceVersion=20070822&WS=1&tag=gctlove 20&language=en USelectric
  • A small container of earthworms. It helps to accelerate the composting process initially.
  • Stainless small-holed hardware cloth or wire mesh.

How to Convert the Plastic Container into a Compost Bin

Select the Ideal Plastic Tubs or Bins

If you check your house properly, you may find spare plastic bins or tubs. You can easily convert them into reusable compost bins. If you cannot find any, always remember to take a look at your nearby department stores.

Make sure that the containers have tight-fitting lids that will be helpful to retain moisture. Our recommended size is 18 gallons having at least 20 inches in height. But if the volume is any less than 18 gallons, the earthworms will not have enough space for movement.

q? encoding=UTF8&ASIN=B07KBJ46LK&Format= SL160 &ID=AsinImage&MarketPlace=US&ServiceVersion=20070822&WS=1&tag=gctlove 20&language=en USbin

Also, it will be tough for them to regulate the temperature.

Prepare the Plastic Bins

If you have two identical plastic containers, you can place one inside the other. As both of them have uniform mouth sizes, they will fit perfectly.

Before doing this, if you can manage to drill a few holes at the bottom of the upper container, it will be helpful to drain out any excess liquid from the first bin. You can use this drained liquid called ‘compost tea’ as fertilizer for your garden.

q? encoding=UTF8&ASIN=B081BDFMBK&Format= SL160 &ID=AsinImage&MarketPlace=US&ServiceVersion=20070822&WS=1&tag=gctlove 20&language=en UScompost tea

This will prevent your compost from getting soggy.

Next, power up your drill and make ¼ inch or ⅛ inch sized holes every 2 or 3 inches apart along each side of the plastic containers including the lid.

If you follow the procedure in the previous paragraph, make sure to drill holes at the bottom of the first container only. However, if you drill using bigger bit sizes, place hardware cloth or wire mesh at the inner wall of the bin to resist rodents.

Remove all plastic residues after making the holes.

Select the Best Location For the Bins

After the holes are drilled, it’s time for you to select the perfect place for the containers. If you live in a cold climate area, consider placing them indoors. Otherwise, the decomposition will stop freezing the compost.

But if you live in a hot climate area, place them outdoors provided you can shelter them from rainfall.

You can place them near your kitchen or vegetable garden. In this way, you can easily compost the kitchen scraps, household waste, food scraps, garden waste, weeds, and yard trimmings into it.

Other than that, you can also place them on balconies, porches, garages, or storage sheds. Just remember that wherever you place them, you need to keep them safe from heavy rainfall, cold, and excess sunlight.

Fill the Bin with Decomposable Materials

Make sure to add any dry decomposable materials as the first layer, for example, grass clippings, coffee filters, broken down sticks, paper napkins, and towels, thin branches, toilet paper rolls, paper egg cartons, shredded newspaper, coffee grounds, dry leaves, wood chips, wood ash, etc.

Decomposable Materials

These dry organic matters will help you to create a stable base and retain the proper moisture. Before adding any big and dry paper rolls, make sure that you chop them into smaller pieces.

You can also make it damp to accelerate the decomposition rate.

Then gradually you can add wet decomposable materials like kitchen scraps. Wet materials also include rinsed egg shells, vegetable peelings, food waste, fruit peels, vegetable scraps, etc.

Remember that before adding any kitchen compostable materials like vegetables and fruits, you need to finely chop them using a knife or food processor similar to a blender.

Chopping into smaller pieces will help them to break down quicker and promote decomposition.

Release the Earthworms

You can always release a handful of earthworms initially to expedite the decomposition process, although it is optional. If your container is smaller, you can start with around 100 to 150 earthworms.

But if you can manage the container of our recommended size, you can release 200 to 300 earthworms at first.

The earthworms consume all the decomposable materials and keep recycling again into the compost. Nurture them properly and protect them from cold or bright sunlight. Contact your local worm farmer who can supply you with earthworms.

In addition, if you have a bait and tackle shop nearby, you can easily get worms for your compost.

Ensure Better Maintenance of the Containers

Don’t add composting materials without proper measurement. Because excessive dry materials will decelerate the decomposition rate while too many wet materials will make the compost soggy and smelly resulting in the death of worms.

Keep in mind that a healthy compost pile generally has less nitrogen matter than carbon materials.

If you find that the contents inside the compost are very wet producing a pungent smell, you need to add some dry scraps like shredded dead leaves and sawdust into it.

On the other hand, if the inside is very dry, add wet materials gradually and spray water to increase moisture levels.

Maintenance of the Container

You need to shuffle the organic material every 3 or 4 days so that none of them stay inactive. Try to use your hand while doing this, because using a scoop or shovel may kill the worms. Keep turning the materials and bring the bottom ones to the top.

In this way, you can release the oxygen trapped inside and let fresh air in.

Don’t leave your compost unturned for a long period. As you have added food scraps, they can consume nutrients to grow a plant. As a result, your compost will become less nutritious day by day. The compost can no longer act as a fertilizer, all your hard work is wasted.

On the contrary, turning the compost too often will interrupt the movement and growth of eco-friendly organisms like actinomycetes, fungi, molds, yeasts, red wiggler worms, pillbugs, etc.

Nurture Properly and take Preventive Measures

  • Check the temperature of the compost daily. If it is warm enough, then the decomposition is occurring properly. But don’t let the inside get too hot, otherwise, the microorganisms will die.
  • If the inside is cold, maybe the decomposition is not happening efficiently. Try to add nitrogen to it through green material and water.
  • You can always add earthworms to accelerate the decomposition process but be sure to keep a count of them. In addition, you can use commercial compost starter and nitrogen fertilizer in the optimum amount to quicken the process.
  • Make sure that the drainage holes at the bottom do not get clogged because of excess compost materials. Shuffling contents from time to time can prevent this.
  • Remember, you must not add all kinds of kitchen waste into the compost, for example, banana peels, peach peels, raw eggs, dairy products, animal bones, meat, etc. Although they will get decomposed in the bin, the process will most likely develop pathogens. This will generate a pungent odor and attract harmful pests and rodents.

Final Words

Composting in a plastic tub or bin is easier than doing it in a large container. You will have better mobility and accessibility with those containers that will help you to nurture efficiently.

While other methods can cost you more, this successful composting process can be completed for less than $20 or $30. Your cheap compost will turn into nutritious fertilizer in just 3 to 5 months (12 to 14 weeks). Then you can use it in your garden for better productivity.

So, don’t wait and start investing in homemade compost now and make natural fertilizers for your garden soil.

How to Kill Grass with Compost?

0

Do you want to start your garden by killing the lawn grass with compost? Even my father adopted the composting process to kill grass when I was young to start our garden. Over the years, I gained a lot of experience working with him.

So, in this article, I’ll write about how to kill grass with compost-based on my practical knowledge.

You will find that the composting process is recommended by most home gardeners to kill the grass. In this process, you have to mow down the big grasses first. Then, you need to lay down a few layers of paper and cardboard on the lawn and apply inches of mulch and compost to it to start the process.

After watering and nurturing for a definite period, the grass will get killed eventually. Continue to read the rest of the article to know about this process in detail.

How to Kill Grass with Compost

Different Methods to Kill Grass from Your Lawn

You can choose any of the three major procedures to reduce or remove grasses from your lawn. These three methods are widely used around the world. But remember, all of these methods have their advantages and disadvantages. Therefore, you must take extra precautions before applying any of these to your surroundings.

First method:

The first method requires professionals to perform because it includes the usage of toxic chemicals. They use these toxic chemicals on your lawn to kill grass faster than any other method.

But keep in mind that these chemicals are so powerful, that they will also kill any environmentally friendly microorganisms, fungus, and soil pathogens, for example, Actinomycetes, Mycorrhiza, Nematodes, etc. The chemicals not only kill grass but also degrade the value of soil. Using such toxic chemicals too much will destroy all organic matter and affect nearby trees.

So, if you are a nature lover, we request you not to adopt this method.

Second method:

The second method is quite manual and exhausting because it requires hard labor to perform. You need to use a sharp shovel or sod cutter to remove grass and weed seeds from your lawn.

It will always be good for you to sharpen up your tools before using them, otherwise, it will require extra push and strength to get your desired outcome.

But if you have back pain or you’re physically tired, you can always hire professionals to do this for you.

Third method:

The third method that we will be writing about in detail is known as sheet mulching. You don’t have to use toxic chemicals and it doesn’t require hard labor to perform.

But keep in mind that you should have enough time in hand to get rid of the grass from your green lawns properly.

What is Sheet Composting?

Among all the methods that we have discussed, or have known before, sheet composting is one of the best eco-friendly ways to kill grass and weeds. You may also know this as lasagna composting or sheet mulching.

It is good for you that this process is quite inexpensive, less exhausting, and requires regular cheap materials to operate with simple skills. You can kill lawns easily, by creating a deficiency of sunlight. Spreading layers of different materials on the grass will eventually break down into compost, thus giving you nutrient-rich soil while killing weeds along the way.

You can perform sheet mulching in almost all types of lawns, for example, Kentucky, Fescue, Centipede, Perennial Ryegrass, Couch grass, Bermuda, St. Augustine, Zoysia, Bahia, Pampas, Buffalo, etc. Sheet mulching isn’t dependent on any season, so you can start the procedure at any time of the year.

Just make sure that you have enough time in hand because this entire process will require 6 to 10 months to properly kill your lawn.

How to Perform Sheet Composting

Required Materials and How to Manage Them

Cardboard:

Regular cardboard or layer of newspaper (black and white only) that doesn’t contain glossy colors. Otherwise, the metal pigments from colored pages can hamper the composting process.

If you want to buy cardboard, look for places that sell refrigerators or similar house appliances. You can also contact local retail stores to get board-like boxes. If there is a local packing company nearby, you can purchase corrugated rolls from them.

Mulch:

A maximum five-inch layer of mulch. You will find natural mulches like pine needles, grass clippings, small gravel, shredded bark, straw, etc. We recommend you use wood chip mulch. You may find this available at different landscape supply yards.

Try not to use mulch from allopathic trees like Walnut, Eucalyptus, etc. which may restrain plant growth in the future. Make sure that the mulch you get from the tree doesn’t contain any contagious bacteria.

You can also contact the local tree companies who can supply you with readily chipped bark or arbor mulch at a cheap cost.

q? encoding=UTF8&ASIN=B08S1TWT2X&Format= SL160 &ID=AsinImage&MarketPlace=US&ServiceVersion=20070822&WS=1&tag=gctlove 20&language=en USarbor mulch

If you live anywhere near California, be sure to check the website lyngsogarden.com to purchase mulch for your garden easily.

Clean water:

An adequate supply of clean water. This helps the cardboard to maintain a proper moisture level.

Also, the water provided during the composting process helps to increase fertility. This will help you a lot in the future if you try to establish a vegetable garden on the same soil.

Water Sprayer:

A regular hose equipped with spray attachments. Depending on the lawn area and the speed of your water flow, you can try various attachments that can modify the range of the water spray. Browse Amazon or eBay to find a wide variety of hose fittings, nozzles, sprinklers, and connectors that control water pressure.

Two inches of compost or worm castings. This compost pile will increase the nutrient value of your soil surface and help you to make an edible garden after the grasses are killed.

Lawn Preparation

  • Set the power of your mower to the lowest setting and then begin scalping your lawn.
  • Use your shovel and get rid of any items that get in your way, for example, stones, heavy metals, or rocks. If any of those items are found reusable, you can save them for later purposes. But if any permanent object becomes a barrier, try to deal with it with utmost caution.
  • If the mower encounters any hardscape, you can use a sharp shovel to pick up or trim around that area. This helps to clear a path for the lawnmower. Put the excavated lawn pieces onto the remaining lawn area upside down. You can use the back of the shovel to flatten it up.
  • Keep watering the ground properly, but don’t turn it into clay soil. If the soil remains hard and compact, it will badly affect the composting process. So, apply adequate water at the required places for a short period. You can keep repeating this process to get the required soil moisture.
  • To prevent spillage of mulch onto nearby fields, roads or pavements, you can set up temporary fences at the perimeter of the composting lawn.
Lawn Preparation

Process of Sheet Mulching

  • Select a less windy day to place the layers of newspaper and cardboard. You need to ensure a thickness of 7 to 10 sheets of newspaper on the grass. Ensure that there are no gaps or holes between the sheets so that no sunlight can reach the grass and weeds.
  • In addition, you can include a layer of kitchen scraps, food waste, coffee grounds, fresh green weeds, or animal manure along with leaves and lawn clippings.
  • Try not to place sheets around bushes or plants, but if you have to, place them at least 10 inches away from those plant stems.
  • It will be better if you can manage more manpower for the job. Divide the tasks of placing a layer of cardboard, spreading mulch and compost, and sprinkling water between them. But if you do all these three tasks alone, make sure to do all of them simultaneously.
  • Sprinkle water over the papers or cardboards to keep them soggy enough. This will prevent them from blowing away. Also, watering frequently helps to maintain moisture, increases organic material, and quickens the composting process.
  • For the composting process, spread a two-inch layer of compost over the lawn. This will also help you in the future to create an edible landscape garden.
  • As you lay down the papers and cardboards, keep applying mulch to them. Try to maintain a minimum layer of five-inch. This will prevent them from blowing or tearing away because of strong wind.

Final Words

Wait patiently after the initial processing is done. You need to allow a minimum of 6 to 10 months so that the entire lawn is turned into compost and the grass with weed seeds is killed.

Finally, after a long wait, you will get fertile, loamy, and earthworm-infested garden beds. Then you can start planting flower and fruit trees in this nutrient-rich native soil. Be sure to contact a soil specialist or your local gardeners to get instant tips.

Just remember to keep up the hard work and believe that your labor will never get unnoticed.

Can A Baby Spider Plant Harm The Plant?

Spider plants maybe are the most common and favorite in-house gardening plant of all time. As they are easy to grow, even beginner-level gardeners can easily raise them. Its tremendous air purifying capacity also makes the ribbon plant adored by all.

The plant requires almost no care besides water and indirect light. In the meanwhile, the plant produces a lot of babies or spideretts within a short period. These baby plants will provide you with the great opportunity to get more plants in your garden but it may not always be the same.

Spider plant babies may seem harmless to you but as they feed upon the mother plant, they drain out a large portion of energy and nutrition from the mother plant. For that, many gardeners suggest the idea of cutting them off to keep the adult plant fit and happy.

Although it entirely depends upon whether to keep the baby spider plants attached to your plant or not you may go through the following to rethink and take the necessary steps.

Can A Baby Spider Plant Harm The Plant
Harli G/ YouTube

Can the babies harm the plant?

Yes, the baby plant can damage your beautiful spider plant. It won’t directly kill your plant but drain nutrients from the mother plant. The more babies your plant produces, the more fertilizer and water it requires because this consumes a large portion of its energy.

If you fail to meet the demand accurately, the babies will feed upon the mother plant, and eventually, you will lose your lovely plant.

To avoid these types of circumstances, you should cut off the babies. The sooner you prune them, the better for the plant, which improves the environment in your home.

If you don’t want your beloved plant to suffer then you should cut the baby plants to prevent them from harming the adult plant.

Should I Leave the spider plant babies?

Yes, you may allow the babies to be with your spider plant. This will help you to get more spider plants. You may end up having more and more plants and gift them to your near and dear ones.

But if you don’t have such kind of plans, then the idea of keeping the babies or spideretts is not suggested for you.

 spider plant babies

If you plan to create more spider plants from the existing ones, you may keep some of the babies and let them grow till it’s time to plant them. If you choose to leave the babies attached to the spider plant, you will need to supplement the mother plant with nutrients.

Keep an eye on your plant if you don’t want to lose all in the process of gaining some plants.

What to use while cutting the babies?

Before you start cutting off the babies from your adult spider plant, you may want to have a clear idea about the options you have at your hand to do the job most conveniently.

To prune your spider plant simply, use a regular pair of scissors. You should also purchase a pair of garden scissors or pruning shears because you will be pruning the spider plants frequently for both cuttings of babies and foliage. You can easily find them at any gardening store near your home.

q? encoding=UTF8&ASIN=B00002N66H&Format= SL160 &ID=AsinImage&MarketPlace=US&ServiceVersion=20070822&WS=1&tag=gctlove 20&language=en USgarden scissors

Before pruning your plants, you can also use some disinfectant measures. You can use readily available sanitization methods such as hand sanitizers or any other simple method that is easily accessible to you.

Disinfectants will assist you in reducing the possibility of bacterial and fungal contaminations and keeping your plant safe and strong. You can also use these to disinfect:

  • You can use a 10% bleach solution. Bleach will destroy your blades’ sharpness and eventually harm your blade if used frequently.
  • You may opt for a household cleaner if you are a nature lover.
  • Rubbing alcohol or white vinegar is also a good option.

How To Cut off the spider plant babies?

If you wish to cut off the little plants on unnecessarily draining energy and nutrient from your beloved plant, you are always welcome to do so.

Although these come with the benefit of gaining more plants, the bait does not always match your expectations. These little ones may create more hassle for your plant and eventually generate misery for you.

For these, anyone would appreciate your plan to cut them off. The sooner you cut them off will be more convenient for your plant.

So, get your scissors and cut them off. Even if you want more plants, you can reduce the number of babies while keeping some for propagation.

If you are still not sure what exactly is spider plant baby is, then get closure to your plant. You will notice some small bush or foliage are kind of separate from your plant while being connected with the plant through a string. These small bushes are the babies you are looking to get rid of.

Get your hands on your garden scissors or pruning shears or even your regular kitchen scissors and go through the strings.

q? encoding=UTF8&ASIN=B000UU6SR4&Format= SL160 &ID=AsinImage&MarketPlace=US&ServiceVersion=20070822&WS=1&tag=gctlove 20&language=en USir?t=gctlove 20&language=en US&l=li2&o=1&a=B000UU6SR4

Cut off the babies by cutting off the connecting strings from the base of the plant and if possible, make sure no portion of the string stays with the plant. These will help your plant to retain its energy and sparkle.

Remember, even if you want to keep the babies and generate more plants from them, it would be always suggested that you cut some off the babies and keep the number of babies limited.

It will help you to keep a tab on your plant’s energy drainage and get some healthy babies or more healthy plants.

How to plant spider plant babies?

If you like the idea of growing more plants from your existing Spider plant and thinking about how to do so, then worry not.

Follow the steps below and get some more magnificent spider plants for you and your loved ones without much effort.

1. First, choose the perfect spider plant baby. Your plant may contain many babies but still, all of them might not get you a great plant.

So, look in the babies and select the ones with some nodes or tuberous roots below the leaves for propagation. These babies are better for planting and growing more spider trees.

2. After selecting the baby to propagate, you should set up the pot to plant the baby in. Get yourself a pot with a better drainage system.

As spider plants hate to waterlog, a pot with a bigger drainage hole will be able to keep your plant free from excess water while passing them away. After selecting the pot fill it up with a decent amount of soil.

You may add some fertilizer and some perlite to make it more suitable for the plant.

q? encoding=UTF8&ASIN=B07CND4WV9&Format= SL160 &ID=AsinImage&MarketPlace=US&ServiceVersion=20070822&WS=1&tag=gctlove 20&language=en USperlite

3. After everything is set, you can move into planting the baby.

At first, remove the Spider baby from its mother plant while completely removing the hard branch that connects the two plants. After removing the hard branch, it’s time to remove the tiny little leaves near the nodes or roots and clear the root of any extra leaves.

Now is the time for the tree to be planted into the ground pot.

4. Dug out the soil a bit and make a small hole and place the baby plant in it.

Add some more soil to the pot if needed. Fill up the pot with soil so that the roots or nodes stay under the soil. After that, gently water the soil with a bit of water and try to keep the plant dry or free from moisture.

After watering, let the excess water drain out from the moist soil.

5. Then the water has been drained, place the plant in a shaded area, preferably away from direct sunlight, to keep it alive.

After two weeks, the plant will have some mature roots, and within a couple of weeks, it will be fully mature, ready to be planted in your garden, or given to a friend or neighbor as a gift.

Last few words

Don’t hesitate to cut off the babies from your spider plant. Even if you cut them all at once, you will always get them again soon.

And if you plan to grow more plants out of your plant, you may keep the number of babies on your plant limited.

You can always reconsider the decision but always keep in mind that even if the babies don’t harm the plant but still it hogs out the energy and nutrients from the mother plant.

Basil leaves are turning yellow and curling

We all know that basil is a hardy plant that can easily survive a little bit of the harshness of nature. But that does not mean you will not face any problems while growing basil in your herb garden. There are many problems that you may face during basil cultivation.

Out of those problems, we often face the problem of yellow and curly leaves. Sometimes you may notice that the leaves are turning yellow or curling up or down. So, to solve this problem, you have to know why they are turning yellow and curling.

Basil leaves can curl and turn yellow due to overwatering, too much or too little sun, disease, or pests. So these are the main reasons for all those curly and yellow leaves on your basil plant.

So, I am here to give you the details of the cause and solution to the problem. Let’s dig deeper!

Basil leaves turning brown
Gardening at 58 North / YouTube

Why basil leaves are turning yellow and curly

As you already know that basil leaves can turn yellow due to overwatering, fungal diseases, pests, malnutrition, or not getting the right amount of sun. Nobody wants some yellow leaves on the plant in the place of some fresh green basil leaves.

Here I have mentioned five causes of it. So, let’s know about those!

1. Frequently deep watering or overwatering!

The most common cause for turning leaves yellow is too much watering. Basil likes moist soil but can’t tolerate soggy soil. So, if you notice the yellow and curly leaves on the plant, you can be sure that the watering is way too much.

Maybe you are using poor drainage clay soil for the plant. Or else, the drainage holes are not enough to drain the excess water. As a result, the excess water will turn the soil soggy.

Besides that, the soil surface is not dehydrated, but you are adding water to it. So, then the over-watering will cause the problem, and soon you will have yellowish and curly leaves on the plant for sure.

2. Providing the sunlight to basil in a wrong manner

Basil is a sun-loving plant. Basil needs direct sunlight for 6 hours per day. But when you place it in a shady place, it can’t get enough sunlight. So when it doesn’t get that amount properly, it tends to curl and turn into brown leaves.

3. Disease attacks can be severe!
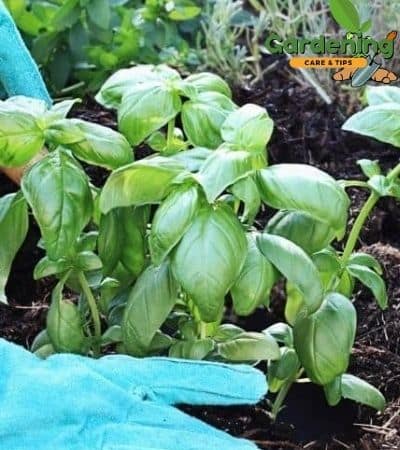
Another cause for curling and yellow leaves is a disease. The root rot and some fungal attacks cause the basil leaves to turn yellow and curly. Over-watering can consider as the main culprit for fungal attacks as soggy soil can attract fungus or bacteria to the plant. Let’s discuss those diseases.

Rotten Root Disease

Root rot is mainly a fungal attack on the roots due to over-watering. The fungi create mold on the downside of the plant, and that causes the roots to rot. As a result, the leaves will start to turn yellow and curly, and eventually, the plant dies due to root rot.

Downy Mildew Disease

You can easily trace the presence of downy mildew disease by tracing the drooping leaves and yellow spots on the leaves. A humid environment encourages this disease to grow. When you kept the plant in a moist environment with poor air circulation, this disease can effortlessly attack your plant. So, it is better to locate the plant in a place where it can get fresh air.

Powdery Mildew Disease

It is another fungal disease that can be the cause of curly leaves. You can notice the curl leaves along with powdery stuff on the leave’s surface. Too much watering and shady place encourage this disease to grow on the plants.

Fusarium Wilt Disease

This deadly fungal disease will turn the leaves curly and brown. In this disease, there grows fungus on the plant that ultimately kills the plant.

4. Either too much or no fertilizer for fighting nutrient deficiency

Indeed, basil doesn’t need heavy fertilization. But a light fertilizer can help the basil to get the nutrition for its growth. Due to nutrient lacking, basil leaves can turn yellow and curly. Also, due to nitrogen deficiency, the basil leaves can turn yellow.

However, using too much fertilizer can cause the leaves to burn, and the leaves can be curly due to the fertilizer burn.

5. Pests are unwanted guests sucking the leaf’s fluid

If you notice a pest on an individual leaf, be sure the entire plant is under pest attack. When the foliage is turning yellow, check the underside of the foliage. If you notice some small substance on the back, the pests are here!

Aphids

These sap-sucker insects attack the underside of leaves. Because of this insect, the leaves will curl and turn yellow. This pest can suck all the fluid and nutrients from the leaves that cause the leaves to become curly and turn yellow. Even the plant can die if you don’t take care of the affected plant.

Spider Mites

It is also like aphids, sucking the leaf’s fluid. Initially, you can notice yellow or brown spots, and gradually the leaves start to curl after the attack. You may not see this pest on the leaves. So, shake the plant softly, and some white stuff falls from the plant. Then, you can be sure of its existence.

Five ways to prevent yellow and curly leaves on basil

So till now, we have discussed the causes of the curly and yellowish leaves. Now it’s time to discuss the prevention of this disease so that the basil can have healthy growth. Let’s jump to the solutions.

1. Stop doing overwatering!
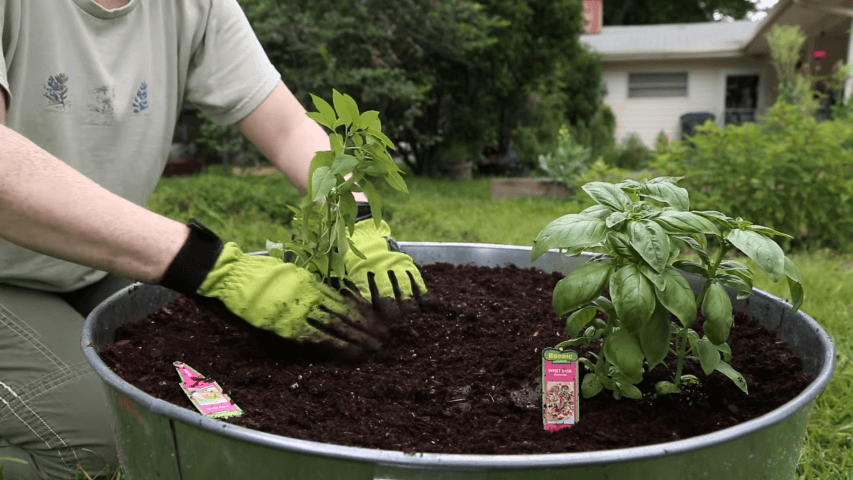
Many people misunderstand the moist with overwatering. Moistening the soil doesn’t mean overwatering. Basil doesn’t need lots of water! Only one inch of water per week is okay for it. Water basil once after every two or three days based on the soil moisture. Other times, you can just moist the soil using a spray bottle, but don’t let the water touch the leaves.

2. Place the basil in a sunny spot!

As basil requires 6 hours of sunlight per day, it is better to put it in a sunny spot. But make sure to protect it from the harsh light of afternoon shade. Also, be aware of the temperature as it shouldn’t be 90 degrees or more. Also, it will better to avoid sunburn.

3. Keep the fertilizer under check!

Basil also needs fertilizer like other plants. You can use some liquid fertilizer once every couple of weeks in a small amount. Or you can use a slow-release fertilizer in the soil or potting mix and re-fertilize it again after six months.

4. Fighting against the pests

For fighting against the pest, you can use chemical pest control spray or insect soap. Follow the package instructions for applying them.

Besides that, you can use a predator, like a ladybug, for taking down the aphids. The aphids are the tasty snacks for ladybugs, you know! Or else use neem oil to keep the pest away.

Sometimes, ants can invite those pests to your basil. So, it’s better to keep the ants away. For that, you can either use ant-killing medicine or cinnamon powder in the soil.

Moreover, you can use some companion plants like garlic or zinnias. They will work well as a repellent for keeping the pests away.

5. Fighting against the disease

Now to talk about the disease. The only remedy to keep sickness away is to keep the basil in a sunny spot and away from soggy soil. Most of the fungus attracts to the plant because of the wet soil surface or wet leaves. So if you give them a warm environment and the right amount of water, neither the plant nor the soil will remain damp.

However, if the disease attacks a single plant, it is better to remove the sick plant as soon as you notice it. The fungus can be contagious to affect the other plants in the garden.

Few last words for you

Don’t be upset if your basil leaves have turned yellow or curly. It is common to face some problems during the gardening journey. But you see, I have mentioned all the possible causes and the solutions for solving those problems. I hope these will help you with your basil problems. Have a good gardening journey, Happy Gardening!

How to start basil from cuttings

Growing basil from cuttings is one of the easiest ways to have this delicious herb in your herb garden. You can even collect basil cuttings from your gardener neighbor. So, you can say that this method is budget-friendly as well.

However, you may think that you can’t get a healthy basil plant from cuttings. But to be honest, you can grow a healthy, bushier plant from basil cuttings without investing in basil seeds or seedlings.

Here I am going to tell you how to start basil from cuttings. Many beginners may be unaware of the process of growing this summer herb from cuttings.

So, let’s dig deeper to get a handful of tips about it.

How to start basil from cuttings
 How To With Angie / YouTube

Five easy steps to grow basil from cuttings

It can take 6-8 weeks to grow basil from seed. On the other hand, it can take only a couple of weeks to grow basil from cuttings. So it is not only a budget-friendly way but also the quickest one.

You can also start this process indoors safely by avoiding the risk of frost on late spring days. That’s why it is easier to cultivate basil from cuttings.

The ways of growing basil from cuttings are also the easiest ones. So, let me share the tips to grow basil in this way.

Step 01: Collect your basil cuttings!

You already know that you can collect the cuttings from your neighbor. Besides that, you can get the cuttings from a grocery store, nearby garden center, nursery, or a farmer’s market.

You can collect a bunch of them for starting your growing process.

The basil cuttings need to be from a fresh and healthy basil plant. If you buy them from the market, then check the freshness of the stem and leaves.

Always try to collect the cuttings from non-bolting variants of basil.

Step 02: Get your basil ready for rooting!

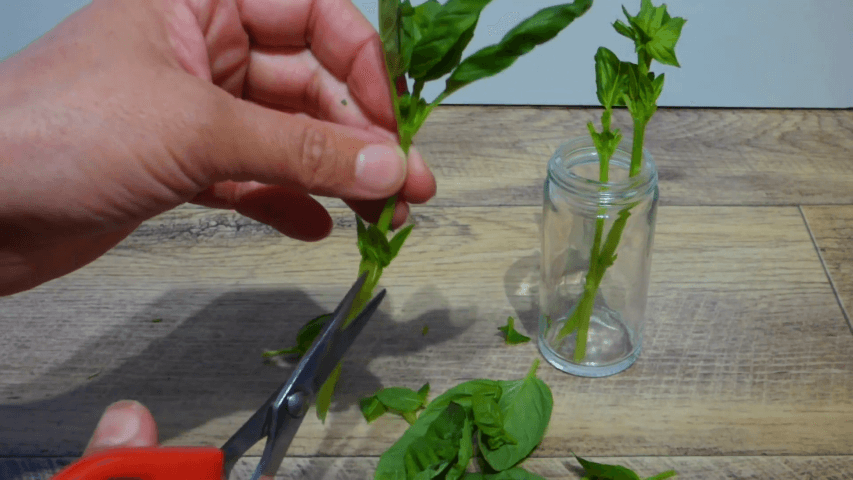
Now you are done with selecting the mother plant. So, cut a stem from under a leaf node of the selected basil sprig. Make sure the basil sprig should be 4-6 inches tall.

Use kitchen scissors or a sharp knife for cutting the stem and make sure the scissors or the knife are clean to prevent fungal or bacterial infections.

Now remove at least 1-2 sets of leaves from the bottom of the stem. Clear the sprig for almost about 2 inches at the bottom. Also, make a 45-degree angle cut from the top so that new foliage can come out from there.

Step 03: Start with growing roots on the cuttings

The growing process of basil mainly starts from this rooting process. There are two ways that you can use for rooting your basil stem.

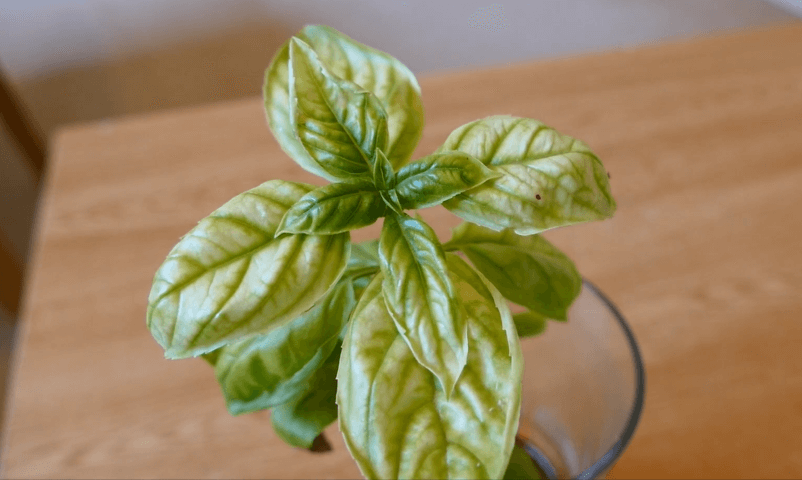
rooting basil stem

Rooting basil in water

For this process, take a mason jar and fill it with fresh water. It’s better to use spring water or filtered water rather than tap water. If there is chlorine in tap water, leave the water for one day to evaporate the chlorine.

When the water is ready, put the cutting stem in the water. Make sure that no leave is sinking in the water. If there remains any left in the water, then they might get rotten.

Put the glass jar into a place where it can get indirect light. Besides that, sometimes put the water jar near a sunny windowsill to get direct sunlight for at least 6 hours.

Change the water regularly to prevent fungal attacks. Within a couple of weeks, you can notice the roots coming out from the stem.

Rooting basil in potting-mix

Then here comes the other way for growing roots is pot-mix or pot soil. For pot-mix rooting, you will need a 4-inch pot, moistened pot mix, and large transparent plastic bags.

At first, fill the pot with potting mix to prevent the stem from drying out. After filling the container with the soil mix, clip the basil stem from the plant and put them into the container. Place the basil stem firmly so that it can get a good connection with the soil.

Put the plant near a sunny windowsill and cover the stem with a plastic bag to capture the humidity environment. Also, if you have placed the pot on a tray, you can use a plastic dome to cover it.

Mist the plant regularly and check the soil moisture quite often. If you find the soil dry, then water it immediately to keep the soil moist.

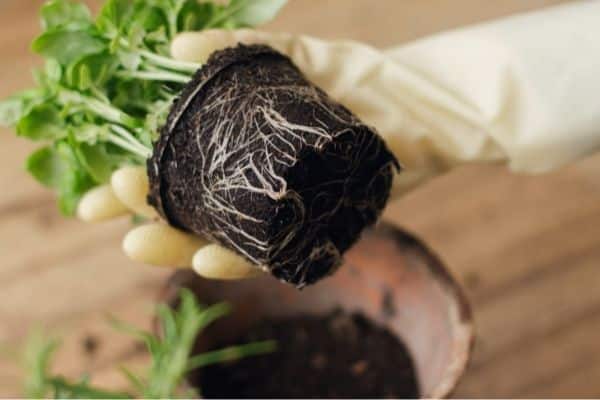
After two weeks, you can check the basil pulling out of the soil to see the root structure. If there are roots, you can move forward to the next step.

Don’t use rooting hormone!

Many times it may take 3-4 weeks to grow the roots on the stem. So, many gardeners may suggest you put the basil stem into the rooting hormone before going forward with the rooting process. But I advise you not to do that.

Basil is a culinary herb that has quite a short life cycle. So, it is not appropriate to put such short-term and edible plants into the rooting hormone before starting the rooting process.

Basil can happily grow without rooting hormone. It is more than enough to select healthy, disease-free plants and then grow them in potting mix or water. Don’t hurry with the growth of the roots.

Step 04: Get ready to plant the basil!

plant the basil

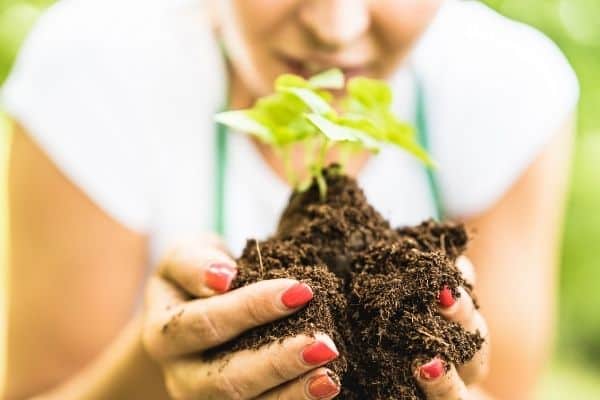
Once the root has formed, it is ready to go into your garden. Before planting it in the garden bed, you better make the basil strong to face the outside environment. That’s why it’s better to plant the basil plant in a container first.

When the white roots are about 2 inches long, you can plant them inside a pot. Take a 5-inch deep pot and fill it with moistened soil or potting soil. Make sure the container has broader space so that the root can grow with satisfaction.

There should be enough drainage holes for draining the extra water out. Also, you can place it on the top of a tray so that the soil can remain moist from the bottom of the pot.

Put your basil under the sunlight for at least 6-8 hours to give warm weather. But try to avoid direct sunlight. As the basil is still in a delicate condition, direct sunlight can cause sunburn.

Also, to get rid of the afternoon shades, you can use a cover for the plant or move the plant to a shady spot.

Moreover, don’t forget to water the basil properly. The soil can dry out quickly due to warm weather. So, check the soil and water them as much as needed to keep the soil moist.

With this little bit of care regularly, the basil will be ready to go out.

Step 05: Time to put your basil outside

basil  plant outside

The basil will take 1-2 weeks to get prepared for going out. Besides that, you can put the basil out for a few hours regularly after the passing of one week. In this way, the basil will be ready to adapt to the outside environment!

After 1-2 weeks, plant the basil outside in your garden beds. Or else, you can keep the basil indoors as long as you want and add this to your culinary herb garden.

No matter where you plant the basil, you can always get the fresh basil according to your requirement.

Few last words for you

I hope these easy guidelines on “how to start basil from cuttings” are helpful for you. So, now you will be able to grow basil from cutting stems.

Besides that, it is a budget-friendly and fastest way to grow basil indoors or outdoors.

Just by following these steps, you can start the basil growing process. Also, take proper care of the plant to get a healthy and bushy basil plant. Happy gardening!

How much sun does basil need to grow

Basil loves to grow in a warm environment. So, it is for sure that it needs a lot of sun. Beginners often get confused about the sunlight demand of the basil when they start growing this popular herb. They either give too much sunlight or fewer hours of sun than needed.

So, how much sun does basil need to grow? Basil needs at least 6 to 8 hours of sunlight per day to grow. Basil needs direct sunlight for almost 7 hours per day at an average rate. Even when you are growing basil in a shaded place, you should be careful about the right amount of sunlight.

Basil can’t survive without sunlight and a warm spot. But it doesn’t mean that basil can endure too much sunlight. So, you must have to know the right amount of light that you can give to your basil plant.

So, let’s dig deeper to know how much sunlight is needed for your basil to grow.

How much sun does basil need to grow

Basil is a sun-loving plant!

This leafy green basil is one of the easiest herbs to grow in your herb garden. This herb has no woody structure, so it is quite a delicate herb. That’s why basil needs your attention.

Basil needs direct sunlight for at least 6-8 hours per day. But averagely 7 hours per day will also do the job. Basil needs sunlight to grow more and more leaves.

Like other plants, basil also performs the photosynthesis process for making food, and the energy coming from the sunlight is an inevitable part of this process. So, if you can’t give enough sunlight to basil, it can’t produce enough food for itself through the process.

Also, it can’t receive the nutrition from the soil properly. Besides that, basils thrive best at the temperature of 70° – 80° F. So, for giving the plant and soil a warm environment, it is a must to keep the basil in a sunny spot whether it can be an indoor or outdoor space.

However, basil babies don’t need too much sunlight which means too much sunlight can be harsh to your basil seedling. On the other hand, if you have planned to sprout the basil seed, you need to give some sunlight but not plenty of sun. It’s better to protect these tender plants with light shade.

Besides that, basil needs a minimum level of sunlight for its healthy growth.

Does basil need direct sunlight?

basil in direct sunlight

As we have already said, basil needs direct sunlight for at least 7 hours at an average summer temperature. It is required for growing basil healthy.

However, if the place is too hot due to the 90-degree weather, then you must not allow too much direct sunlight to your basil. You can provide partial shade for the basil during those days of summer.

What will happen if basil gets too much sun?

Though basil is a sun-loving plant, it doesn’t mean that basil needs plenty of sun. Too much sun exposure can cause the discoloration of baby basil. Besides that, mature basil plants also can get damaged if there is more sunlight than the basil sun requirements.

The basil leaves have to fight to keep the water inside when the temperature rises to around 90° F. Basils are bound to transpiration like other plants. So, when the weather is too hot due to intense sunlight, the leaves start to lose water rapidly.

As a result, the leaves start wilting as well as the risk of fungal infection increased.

Besides that, the plant cells will start to decline due to dehydration caused by the heat. Eventually, it will die. Also, if you are growing basil from seeds, then the germination will take a long time.

Even the basil sprouts can get damaged. Thus you can’t get your desired result.

However, if you notice drooping leaves, shrunk leaves, and the discolored edges of the leaves, then it is high time you had to get rid of too much sunlight.

What will happen if basil gets too little sun?

Basil may not grow properly due to the lack of sunlight and warm weather. Basil can’t produce enough food without the right amount of sun.

As a result, the leaves will start to fall from the trees to prevent the food crisis and save energy. The basil will grow fewer leaves as well as the leaves will get smaller. 

basil in too little sun

Besides that, you can’t get a bushy plant with those fewer leaves or with those small leaves. However, too little sunlight can cause basil’s green color leaves to turn yellow.

How much shade is appropriate for basil?

You can provide partial shade to your basil and grow it with partial sunlight during hot weather. Excessive sunlight and heat can be harmful to the plant. 

Besides that, high temperatures can make the soil dry. Or else, you may find it hard to keep the soil moist frequently.

However, during the spring, you don’t have to add shades for the sunlight. But on summer days, it is a must to add a light shade over the plants to protect them. Most importantly, when the temperature is nearly 90 degrees.

You can arrange for a light shade for the plants to avoid the hottest hours of sun. Most importantly, you have to avoid the harsh afternoon shade.

q? encoding=UTF8&ASIN=B07QGVGJNC&Format= SL160 &ID=AsinImage&MarketPlace=US&ServiceVersion=20070822&WS=1&tag=gctlove 20&language=en USshade

However, you have to make sure that basils are not missing the sunlight because of the shade. You have to avoid the brutal lights of midday or afternoon.

Basil can grow without sunlight too!

Are you surprised to hear that? Well, what I mean to say is that you can also grow basil under artificial lights. Many beginner gardeners tend to plant basil indoors. But the problem is that they don’t get enough sunlight for the container garden.

q? encoding=UTF8&ASIN=B09NVH8QDV&Format= SL160 &ID=AsinImage&MarketPlace=US&ServiceVersion=20070822&WS=1&tag=gctlove 20&language=en USgrow light

Also, you can grow basil in containers for getting fresh basil during winter.

But there might not be sunlight during winter days.

That’s why you need to arrange for artificial lights to grow basil. You have to put your basil under growing lights or fluorescent bulbs to provide plenty of light to basil.

For getting the best growth of basil, you must provide the plant with light per day for about 10-12 hours.

Where should you put your basil plant?

I have already discussed that basil needs plenty of sunlight and warm weather to grow properly. So, you certainly have to put it in a sunny and cozy place.

It is better to choose a south-facing or south-east facing spot to receive the morning hour’s sun with fresh air. Besides that, it will be easy to provide shades for the plants to avoid the afternoon shade.

Where should you put your basil plant

If you are planting basil indoors, choose a sunny window or windowsill or another open space with a satisfying allowance of sunlight. The place should be south-facing or south-east facing. Also, make sure that the basil can receive sunlight at least for 6 hours from that spot.

If you are planting it in garden beds or ground gardens, then choose the sunniest spot from where it can get the sunlight as much as it needs.

Besides that, make sure to set up a shade from the east side of the spot so that the plant doesn’t have to endure the afternoon shade.

Also, set up the shade in an easy movable manner so that you can move it over the plant when the midday sun gets too hot.

Few last words for you

This popular herb is the first choice of a gardener for the herb garden. Whether you are growing basil in pots or garden beds, you have to provide the right amount of sunlight to the plant. It is necessary to get fresh green leaves for making your basil pesto.

Well, to get a healthy and bushy basil plant, you have to make sure that the basil is getting the sun for at least 6 hours per day. 

Neither plenty of sun nor too little sun can satisfy your basil plant. So, make sure it is getting the right amount. Besides that, notice the drooping leaves or discolored leaves and try to identify whether it is for sunlight or not. 

Take care and Happy Gardening!

How Tall Does Basil Grow

Basil is a popular herb that many gardeners, as well as beginners, choose to grow in their garden. Basil is also an ideal choice for getting fresh basil from indoor gardening.

However, you may be concerned with the height of the basil plant. What if it grows too tall!

So how tall does basil grow?

Basil usually grows around 12 to 20 inches tall. Some varieties can even grow up to 16 to 24 inches or more than that. There are two types of basil. One is purple leaf basil which usually grows 20 inches in length and another one is dwarf leaf basil which usually grows 12 inches tall.

How Tall Does Basil Grow

Well, so now you may have nothing to worry about the height of the basil plant. You can grow both varieties as per your space and wish. Let’s dig deeper and know more about these basil varieties.

Short-sized basil that you can grow indoors

There are many varieties of this annual herb. Some varieties are short, some are tall. However, it is convenient to choose a short size for the little space inside your house.

So, let’s know more about the short-sized basils that you can grow indoors.

Basil plants for smaller indoor space

There are so many people who only grow some herbs in the kitchen near a sunny window or in a hanging pot.

q? encoding=UTF8&ASIN=B08S398D35&Format= SL160 &ID=AsinImage&MarketPlace=US&ServiceVersion=20070822&WS=1&tag=gctlove 20&language=en UShanging pot

Those who don’t have enough space to grow medium size plants can easily grow the short basil in containers.

Here I am attaching a chart of basils that grows between 8 and 16 inches only.

Range of the HeightVarieties name
8 to 10 inchesGreek basil, Pistou basil, Spicy Globe Basil, Summerlong
8 to 12 inchesMinette Dwarf Basil, Spicy Bush basil, Boxwood basil
12 to 16 inchesThai basil, Holy basil, Mammoth

So, these are the varieties of basil that you can grow without having large spaces. Let’s know more about these varieties.

Greek basil:

This basil is also known as Dwarf Greek basil. The Greek basil plant has tiny leaves and white flowers. The round shape of the greek basil plant makes it suitable for small container gardens.

It has a strong spicy flavor. This small plant can grow up to 8 to 10 inches tall only.

Spicy Globe basil: 

This small variety of Spicy Globe basil can grow up to 8 to 10 inches and so it can be a suitable one for your mini garden. The leaves have a mild taste and you can add them easily to your soup or pasta.

Minette Dwarf basil:

This is a variety of dwarf basil with dense and smaller leaves. The leaves have a scent of cloves and a flavor of sweet anise. The plant can grow to a spherical shape with a height of 10 inches only.

Spicy Bush Basil:

It is a variety with a height of between 8 and 12 inches. This has small shiny green leaves with amazing fragrance and a spicy taste.

Spicy Bush Basil

Boxwood Basil:

This basil is called boxwood, probably for its figure-like boxwood plant. This basil can grow up to 12 inches in height. The leaves are small and its perfect shrub-like form makes it suitable for small spaces.

Thai Basil:

This basil has a taste of licorice with strong flavors. The purple stems and flowers make this plant attractive. Thai basil usually has a height of 12 to 16 inches.

Mammoth:

This basil is mainly a variety of lettuce leaf that has wrinkled leaves with ruffled edges. This variety can grow up to 16 inches with a width of the same range as height.

The taste of leaves might taste similar to Genovese basil but has a strong flavor.

Basil plants for bigger indoor space

Basil plants for bigger indoor space

If you have a large veranda or a bigger room with open space, then you can easily grow some medium size basil in a larger container.

Here I have mentioned a chart in which you can see the varieties.

Range of the HeightVarieties name
14 to 20 inchesDark Opal basil, Christmas basil, Lemon basil, Spicy Saber
16 to 18 inchesGenovese basil, Pesto Perpetuo, Ararat
16 to 24 inchesLime basil, Purple Ruffle basil, Siam Queen Thai Basil
18 to 24 inchesSweet basil, Napoletano basil, Cinnamon basil

Dark Opal Basil:

This purple basil can add some vibrant color to your herb garden. It has a mixed flavor of anise and ginger. This variety can grow up to 14 to 20 inches at its maturity period.

Christmas Basil:

With glossy green foliage and purple flower, this basil plant can grow up to 14 to 20 inches tall. This basil can add fruity flavor to your recipes.

Lemon Basil:

With beautiful white basil flower spikes, it can attract the attention of people. The plant has sweet-tart flavored leaves that also have a fresh lemon scent.

The plant can grow up to 14 to 20 inches. It is the main ingredient of many Indonesian dishes.

Genovese Basil:

With the sight of flatter, large, and pointer leaves, you can identify the Genovese basil plant. The aromatic leaves have a clove fragrance and the spicy anise flavor of this variety makes it suitable for Italian dishes.

Genovese basil plants can grow up to 16 to 18 inches tall.

Pesto Perpetuo:

This is a non-bolting variety with light green and fresh cream leaves. This variety has a columnar habit and you can get lots of leaves because of its non-bolting feature. This variety can grow up to 16 to 18 inches tall.

Sweet Basil:

Sweet Basil

The most common variety of basil is sweet basil. These basil leaves are almost rounded and cup-shaped. This basil can grow up to 18 to 24 inches tall.

The spicy clove flavor of this basil is everyone’s favorite.

Napoletano Basil:

This plant has larger leaves than any other basil plant. That’s why this plant’s tasty leaves are used for wrapping sushi, fish, or cheese.

The leaves are spicier and the plant can grow up to 18 to 24 inches.

Cinnamon Basil:

This basil is also known as Mexican basil. The shiny green leaves are smaller than the leaves of sweet basil and the purple stems and flowers make this plant attractive.

This basil can grow up to 18 24 inches tall in the proper environment.

Basils that are too tall to grow indoors

There are some basil varieties that are too tall to grow indoors. These basil varieties can usually grow up to 24 inches or taller than that, probably up to 3 or 4 feet.

That’s why it is better to grow them in the ground garden or garden beds.

Some varieties of these giant basils are Lettuce Leaf Basil, Cardinal Basil, Green Ruffles, African Blue basil, Italian Large leaf basil, Clove basil, Emerald Towers, and Licorice basil.

How to make the basil bushier without making it large

Basil will grow into a thick and bushy plant if you keep the plant short in size. Most of the time it is noticed that the plant is only getting taller and taller with a few leaves on it.

But you surely don’t want that to happen to your basil plant, right?

basil bushier

I have mentioned the average size of different basil varieties. But you can definitely keep the plant shorter and bushier by pruning or harvesting them often.

For pruning or harvesting the basil, you have to cut the stem of the basil when it reaches a height of 6 to 8 inches. Cut the stem from 1/4 inch above nodes or sets of leaves. It is better to use scissors for cutting.

q? encoding=UTF8&ASIN=B07VLXJ7C3&Format= SL160 &ID=AsinImage&MarketPlace=US&ServiceVersion=20070822&WS=1&tag=gctlove 20&language=en USscissors for cutting

Besides that, leave 2 or 3 sets of true leaves on the plant so that new stems can come out from them as well as they will fulfill the need for food.

Moreover, you can cut individual leaves from the stem to maintain a bushy shape. You should prune or harvest the leaves at least once after every two or three weeks.

As a result, you will notice that the plants are getting bushier. Also, this will keep the flowers away from the plant.

However, if you notice the flower buds coming on the plants, you must not wait for the stem. Pinch the flowers immediately off the plant. It is necessary as allowing flowers on the plant will discourage the leafy growth of the plant.

Along with pruning, you need to make sure that your basil is getting enough nutrition and a proper environment for growth.

Like plenty of direct sunlight, well-drained soil for better drainage, the right amount of watering to keep the soil moist, hot weather with high temperatures, and providing nutrition with liquid fertilizer.

Few last words for you

I hope you found this information quite helpful. There are some varieties of basil that are perfect for indoors, some are perfect for outdoors.

So select your favorite one among them to plant basil indoors or outdoors according to your space.

I hope you will get a bountiful harvest of fresh basil. Happy Gardening!

You May Also Like:

How Much Sun Does Basil Need To Grow